
User Manual

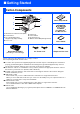
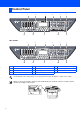
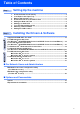
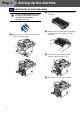
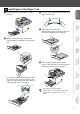
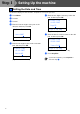
Table Of Contents
- Quick Setup Guide MFC-8460N/MFC-8860DN
- Getting Started
- Table of Contents
- Step1 Setting Up the machine
- Step2 Installing the Drivers & Software
- Supplied CD-ROM “MFL-Pro Suite”
- For USB Interface Cable Users (For Windows® 98/98SE/Me/2000 Professional/XP/XP Professional x64 Edition)
- For Parallel Interface Cable Users (For Windows® 98/98SE/Me/2000 Professional/XP/XP Professional x64 Edition)
- For Windows NT® Workstation Version 4.0 Users
- For Network Interface Cable Users (For Windows® 98/98SE/Me/NT/2000 Professional/XP/XP Professional x64 Edition)
- For USB Interface Cable Users
- For Network Interface Cable Users
- For Network Users and Administrators
- Options and Consumables
- brother IND

5
Setting Up
the machine
Windows
®
USB
Windows
®
Parallel
Windows
NT
®
4.0
Parallel
Macintosh
®
USB
Macintosh
®
Network
Windows
®
Network
Network
Administrators
1 Pull the paper tray completely out of the
machine.
2 While pressing the paper guide release
lever (1), slide the adjusters to fit the paper
size.
Press the lever (2) located at the back of the
tray and pull out or push in the back of the
paper tray to fit the paper size. Move the tray
lock button (3) to the lock position.
3 Fan the stack of paper well to avoid paper
jams and misfeeds.
4 Put paper in the paper tray.
Check that the paper is flat in the tray and
below the maximum paper mark (1).
5 Put the paper tray firmly back into the
machine and unfold the output tray support
flap (1) before you use the machine.
2 Load Paper in the Paper Tray
(1)
(2) (3)
For details on supported paper
specifications, see “Acceptable paper and
other media” in Chapter 2 of the User’s
Guide.
(1)
(1)