
User Manual
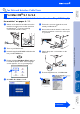
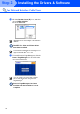

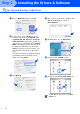

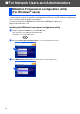
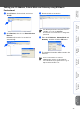
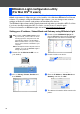
Table Of Contents
- Quick Setup Guide MFC-8460N/MFC-8860DN
- Getting Started
- Table of Contents
- Step1 Setting Up the machine
- 1 Install the Drum Unit Assembly
- 2 Load Paper in the Paper Tray
- 3 Release the Scanner Lock
- 4 Install the Power Cord and Phone Line
- 5 Set Your Country (For Australia / New Zealand Customer Only)
- 6 Setting the Date and Time
- 7 Setting your Station ID
- 8 Tone and Pulse dialling mode (not available for New Zealand)
- 9 Selecting a Receive Mode
- 10 Setting the LCD Contrast
- Step2 Installing the Drivers & Software
- Supplied CD-ROM “MFL-Pro Suite”
- For USB Interface Cable Users (For Windows® 98/98SE/Me/2000 Professional/XP/XP Professional x64 Edition)
- For Parallel Interface Cable Users (For Windows® 98/98SE/Me/2000 Professional/XP/XP Professional x64 Edition)
- For Windows NT® Workstation Version 4.0 Users
- For Network Interface Cable Users (For Windows® 98/98SE/Me/NT/2000 Professional/XP/XP Professional x64 Edition)
- For USB Interface Cable Users
- For Network Interface Cable Users
- For Network Users and Administrators
- Options and Consumables
- brother ARL/ASA/NZ

30
0
Click the Brother Laser (IP) icon, and then
choose BRN_XXXXXX.
Close the Chooser.
The MFL-Pro Suite and Printer driver
have been installed.
A
To install Presto!
®
PageManager
®
, click the
Presto! PageManager icon and follow the
on-screen instructions.
Presto!
®
PageManager
®
has been
installed and the installation is now
complete.
For Network Interface Cable Users
XXXXXX are the last six digits of the Ethernet
address.
ControlCenter2 and Network Scanning are not
supported in Mac OS
®
9.1 to 9.2.
You can easily scan, share and organize
photos and documents using Presto!
®
PageManager
®
.
Installing the Drivers & Software
Step 2