
User Manual
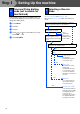
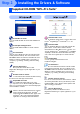


Table Of Contents
- Quick Setup Guide MFC-8460N/MFC-8860DN
- Getting Started
- Table of Contents
- Step1 Setting Up the machine
- 1 Install the Drum Unit Assembly
- 2 Load Paper in the Paper Tray
- 3 Release the Scanner Lock
- 4 Install the Power Cord and Phone Line
- 5 Set Your Country (For Australia / New Zealand Customer Only)
- 6 Setting the Date and Time
- 7 Setting your Station ID
- 8 Tone and Pulse dialling mode (not available for New Zealand)
- 9 Selecting a Receive Mode
- 10 Setting the LCD Contrast
- Step2 Installing the Drivers & Software
- Supplied CD-ROM “MFL-Pro Suite”
- For USB Interface Cable Users (For Windows® 98/98SE/Me/2000 Professional/XP/XP Professional x64 Edition)
- For Parallel Interface Cable Users (For Windows® 98/98SE/Me/2000 Professional/XP/XP Professional x64 Edition)
- For Windows NT® Workstation Version 4.0 Users
- For Network Interface Cable Users (For Windows® 98/98SE/Me/NT/2000 Professional/XP/XP Professional x64 Edition)
- For USB Interface Cable Users
- For Network Interface Cable Users
- For Network Users and Administrators
- Options and Consumables
- brother ARL/ASA/NZ

9
Setting Up
the machine
Windows
®
USB
Windows
®
Parallel
Windows
NT
®
4.0
Parallel
Macintosh
®
USB
Macintosh
®
Network
Windows
®
Network
Network
Administrators
You should store your name and fax number to be printed on all fax pages that you send.
1
Press Menu.
2
Press 0.
3
Press 3.
4
Enter your fax number (up to 20 digits) on
the dial pad, and then press OK.
5
Enter your telephone number (up to 20
digits) on the dial pad, and then press OK.
(If your telephone number and fax number
are the same, enter the same number
again.)
6
Use the dial pad to enter your name (up to
20 characters), and then press OK.
7
Press Stop/Exit.
7 Setting your Station ID
03.Station ID
Fax:_
Enter & OK Key
03.Station ID
Fax:+44XXXXXXXX
Tel:_
Enter & OK Key
03.Station ID
Fax:+44XXXXXXXX
Tel:+44XXXXXXXX
Name:_
Enter & OK Key
■ Refer to the following chart for entering
your name.
■ If you need to enter a character that is on
the same key as the previous character,
press to move the cursor to the right.
■ If you entered a letter incorrectly and want
to change it, press to move the cursor
under the incorrect character, press
Clear/Back.
Press
key
One
time
Two
times
Three
times
Four
times
2 ABC2
3 DEF3
4 GH I 4
5 JKL5
6 MNO6
7 PQRS
8 TUV8
9 WX Y Z
For more details, see “Entering Text” in
Chapter D of the User’s Guide.