
User Manual


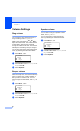
Table Of Contents
- USER’S GUIDE MFC-8460N/MFC-8860DN
- Approval Information and Compilation and Publication Notice
- Table of Contents
- Section I: General
- General information
- Using the documentation
- Accessing the complete User’s Guide
- Viewing documentation
- Viewing documentation (Windows®)
- How to find Scanning instructions
- Software User's Guide:
- PaperPort® User's Guide:
- How to find Internet FAX instructions (MFC-8860DN only)
- Viewing Documentation (Macintosh®)
- How to find Scanning instructions
- Software User's Guide:
- Presto!® PageManager® User's Guide:
- How to find Internet FAX instructions (MFC-8860DN only)
- Viewing documentation
- Control panel overview
- Loading documents and paper
- General setup
- Security features
- General information
- Section II: Fax
- Sending a fax
- How to fax
- Broadcasting
- Additional sending operations
- Receiving a fax
- Phone and external devices
- Phone line services
- Telephone Service for Australia
- Telephone Service for New Zealand
- Telephone Service for Some Countries
- Connecting an external TAD
- External and extension phones
- Dialling and storing numbers
- Remote fax options
- Printing reports
- Polling
- Sending a fax
- Section III: Copy
- Section IV: Software
- Section V: Appendices
- A Safety and Legal
- B Options
- C Troubleshooting and routine maintenance
- D Menu and Features
- E Specifications E
- F Glossary
- Index
- brother ARL/ASA/NZ

General setup
19
3
Tray use in Fax mode 3
You can change the default tray priority that
the machine will use for printing received
faxes.
When you select Tray#1 Only, MP Only or
Tray#2 Only
1
, the machine takes paper
only from that tray. If the selected tray is out
of paper, No Paper will appear on the LCD.
Insert the paper in the empty tray.
When you select T1>T2>MP, the machine
takes paper from Tray #1 until it is empty,
then from Tray #2, then from the MP tray.
When you select MP>T1>T2, the machine
takes paper from the MP tray until it is empty,
then from Tray #1, then from Tray #2.
Note
• You can use four sizes of paper for
printing faxes: A4, Letter, Legal or Folio.
When a suitable size is not in any of the
trays received faxes will be stored in the
machine
’s memory and
Check Paper Size will appear on the
LCD. For details, see Check Paper Size
on page 117.
• If the tray is out of paper and received
faxes are in the machine
’s memory,
No Paper will appear on the LCD. Insert
paper in the empty tray.
a Press Menu, 1, 7, 2.
17.Tray Use
2.Fax
a MP>T1
b T1>MP
Select ab & OK
b Press a or b to select Tray#1 Only,
Tray#2 Only, MP Only, MP>T1>T2
1
or T1>T2
1
>MP. Press OK.
1
Tray#2 Only and T2 appear only if the
optional tray is installed.
Tray use in Print mode 3
You can change the default tray the machine
will use for printing from your computer.
a Press Menu, 1, 7, 3.
17.Tray Use
3.Print
a MP>T1
b T1>MP
Select ab & OK
b Press a or b to select Tray#1 Only,
Tray#2 Only
1
, MP Only, MP>T1>T2
1
or T1>T2
1
>MP. Press OK.
1
Tray#2 Only and T2 appear only if the
optional tray is installed.
Note
• The setting in the printer driver will take
priority over the setting made on the
control panel.
• If the control panel is set to
Tray#1 Only, Tray#2 Only, MP Only
or MP>T1>T2 and you choose ‘Auto
Select’ in the printer driver, the tray use
will be MP>T1>T2.
If the control panel is set to T1>T2>MP and
you choose ‘Auto Select’ in the printer
driver, the tray use will remain T1>T2>MP.