
User Manual
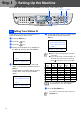
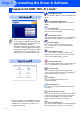
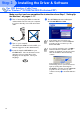
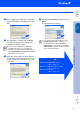
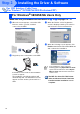
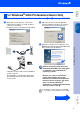
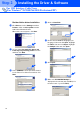
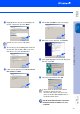
Table Of Contents
- Quick Setup Guide MFC-8440/MFC-8840D/MFC-8840DN
- Getting Started
- Table of Contents
- Step1 Setting Up the Machine
- 1 Install the Automatic Document Feed (ADF) Support
- 2 Install the Drum Unit Assembly
- 3 Load Paper in the Paper Tray
- 4 Release the Scanner Lock
- 5 Install the Power Cord and Phone Line
- 6 Selecting a Receive Mode
- 7 Setting the Date and Time
- 8 Setting Your Station ID
- 9 Selecting Your Language (Canada Only)
- 10 Sending in the Product Registration and Test Sheet (USA Only)
- Step2 Installing the Driver & Software
- Supplied CD-ROM “MFL-Pro Suite”
- For USB Interface Cable Users (For Windows® 98/98SE/Me/2000 Professional/XP)
- For Parallel Interface Cable Users (For Windows® 98/98SE/Me/2000 Professional/XP)
- For Windows NT® Workstation Version 4.0 Users
- For Network Interface Cable Users (For Windows® 98/98SE/Me/NT/2000 Professional/XP)
- For USB Interface Cable Users
- For Network Interface Cable Users
- For Administrators
- brother USA

10
Setting Up the Machine
MFC-8440, MFC-8840D and MFC-8840DN have similar control panel keys.
You should store your name and fax number to be
printed on all fax pages that you send.
1
Press the Menu key.
2
Press the key.
3
Press the key.
4
Enter your fax number (up to 20 digits) on
the dial pad, and then press the Set key.
5
Enter your telephone number (up to 20
digits) on the dial pad, and then press the
Set key.
(If your telephone number and fax number
are the same, enter the same number
again.)
6
Use the dial pad to enter your name (up to
20 characters), and then press the
Set key.
7
Press the Stop/Exit key.
8 Setting Your Station ID
Set
Menu
Stop/ExitDial pad
03.Station ID
Fax:_
Enter & Set Key
03.Station ID
Fax:908XXXXXXXX
Tel:_
Enter & Set Key
03.Station ID
Fax:908XXXXXXXX
Tel:908XXXXXXXX
Name:_
Enter & Set Key
■ Refer to the following chart for entering
your name.
■ If you need to enter a character that is on
the same key as the previous character,
press to move the cursor to the right.
Press
key
One
time
Two
times
Three
times
Four
times
2 ABC2
3 DEF3
4 GH I 4
5 JKL5
6 MNO 6
7 PQRS
8 TUV8
9 WX Y Z
For more details, see “Setting the Station
ID” in Chapter 4 of the User's Guide.
If you want to repeat from step1, press the
Stop/Exit key.
Step 1