
Quick Setup Guide
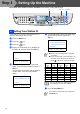
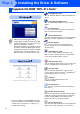

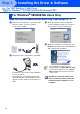
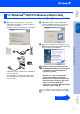
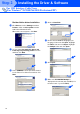
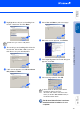
Table Of Contents
- Quick Setup Guide MFC-8440/MFC-8840D/MFC-8840DN
- Getting Started
- Table of Contents
- Step1 Setting Up the Machine
- 1 Install the Automatic Document Feed (ADF) Support
- 2 Install the Drum Unit Assembly
- 3 Load Paper in the Paper Tray
- 4 Release the Scanner Lock
- 5 Install the Power Cord and Phone Line
- 6 Selecting a Receive Mode
- 7 Setting the Date and Time
- 8 Setting Your Station ID
- 9 Selecting Your Language (Canada Only)
- 10 Sending in the Product Registration and Test Sheet (USA Only)
- Step2 Installing the Driver & Software
- Supplied CD-ROM “MFL-Pro Suite”
- For USB Interface Cable Users (For Windows® 98/98SE/Me/2000 Professional/XP)
- For Parallel Interface Cable Users (For Windows® 98/98SE/Me/2000 Professional/XP)
- For Windows NT® Workstation Version 4.0 Users
- For Network Interface Cable Users (For Windows® 98/98SE/Me/NT/2000 Professional/XP)
- For USB Interface Cable Users
- For Network Interface Cable Users
- For Administrators
- brother USA

18
Installing the Driver & Software
Brother Native driver Installation
B
Click Start and select Settings and then
Printers. Click on Add a printer and the
Add Printer Wizard will start.
When this screen appears, click Next.
C
Un-check the Automatically detect and
install my Plug and Play printer selection
and then click Next.
D
Select USBXXX from the pull down window
for the Printer Port Selection and then click
Next.
E
Click on Have Disk.
F
Browse the CD-ROM and highlight your
language folder and click Open. Highlight
the W2K folder and click Open. Highlight
the Addprt folder and click Open.
G
Click Open.
H
Make sure X:\USA\W2K\Addprt is
displayed in the window and click OK (X:\ is
the drive letter of your CD-ROM).
For USB Interface Cable Users
(For Windows
®
98/98SE/Me/2000 Professional/XP)
Step 2