
User Guide


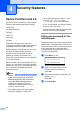
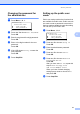


Table Of Contents
- USER’S GUIDE MFC-8480DN/MFC-8680DN/MFC-8690DW/MFC-8890DW
- Brother numbers
- Ordering accessories and supplies
- Notice - Disclaimer of Warranties (USA and Canada)
- Compilation and Publication Notice
- Brother™ One-Year Limited Warranty and Replacement Service (USA Only)
- BROTHER MULTIFUNCTION CENTER / FAX MACHINELIMITED WARRANTY (Canada only)
- Table of Contents
- Section I: General
- 1 General information
- Using the documentation
- Accessing the Software User’s Guide and Network User’s Guide
- Viewing documentation
- Viewing documentation (Windows®)
- How to find scanning instructions
- Software User’s Guide:
- ScanSoft™ PaperPort™ 11SE with OCR How-to-Guides:
- How to find Network setup instructions (MFC-8690DW and MFC-8890DW)
- Viewing documentation (Macintosh)
- How to find scanning instructions
- Software User’s Guide:
- Presto! PageManager User’s Guide:
- How to find Network setup instructions (MFC-8690DW and MFC-8890DW)
- Viewing documentation
- Accessing Brother support (Windows®)
- Control panel overview
- 2 Loading paper and documents
- 3 General Setup
- 4 Security features
- 1 General information
- Section II: Fax
- 5 Sending a fax
- How to fax
- Broadcasting
- Additional sending operations
- 6 Receiving a fax
- 7 Telephone services and external devices
- 8 Dialing and storing numbers
- 9 Remote Fax Options
- 10 Polling
- 11 Printing reports
- 5 Sending a fax
- Section III: Copy
- Section IV:Direct printing
- Section V:Software
- Section VI: Appendixes
- A Safety and legal
- B Options
- C Troubleshooting and routine maintenance
- D Menu and features
- E Specifications
- F Glossary
- Index
- brother USA/CAN

Security features
31
4
Changing the password for
the administrator 4
a Press Menu, 1, 8, 1.
18.Security
1.Function Lock
a Lock OffiOn
b Set Password
Select ab or OK
b Press a or b to choose Set Password.
Press OK.
c Enter the registered four-digit password.
Press OK.
d Enter a four-digit number for the new
password.
Press OK.
e If the LCD shows Verify: re-enter the
new password.
Press OK.
f Press Stop/Exit.
Setting up the public user
mode 4
Public user mode restricts the functions that
are available for Public users. Public users do
not need to enter a password to access the
features made available through this setting.
You can set up one Public user.
a Press Menu, 1, 8, 1.
18.Security
1.Function Lock
a Lock OffiOn
b Set Password
Select ab or OK
b Press a or b to choose Setup ID.
Press OK.
c Enter the administrator password.
Press OK.
d Press a or b to choose Public.
Press OK.
e Press a or b to choose Enable or
Disable for Fax Tx.
Press OK.
After you have set Fax Tx, repeat this
step for Fax Rx, Copy, Scan,
USB Direct and PC Print.
When you have finished changing
settings press d or c to choose Exit
and press OK.
f Press Stop/Exit.