
User Guide


Table Of Contents
- USER’S GUIDE MFC-8480DN/MFC-8680DN/MFC-8690DW/MFC-8890DW
- Brother numbers
- Ordering accessories and supplies
- Notice - Disclaimer of Warranties (USA and Canada)
- Compilation and Publication Notice
- Brother™ One-Year Limited Warranty and Replacement Service (USA Only)
- BROTHER MULTIFUNCTION CENTER / FAX MACHINELIMITED WARRANTY (Canada only)
- Table of Contents
- Section I: General
- 1 General information
- Using the documentation
- Accessing the Software User’s Guide and Network User’s Guide
- Viewing documentation
- Viewing documentation (Windows®)
- How to find scanning instructions
- Software User’s Guide:
- ScanSoft™ PaperPort™ 11SE with OCR How-to-Guides:
- How to find Network setup instructions (MFC-8690DW and MFC-8890DW)
- Viewing documentation (Macintosh)
- How to find scanning instructions
- Software User’s Guide:
- Presto! PageManager User’s Guide:
- How to find Network setup instructions (MFC-8690DW and MFC-8890DW)
- Viewing documentation
- Accessing Brother support (Windows®)
- Control panel overview
- 2 Loading paper and documents
- 3 General Setup
- 4 Security features
- 1 General information
- Section II: Fax
- 5 Sending a fax
- How to fax
- Broadcasting
- Additional sending operations
- 6 Receiving a fax
- 7 Telephone services and external devices
- 8 Dialing and storing numbers
- 9 Remote Fax Options
- 10 Polling
- 11 Printing reports
- 5 Sending a fax
- Section III: Copy
- Section IV:Direct printing
- Section V:Software
- Section VI: Appendixes
- A Safety and legal
- B Options
- C Troubleshooting and routine maintenance
- D Menu and features
- E Specifications
- F Glossary
- Index
- brother USA/CAN
Troubleshooting and routine maintenance
165
C
IMPORTANT
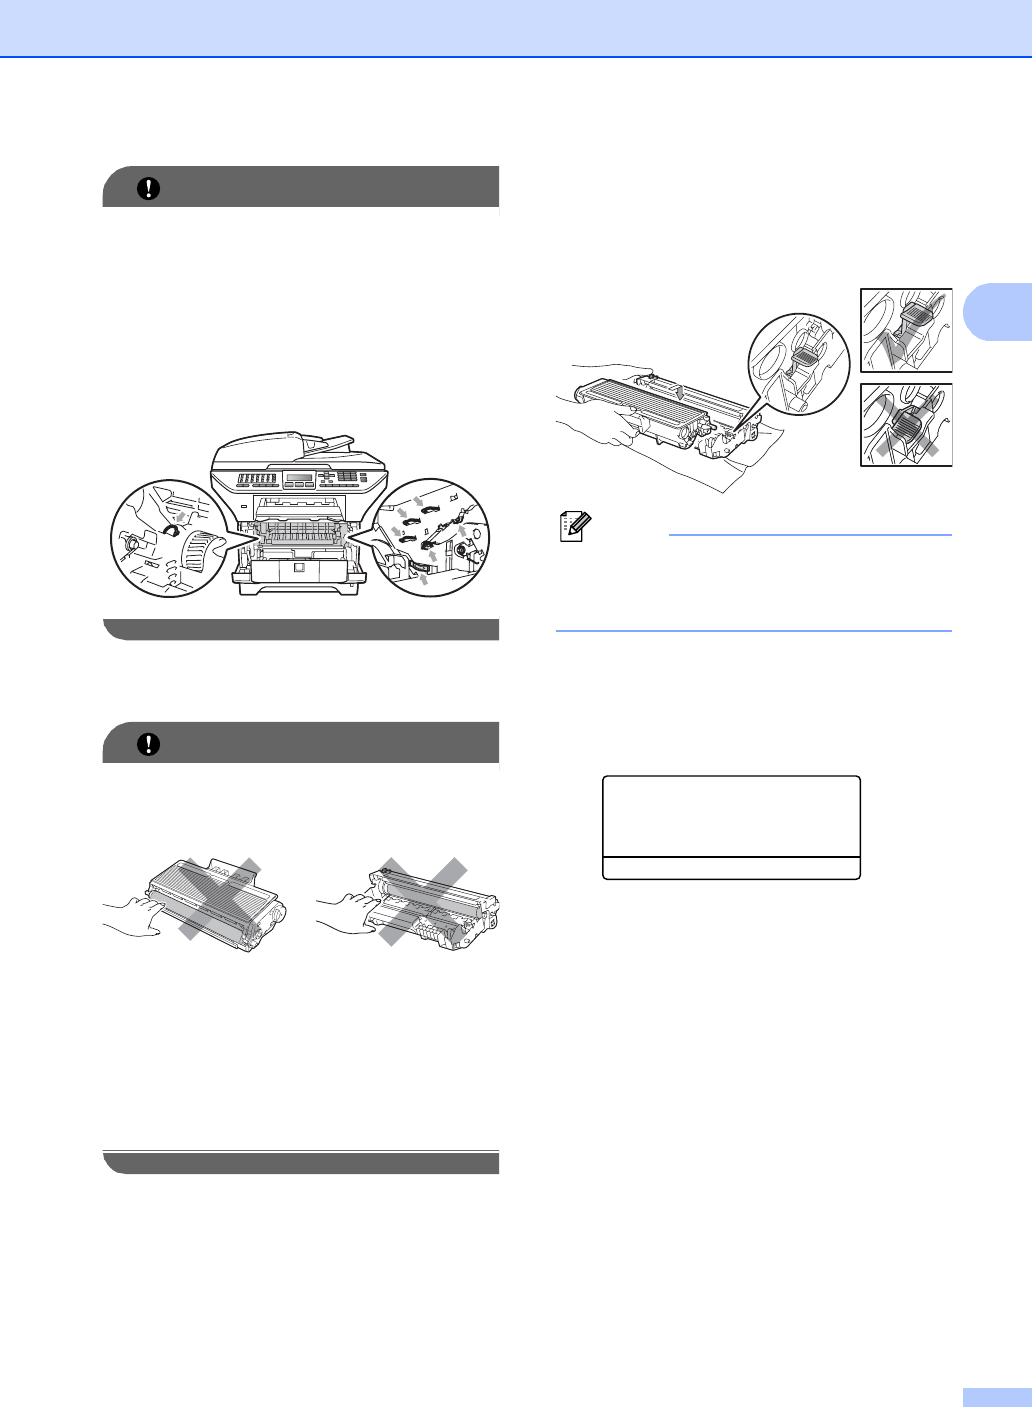
• We recommend that you put the drum unit
and toner cartridge assembly on a clean,
flat surface with a sheet of disposable
paper or cloth underneath it in case you
accidentally spill or scatter toner.
• To prevent damage to the machine
caused by static electricity, DO NOT touch
the electrodes shown in the illustration.
c Push down the blue lock lever and take
the toner cartridge out of the drum unit.
IMPORTANT
• To avoid print quality problems, DO NOT
touch the shaded parts shown in the
illustrations.
• Wait to unpack a new drum unit until
immediately before you put it in the
machine. Exposure to direct sunlight or
room light may damage the drum unit.
• Be sure to seal up the used drum unit
tightly in a bag so that toner powder does
not spill out of the unit.
d Unpack the new drum unit.
e Put the toner cartridge firmly into the
new drum unit until you hear it lock into
place. If you put the cartridge in
properly, the blue lock lever will lift
automatically.
Note
Make sure that you put in the toner
cartridge properly or it may separate from
the drum unit.
f Put the new drum unit and toner
cartridge assembly in the machine.
Do not close the front cover.
g Press Clear/Back.
Replace Drum?
a 1.Yes
b 2.No
Select ab or OK
To confirm you are installing a new
drum, press 1.
h When the LCD shows Accepted, close
the front cover.