
User Manual


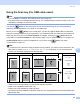


Table Of Contents
- SOFTWARE USER’S GUIDE DCP-8070D DCP-8085DN MFC-8370DN MFC-8880DN
- Table of Contents
- Windows®
- Printing
- Using the Brother printer driver
- Printing a document
- Duplex printing
- Simultaneous scanning, printing and faxing
- Printer operation keys
- Status Monitor
- Printer driver settings
- Features in the Windows® printer driver
- Basic tab
- Advanced tab
- Accessories tab
- Support
- Features in the BR-Script 3 (PostScript® 3™ language emulation) printer driver
- Scanning
- ControlCenter3
- Network Scanning (For models with built-in network)
- Before using Network Scanning
- Using the Scan key
- Scan to E-mail (PC)
- Scan to E-mail (E-mail server) (MFC-8880DN only)
- Scan to Image
- Scan to OCR
- Scan to File
- Scan to FTP (Not available for DCP-8070D)
- Scan to Network (Not available for DCP-8070D)
- How to set a new default for the file size (For Scan to E-mail (E-mail server), Scan to FTP and Scan to Network)
- How to set a new default for the Duplex Scan mode (For Scan to E-mail (E-mail server) only)
- Maximum ADF output tray capacity (DCP-8070D and MFC-8370DN)
- Remote Setup (MFC models only)
- Brother PC-FAX Software (MFC models only)
- Firewall settings (For Network users)
- Printing
- Apple Macintosh
- Printing and Faxing
- Printer operation key
- Status Monitor
- Features in the printer driver (Macintosh)
- Removing the Printer driver for Macintosh
- Using the BR-Script3 Driver (Post Script® 3™ language emulation printer driver)
- Features in the BR-Script 3 (PostScript® 3™ language emulation) printer driver
- Sending a fax (MFC models only)
- Scanning
- ControlCenter2
- Network Scanning (For models with built-in network support)
- Before using Network Scanning
- Using the Scan key
- Scan to E-mail (PC)
- Scan to E-mail (E-mail server) (MFC-8880DN only)
- Scan to Image
- Scan to OCR
- Scan to File
- Scan to FTP (Not available for DCP-8070D)
- Scan to Network (Not available for DCP-8070D)
- How to set a new default for the file size (For Scan to E-mail (E-mail server), Scan to FTP and Scan to Network)
- How to set a new default for the Duplex Scan mode (For Scan to E-mail (E-mail server) only)
- Maximum ADF output tray capacity (DCP-8070D and MFC-8370DN)
- Remote Setup
- Printing and Faxing
- Index
- brother CHN-ENG

Scanning
169
9
Scan to USB 9
You can scan black and white and colour documents directly to a USB Flash memory drive. Black and white
documents will be stored in the PDF (*.PDF) or Secure PDF (*.PDF) or TIFF (*.TIF) file formats. Colour
documents may be stored in PDF (*.PDF), Secure PDF(*.PDF), XPS(*.XPS) or JPEG (*.JPG) file formats.
The default File names are based on the current date. You can change the colour, quality and file name.
a Put a USB Flash memory drive into your machine.
b Load your document in the ADF or on the scanner glass.
c Press (Scan).
d Press a or b to choose Scan to USB.
Press OK.
If your machine does not support Duplex Scan, go to step f.
If your machine supports Duplex Scan, go to step e.
e Press a or b to choose 1sided, 2sided (L)edge or 2sided (S)edge.
Press OK.
f Choose one of the options below.
To change the setting, choose Change Setting. Press OK and go to step g.
To start scanning with the settings you set in the Function Menu (For MFC models, Menu, 5, 2 and
For DCP models, Menu, 4, 2), choose Start Scan. Press OK and go to step j.
g Press a or b to choose the quality you want.
Press OK.
Resolution File Format Options
Color 100 dpi PDF / Secure PDF / JPEG / XPS
Color 200 dpi PDF / Secure PDF / JPEG / XPS
Color 300 dpi PDF / Secure PDF / JPEG / XPS
Color 600 dpi PDF / Secure PDF / JPEG / XPS
Gray 100 dpi PDF / Secure PDF / JPEG / XPS
Gray 200 dpi PDF / Secure PDF / JPEG / XPS
Gray 300 dpi PDF / Secure PDF / JPEG / XPS
B&W 200 dpi PDF / Secure PDF / TIFF
B&W 200x100 dpi PDF / Secure PDF / TIFF