
User Manual


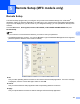
Table Of Contents
- SOFTWARE USER’S GUIDE DCP-8070D DCP-8085DN MFC-8370DN MFC-8380DN MFC-8480DN MFC-8880DN MFC-8890DW
- Table of Contents
- Section I: Windows®
- 1 Printing
- Using the Brother printer driver
- Printing a document
- Duplex printing
- Simultaneous scanning, printing and faxing
- Printer operation keys
- Status Monitor
- Printer driver settings
- Features in the Windows® printer driver
- Basic tab
- Advanced tab
- Accessories tab
- Support
- Features in the BR-Script3 (PostScript® 3™ language emulation) printer driver
- 2 Scanning
- Scanning a document using the TWAIN driver
- Scanning a document using the WIA driver (Windows® XP/Windows Vista®)
- Scanning a document using the WIA driver (Windows Photo Gallery and Windows Fax and Scan)
- Using the Scan key (For USB or Parallel cable users)
- Using ScanSoft™ PaperPort™ 11SE with OCR by NUANCE™
- 3 ControlCenter3
- 4 Network Scanning (For models with built-in network)
- Before using Network Scanning
- Using the Scan key
- Scan to E-mail (PC)
- Scan to E-mail (E-mail Server) (MFC-8880DN and MFC-8890DW)
- Scan to Image
- Scan to OCR
- Scan to File
- Scan to FTP (Not available for DCP-8070D)
- Scan to Network (Not available for DCP-8070D)
- How to set a new default for the file size (For Scan to E-mail (E-mail server), Scan to FTP and Scan to Network)
- How to set a new default for the Duplex Scan mode (For Scan to E-mail (E-mail server) only)
- Maximum ADF output tray capacity (DCP-8070D, MFC-8370DN and MFC-8380DN)
- 5 Remote Setup (MFC models only)
- 6 Brother PC-FAX Software (MFC models only)
- 7 Firewall settings (For Network users)
- 1 Printing
- Section II: Apple Macintosh
- 8 Printing and Faxing
- Printer operation keys
- Status Monitor
- Features in the printer driver (Macintosh)
- Removing the Printer driver for Macintosh
- Using the BR-Script3 Driver (Post Script® 3™ language emulation printer driver)
- Features in the BR-Script3 (PostScript® 3™ language emulation) printer driver
- Sending a fax (MFC models only)
- 9 Scanning
- 10 ControlCenter2
- 11 Network Scanning
- Before using Network Scanning
- Using the Scan key
- Scan to E-mail (PC)
- Scan to E-mail (E-mail server, MFC-8880DN and MFC-8890DW)
- Scan to Image
- Scan to OCR
- Scan to File
- Scan to FTP (Not available for DCP-8070D)
- Scan to Network (Not available for DCP-8070D)
- How to set a new default for the file size (For Scan to E-mail (E-mail server), Scan to FTP and Scan to Network)
- How to set a new default for the Duplex Scan mode (For Scan to E-mail (E-mail server) only)
- Maximum ADF output tray capacity (DCP-8070D, MFC-8370DN and MFC-8380DN)
- 12 Remote Setup (MFC models only)
- 8 Printing and Faxing
- Index
- brother UK

Network Scanning (For models with built-in network)
97
4
Scan to Network (Not available for DCP-8070D) 4
When you choose Scan to Network, you can scan a black and white or colour document directly to a CIFS
server on your local network or on the internet. (For more information about CIFS severs, see the Network
User’s Guide.)
The details required to use Scan to Network can be entered by using Web Based Management to pre-
configure and store the details in a Scan to Network profile. A Scan to Network profile stores user information
and configuration settings for use on a network, or the internet.
Note
Scan to Network is available when Scan to Network profiles are configured by using Web Based
Management.
To use Web Based Management, type http://xxx.xxx.xxx.xxx/ (where xxx.xxx.xxx.xxx is the IP address of
your machine) into your browser, and then you can configure or change the settings in
FTP/Network Scan Profile in Administrator Settings. You can configure up to ten Scan to Network profiles
and you can choose what profile numbers (1 to 10) to use for Scan to Network settings in
FTP/Network Scan Settings.
In addition to the seven preset file names you can store two user defined file names that can be used for
creating a Scan to Network profile.
Choose FTP/Network Scan Settings in Web Based Management. In Create a User Defined File Name,
enter a file name in one of the two user defined fields and click Submit. A maximum of 15 characters can be
entered in each of the user defined name fields.