
Quick Setup Guide
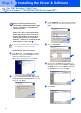
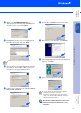
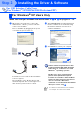

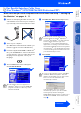
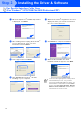
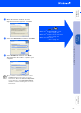
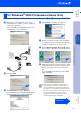
Table Of Contents
- Getting Started
- Table of Contents
- Setting Up the Machine
- Install the Automatic Document Feed (ADF) Support
- Install the Drum Unit Assembly
- Load Paper in the Paper Tray
- Release the Scanner Lock
- Install Power Cord and Phone Line
- Selecting a Receive Mode
- Setting the Date and Time
- Setting Your Station ID
- Selecting Your Language (Canada Only)
- Sending in the Product Registration and Test Sheet (USA Only)
- Installing the Driver & Software
- Supplied CD-ROM (MFL-Pro Suite)
- For USB Interface Cable Users (For Windows® 98/98SE/Me/2000 Professional/XP)
- For Parallel Interface Cable Users (For Windows® 95/98/98SE/Me/2000 Professional/XP)
- For Windows NT® Workstation Version 4.0 Users
- For Network Interface Cable Users (For Windows® 95/98/98SE/Me/NT/2000 Professional/XP)
- For USB Interface Cable Users
- For Network Interface Cable Users
- For Administrators

27
D
Wh en the Br othe r Softw are License
Agreement window appears, click Yes .
E
Select L o ca l Int erfa ce, an d then click Next.
F
Select Standard, and then click Next.
The application files will be copied to your
computer.
If you want to install the PS driver, select
Custom and then follow the on-screen
instructions. When the Select Components
screen appears, check PS Printer Driver,
and then continue following the on-screen
instructions.
Windows
®
95/9 8/9 8S E/Me Users
➝ Go to pa ge 28
Windows
®
2000 Professional Users
➝ Go to pa ge 29
Windows
®
XP Users
➝ Go to pa ge 32
Installing the Driver & Software
Setting Up
the Machine
For
Ad min ist ra to rs
Wind ows
®
Para llel