
Printer/Fax/Scanner/Copier Quick Setup Guide
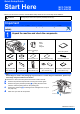
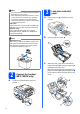

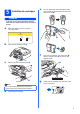

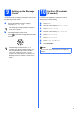
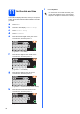
Table Of Contents
- Quick Setup Guide MFC-790CW MFC-990CW
- Start Here
- 1 Unpack the machine and check the components
- 2 Connect the handset (MFC-790CW only)
- 3 Load plain Letter/A4 paper
- 4 Connect the power cord and telephone line
- 5 Install the ink cartridges
- 6 Check the print quality
- 7 Choose your language (If needed)
- 8 Choose the correct Receive Mode
- 9 Setting up the Message Center
- 10 Set the LCD contrast (If needed)
- 11 Set the date and time
- 12 Set your station ID
- 13 Set tone or pulse dialing mode
- 14 Automatic Daylight Savings Time
- 15 Send in the Product Registration and Test Sheet (USA only)
- Set up the cordless handset (MFC-990CW only)
- For USB Interface Users (For Windows® 2000 Professional/XP/XP Professional x64 Edition/ Windows Vista®)
- For USB Interface Users (For Mac OS® X 10.2.4 or greater)
- For Wired Network Interface Users (For Windows® 2000 Professional/XP/XP Professional x64 Edition/ Windows Vista®)
- For Wired Network Interface Users (For Mac OS® X 10.2.4 or greater)
- For Wireless Network Interface Users
- 23 Before you begin
- 24 Confirm your network environment (Infrastructure Mode)
- Connecting the Brother machine to the wireless network
- Install the Drivers & Software (For Windows® 2000 Professional/XP/XP Professional x64 Edition/ Windows Vista®)
- Install the Drivers & Software (For Mac OS® X 10.2.4 or greater)
- Install Optional Applications Windows®
- For Network Users
- Consumables
- brother USA/CAN
- Start Here

3
d Fan the stack of paper well to avoid paper jams
and misfeeds.
e Gently put the paper into the paper tray print
side down and top edge first. Check that the
paper is flat in the tray.
f Gently adjust the paper side guides to the
paper with both hands. Make sure that the
paper side guides touch the edges of the
paper.
g Close the paper tray cover a.
h Slowly push the paper tray completely into the
machine.
i While holding the paper tray in place, pull out
the paper support a until it clicks, and then
unfold the paper support flap b.
Important
Do not push the paper in too far.
Note
When you use Legal size paper, press and hold
the universal guide release button a as you slide
out the front of the paper tray.
1
1
1
2