
Installation Instructions


8
8
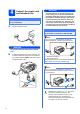
Set up the TAD
You must record an outgoing message in order to use
the TAD mode.
a Record the TAD outgoing message
(TAD Message).
b Activate TAD mode.
Press . The button will light when the mode
is active.
9
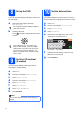
Set the LCD contrast
(If needed)
If you are having difficulty reading the LCD, try
changing the contrast setting.
a Press MENU.
b Press a or b to display General Setup.
c Press General Setup.
d Press a or b to display LCD Settings.
e Press LCD Settings.
f Press LCD Contrast.
g Press Light, Med or Dark.
h Press Stop/Exit.
10
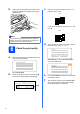
Set the date and time
The machine displays the date and time, and if you
set up the station ID, it will add it to each fax you send.
a Press MENU.
b Press a or b to display Initial Setup.
c Press Initial Setup.
d Press Date&Time.
e Enter the last two digits of the year on the
Touchscreen, and then press OK.
(e.g. Enter 0 8 for 2008.)
f Repeat for Month and Day, and Hours and
Minutes in 24-hour format.
g Press Stop/Exit.
See Outgoing message (OGM) in Chapter 9
of the User’s Guide.
If the TAD Mode is on, it overrides your
Receive Mode setting. The built-in digital
TAD answers voice calls. If the call is a fax,
you can receive a fax automatically. For
details, see Digital TAD in Chapter 9 of the
User’s Guide.
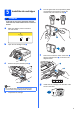
Note
You can also adjust the angle of the display by
lifting it.
Year:2008
Year :20 08
Date&Time
Da te& Time