
User Manual
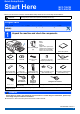
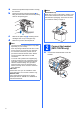
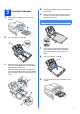
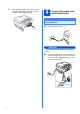
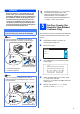
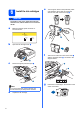
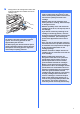
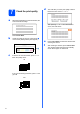
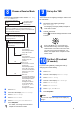
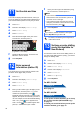
Table Of Contents
- Quick Setup Guide MFC-790CW MFC-990CW
- Start Here
- 1 Unpack the machine and check the components
- 2 Connect the handset (MFC-790CW only)
- 3 Load plain A4 paper
- 4 Connect the power cord and telephone line
- 5 Set Your Country (For Australia / New Zealand Customer Only)
- 6 Install the ink cartridges
- 7 Check the print quality
- 8 Choose a Receive Mode
- 9 Set up the TAD
- 10 Set the LCD contrast (If needed)
- 11 Set the date and time
- 12 Enter personal information (station ID)
- 13 Set tone or pulse dialling mode (Not available for New Zealand)
- Set up the cordless handset (MFC-990CW only)
- For USB Interface Users (For Windows® 2000 Professional/XP/XP Professional x64 Edition/ Windows Vista®)
- For USB Interface Users (For Mac OS® X 10.2.4 or greater)
- For Wired Network Interface Users (For Windows® 2000 Professional/XP/XP Professional x64 Edition/ Windows Vista®)
- For Wired Network Interface Users (For Mac OS® X 10.2.4 or greater)
- For Wireless Network Interface Users
- 20 Before you begin
- 21 Confirm your network environment (Infrastructure Mode)
- Connecting the Brother machine to the wireless network
- Install the Drivers & Software (For Windows® 2000 Professional/XP/XP Professional x64 Edition/ Windows Vista®)
- Install the Drivers & Software (For Mac OS® X 10.2.4 or greater)
- Install Optional Applications Windows®
- For Network Users
- Consumables
- brother ARL/ASA/NZ
- Start Here

4
i While holding the paper tray in place, pull out
the paper support a until it clicks, and then
unfold the paper support flap b.
4
Connect the power cord
and telephone line
a Connect the power cord.
WARNING
The machine must be fitted with an earthed
plug.
b Connect the telephone line cord. Connect one
end of the telephone line cord to the socket on
the machine marked LINE and the other end to
a telephone wall socket.
1
2
Important
DO NOT connect the USB cable yet (if you are
using a USB cable).