
User Manual

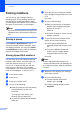
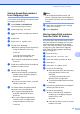


Table Of Contents
- USER’S GUIDE MFC-790CW MFC-990CW
- Approval Information and Compilation and Publication Notice
- Table of Contents
- Section I: General
- 1 General Information
- 2 Loading paper and documents
- 3 General setup
- 4 Security features
- Section II: Fax
- 5 Sending a Fax
- Entering Fax mode
- Broadcasting (Monochrome only)
- Additional sending operations
- Sending faxes using multiple settings
- Contrast
- Changing fax resolution
- Dual access (Monochrome only)
- Real time transmission
- Overseas Mode
- Delayed Faxing (Monochrome only)
- Delayed Batch Transmission (Monochrome only)
- Checking and cancelling waiting jobs
- Setting your changes as a new default
- Restoring all settings to the factory settings
- Sending a fax manually
- Sending a fax at the end of a conversation
- Out of Memory message
- 6 Receiving a Fax
- 7 Telephone and External devices
- Voice operations
- Telephone Service for Australia
- Telephone Service for New Zealand
- Telephone Service for Some Countries
- Connecting an external TAD (telephone answering device)
- External and extension telephones
- 8 Dialling and storing numbers
- 9 Digital TAD
- 10 Printing Reports
- 11 Polling
- 5 Sending a Fax
- Section III: Copy
- Section IV: Direct Photo Printing
- 13 Printing photos from a memory card or USB Flash memory drive
- 14 Printing photos from a camera
- 15 Wireless photo printing (MFC-990CW only)
- Section V: Software
- Section VI: Appendixes
- A Safety and Legal
- B Troubleshooting and Routine Maintenance
- Troubleshooting
- Error and Maintenance messages
- Routine maintenance
- Replacing the ink cartridges
- Cleaning the outside of the machine
- Cleaning the scanner glass
- Cleaning the machine’s printer platen
- Cleaning the paper pick-up roller
- Cleaning the print head
- Checking the print quality
- Checking the print alignment
- Checking the ink volume
- Uninstalling and installing the handset and handset cradle (MFC-790CW only)
- Machine Information
- Packing and shipping the machine
- C Menu and Features
- D Specifications
- E Glossary
- Index
- brother ARL/ASA/NZ

Chapter 8
74
i To choose where the number will be
stored, do one of the following:
To accept the displayed next
available Speed Dial location, press
OK.
To enter a different Speed Dial
location, press a 2-digit number
using the buttons on the LCD.
Press OK.
Note
If the 2-digit Speed Dial location you
choose is already taken, the OK button on
the LCD will not work. Choose a different
location.
j When the LCD displays your settings,
press OK to confirm.
k Press Stop/Exit.
Changing Speed Dial names
or numbers 8
You can change a Speed Dial name or
number that has already been stored.
a Press Speed Dial.
b Press More.
c Do one of the following:
Press Change to edit the names or
numbers.
Press Delete to delete all
information in a Speed Dial location.
Press the number you want to delete.
Press OK.
Go to step i.
d Press the number you want to change.
e Press Name:, Fax/Tel1: or
Fax/Tel2:.
f Do one of the following:
If you chose Name:, enter the name
(up to 16 characters) using the
buttons on the LCD.
(See Entering Text on page 195.)
Press OK.
If you chose Fax/Tel1: or
Fax/Tel2:, enter the new number
(up to 20 digits) using the buttons on
the LCD.
Press OK.
Note
How to change the stored name or
number:
If you want to change a character, press
d or c to position the cursor under the
character you want to change, and then
press . Re-enter the character.
g Do one of the following:
To change more details, go to f.
Press OK to complete.
The LCD will display your settings.
h To change another Speed Dial location,
repeat steps b to g.
i Press Stop/Exit.