
User Manual


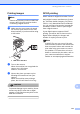
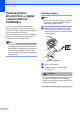
Table Of Contents
- USER’S GUIDE MFC-790CW MFC-990CW
- Approval Information and Compilation and Publication Notice
- Table of Contents
- Section I: General
- 1 General Information
- 2 Loading paper and documents
- 3 General setup
- 4 Security features
- Section II: Fax
- 5 Sending a Fax
- Entering Fax mode
- Broadcasting (Monochrome only)
- Additional sending operations
- Sending faxes using multiple settings
- Contrast
- Changing fax resolution
- Dual access (Monochrome only)
- Real time transmission
- Overseas Mode
- Delayed Faxing (Monochrome only)
- Delayed Batch Transmission (Monochrome only)
- Checking and cancelling waiting jobs
- Setting your changes as a new default
- Restoring all settings to the factory settings
- Sending a fax manually
- Sending a fax at the end of a conversation
- Out of Memory message
- 6 Receiving a Fax
- 7 Telephone and External devices
- Voice operations
- Telephone Service for Australia
- Telephone Service for New Zealand
- Telephone Service for Some Countries
- Connecting an external TAD (telephone answering device)
- External and extension telephones
- 8 Dialling and storing numbers
- 9 Digital TAD
- 10 Printing Reports
- 11 Polling
- 5 Sending a Fax
- Section III: Copy
- Section IV: Direct Photo Printing
- 13 Printing photos from a memory card or USB Flash memory drive
- 14 Printing photos from a camera
- 15 Wireless photo printing (MFC-990CW only)
- Section V: Software
- Section VI: Appendixes
- A Safety and Legal
- B Troubleshooting and Routine Maintenance
- Troubleshooting
- Error and Maintenance messages
- Routine maintenance
- Replacing the ink cartridges
- Cleaning the outside of the machine
- Cleaning the scanner glass
- Cleaning the machine’s printer platen
- Cleaning the paper pick-up roller
- Cleaning the print head
- Checking the print quality
- Checking the print alignment
- Checking the ink volume
- Uninstalling and installing the handset and handset cradle (MFC-790CW only)
- Machine Information
- Packing and shipping the machine
- C Menu and Features
- D Specifications
- E Glossary
- Index
- brother ARL/ASA/NZ

116
14
Printing photos
directly from a
PictBridge camera
14
Your Brother machine supports the
PictBridge standard, allowing you to connect
to and print photos directly from any
PictBridge compatible digital camera.
If your camera is using the USB Mass
Storage standard, you can also print photos
from a digital camera without PictBridge.
(See Printing photos directly from a digital
camera (without PictBridge) on page 118.)
PictBridge requirements 14
To avoid errors, remember the following
points:
The machine and the digital camera must
be connected using a suitable USB cable.
The image file extension must be .JPG
(other image file extensions like .JPEG,
.TIF, .GIF and so on will not be
recognized).
PhotoCapture Center™ operations are
not available when using the PictBridge
feature.
Setting your digital camera 14
Make sure your camera is in PictBridge
mode. The following PictBridge settings may
be available from the LCD of your PictBridge
compatible camera.
Depending on your camera some of these
settings may not be available.
1
See DPOF printing on page 117 for more details.
2
If your camera is set to use the Printer Settings
(Default setting), the machine will print your photo
using the following settings.
When your camera does not have any
menu selections, these settings are also
used.
The names and availability of each setting
depends on the specification of your
camera.
Please refer to the documentation supplied
with your camera for more detailed
information on changing PictBridge settings.
Printing photos from a camera 14
Camera Menu
Selections
Options
Paper Size Letter, A4, 10x15cm, Printer
Settings (Default setting)
2
Paper Type Plain Paper, Glossy Paper,
Inkjet Paper, Printer Settings
(Default setting)
2
Layout Borderless: On, Borderless:
Off, Printer Settings (Default
setting)
2
DPOF setting
1
-
Print Quality Normal, Fine,
Printer Settings (Default
setting)
2
Color
Enhancement
On, Off,
Printer Settings (Default
setting)
2
Date Print On, Off,
Printer Settings (Default
setting)
2
Settings Options
Paper Size 10x15cm
Paper Type Other Glossy
Layout Borderless: On
Print Quality Photo
Color Enhancement Off
Date Print Off