
User guide


MFC790CW Windows Network Connection Repair Instructions
6
© 1995 - 2010 Brother International Corporation
www.brother-usa.com
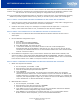
provided with your firewall software for information on how to add the following
network ports:
a. For network scanning, add UDP port 54925.
b. For network PC-Fax receiving, add UDP port 54926.
c. If you still have trouble with your network connection, add UDP port137.
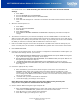
12. a. If the Brother machine is the only network-printing device found on the network the installation of
the Brother drivers will automatically start. If there is more than one network-printing device found
you will be asked to select your model machine from the list and then click NEXT.
b. If the Brother machine is not yet configured for use on your network, a window will appear stating:
Find unconfigured Device. Click OK. The Configure IP Address window will appear. Choose
SPECIFY YOUR MACHINE BY ADDRESS (ADVANCED USERS), and enter the IP address information
appropriate to your network, then click NEXT. If you are not certain what information to enter you
should contact your network administrator.
13. The installation screens will appear one after another. Please wait. It will take a few moments for all
the screens to appear. DO NOT try to cancel any of the screens during this installation. If asked:
Would you like to install this device software? Click INSTALL.
14. When the On-Line Registration screen is displayed, make your selection and follow the on-screen
instructions. Once you have completed the registration process, close your web browser to return to
this window. Click NEXT to continue the installation.
15. When prompted to restart the computer, select YES, I WANT TO RESTARTMY COMPUTER NOW, and
click FINISH. The computer will restart. The installation is now complete.
16. Note: After restarting the computer you must be logged on with Administrator rights.
17. Attempt to print again.
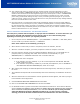
ENTERING TEXT:
1. You can use the left and right arrow keys to move the cursor left and right. Use the A1@ toggle key to
choose between letters, numbers and special characters.
2. For letters, press the appropriate key repeatedly until the desired letter appears. The letters appear in
this order: lower case then upper case. Press OK once all the letters have been entered.
3. To enter a space, press the A1@ to choose the special characters, then press the SPACE button, which
resembles an underscore ( _ ) until a blank space appears. Advance the cursor to the right using the
right arrow key.
4. You can use the backspace button to delete a character or the forward arrow to advance to the next
space if using repeating characters.