
Network User's Guide for Internet Fax

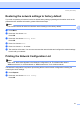

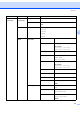
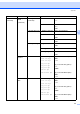
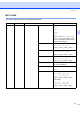

Table Of Contents
- NETWORK USER’S GUIDE MFC-7440N MFC-7840N MFC-7840W
- Table of Contents
- 1 Internet fax
- Overview
- Getting connected
- Control panel key functions
- Sending an Internet fax
- Manually entering text
- Receiving E-mail or Internet fax
- Receiving an Internet fax to your computer
- Forwarding received E-mail and fax messages
- Relay broadcasting
- TX Verification Mail
- Setup Mail TX
- Setup Mail RX
- Error mail
- Important information on Internet fax
- Overview
- 2 Fax operation
- 3 Control panel setup
- LAN menu
- TCP/IP
- Ethernet (wired network only)
- Setup Wizard (MFC-7840W wireless network only)
- SES/WPS/AOSS (MFC-7840W wireless network only)
- WPS w/PIN Code (MFC-7840W wireless network only)
- WLAN Status (MFC-7840W wireless network only)
- Set to Default (MFC-7840W only)
- Wired Enable (MFC-7840W wired network only)
- WLAN Enable (MFC-7840W wireless network only)
- Setup Internet (from the Setup IFAX menu)
- Setup Mail RX (from the Setup IFAX menu)
- Setup Mail TX (from the Setup IFAX menu)
- Setup Relay (from the Setup IFAX menu)
- Scan to E-mail (E-mail server)
- Scan to FTP
- Fax to Server
- Time Zone
- Restoring the network settings to factory default
- Printing the Network Configuration List
- LAN menu
- Appendix A
- Index

Control panel setup
45
3
h Press a or b to choose Suffix.
Press OK.
i Enter the suffix using dial pad.
j Press OK.
k Press Stop/Exit.
Note
You can enter the prefix and suffix address using up to a total of 40 characters.
How to operate Fax to Server 3
a Place the document in the ADF or on the scanner glass.
b Enter the fax number.
c The machine will send the message over a TCP/IP network to the fax server.