
User`s guide


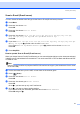
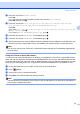
Table Of Contents
- NETWORK USER’S GUIDE MFC-7440N MFC-7840N MFC-7840W
- Table of Contents
- 1 Internet fax
- Overview
- Getting connected
- Control panel key functions
- Sending an Internet fax
- Manually entering text
- Receiving E-mail or Internet fax
- Receiving an Internet fax to your computer
- Forwarding received E-mail and fax messages
- Relay broadcasting
- TX Verification Mail
- Setup Mail TX
- Setup Mail RX
- Error mail
- Important information on Internet fax
- Overview
- 2 Fax operation
- 3 Control panel setup
- LAN menu
- TCP/IP
- Ethernet (wired network only)
- Setup Wizard (MFC-7840W wireless network only)
- SES/WPS/AOSS (MFC-7840W wireless network only)
- WPS w/PIN Code (MFC-7840W wireless network only)
- WLAN Status (MFC-7840W wireless network only)
- Set to Default (MFC-7840W only)
- Wired Enable (MFC-7840W wired network only)
- WLAN Enable (MFC-7840W wireless network only)
- Setup Internet (from the Setup IFAX menu)
- Setup Mail RX (from the Setup IFAX menu)
- Setup Mail TX (from the Setup IFAX menu)
- Setup Relay (from the Setup IFAX menu)
- Scan to E-mail (E-mail server)
- Scan to FTP
- Fax to Server
- Time Zone
- Restoring the network settings to factory default
- Printing the Network Configuration List
- LAN menu
- Appendix A
- Index

Control panel setup
37
3
Notification 3
The notification feature allows a confirmation of receipt message to be transmitted to the sending station
when the Internet Fax has been received.
This feature only works on Internet Fax machines that support the “MDN” specification.
a Press Menu.
b Press a or b to choose LAN.
Press OK.
c Press a or b to choose Setup IFAX.
Press OK.
d Press a or b to choose Setup Mail RX.
Press OK.
e Press a or b to choose Notification.
Press OK.
f Press a or b to choose On, MDN or Off.
Press OK.
g Press Stop/Exit.
Setup Mail TX (from the Setup IFAX menu) 3
This menu has three selections: Sender Subject, Size Limit and Notification.
Sender Subject 3
This field displays the subject that is attached to the Internet fax data being sent from the Brother machine to
a computer (default is “Internet Fax Job”).
a Press Menu.
b Press a or b to choose LAN.
Press OK.
c Press a or b to choose Setup IFAX.
Press OK.
d Press a or b to choose Setup Mail TX.
Press OK.
e Press a or b to choose Sender Subject.
Press OK.
f If you want to change the Sender Subject, press 1 to choose change to change the Sender Subject.
Go to g.
If you don’t want to change the Sender Subject, press 2 to choose Exit.
Go to h.