
User Manual

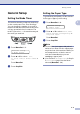

Table Of Contents
- USER’S GUIDE MFC-7420/MFC-7820N
- APPROVAL INFORMATION
- Compilation and Publication Notice
- EC Declaration of Conformity
- Safety precautions
- Quick Reference Guide
- Table of Contents
- 1 Introduction
- 2 Getting started
- Initial setup
- General Setup
- Setting the Mode Timer
- Setting the Paper Type
- Setting the Paper Size
- Setting the Ring Volume
- Setting the Beeper Volume
- Setting the Speaker Volume
- Turning on Automatic Daylight Savings Time
- Toner Save
- Sleep Time
- Setting the LCD Contrast
- Security
- TX Lock (MFC-7420 only)
- Memory Security (MFC-7820N only)
- Setting Lock
- 3 Setup Send
- 4 Setup Receive
- 5 Quick-Dial numbers and dialling options
- 6 Remote Fax Options
- 7 Printing reports
- 8 Making copies
- 9 Software and Network Features
- 10 Important information
- 11 Troubleshooting and routine maintenance
- Appendix A
- Appendix B
- Glossary
- Specifications
- Index
- Remote Retrieval Access card
- brother UK/IRE/SAF

Chapter 2
2 - 3
Setting the Phone Line Type
If you are connecting the machine to a line
that features a PABX (PBX) or ISDN to send
and receive faxes, it is also necessary to
change the Phone Line Type accordingly by
completing the following steps.
1
Press Menu/Set, 0, 5.
2
Press ▲ or ▼ to select PBX, ISDN (or
Normal).
Press Menu/Set.
3
Press Stop/Exit.
PABX (PBX) and TRANSFER
The machine is initially set to Normal, which
lets the machine connect to a standard PSTN
(Public Switched Telephone Network) line.
However, many offices use a central
telephone system or Private Automatic
Branch Exchange (PABX). Your machine can
be connected to most types of PABX (PBX).
The machine’s recall feature supports timed
break recall only (TBR). TBR will work with
most PABX (PBX) systems allowing you to
gain access to an outside line, or transfer
calls to another extension. The feature works
when Tel/R is pressed.
Note
You can program a Tel/R key press as part of
a number stored in a One-Touch or
Speed-Dial location. When programming the
One-Touch or Speed-Dial number (Menu/Set
2, 3, 1 or 2, 3, 2) press Tel/R first (the screen
displays "!"), then enter the telephone
number. If you do this, you do not need to
press Tel/R each time before you dial using a
One-Touch or Speed-Dial location. (See
Storing numbers for easy dialling on page
5-1.) However, if PBX is not selected in the
Phone Line Type setting, you cannot use the
One-Touch or Speed-Dial number that Tel/R
press is programmed into.
Initial Setup
5.Phone Line Set