
User Manual
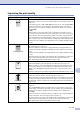
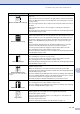

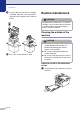

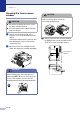
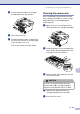
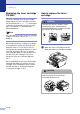
Table Of Contents
- USER’S GUIDE MFC-7420/MFC-7820N
- APPROVAL INFORMATION
- Compilation and Publication Notice
- EC Declaration of Conformity
- Safety precautions
- Quick Reference Guide
- Table of Contents
- 1 Introduction
- 2 Getting started
- Initial setup
- General Setup
- Setting the Mode Timer
- Setting the Paper Type
- Setting the Paper Size
- Setting the Ring Volume
- Setting the Beeper Volume
- Setting the Speaker Volume
- Turning on Automatic Daylight Savings Time
- Toner Save
- Sleep Time
- Setting the LCD Contrast
- Security
- TX Lock (MFC-7420 only)
- Memory Security (MFC-7820N only)
- Setting Lock
- 3 Setup Send
- 4 Setup Receive
- 5 Quick-Dial numbers and dialling options
- 6 Remote Fax Options
- 7 Printing reports
- 8 Making copies
- 9 Software and Network Features
- 10 Important information
- 11 Troubleshooting and routine maintenance
- Appendix A
- Appendix B
- Glossary
- Specifications
- Index
- Remote Retrieval Access card
- brother UK/IRE/SAF

Troubleshooting and routine maintenance
11 - 16
11
Improving the print quality
Examples of poor print quality Recommendation
Faint
Check the machine’s environment. Conditions such as humidity, high
temperatures, and so on may cause this print fault. (See Choosing a location on
page 1-2.)
If the whole page is too light, Toner Save mode may be on. Turn off Toner Save
mode in the machine’s menu setting or in the printer Properties of the driver.
(See Toner Save on page 2-6 or Advanced tab in the Software User’s Guide on
the CD-ROM.).
—OR—
If this problem occurs when making copies or printing received faxes, turn off
Toner Save mode in the machine’s menu setting. (See Toner Save on page 2-6.)
Clean the laser scanner window and the primary corona wire on the drum unit.
(See Cleaning the laser scanner window on page 11-23 and Cleaning the corona
wire on page 11-24.) If the print quality has not improved, install a new drum unit.
Install a new toner cartridge. (See Replacing the toner cartridge TN-2000 on page
11-25.)
Grey background
Make sure that you use paper that meets the recommended specifications.
(See About paper on page 1-9.)
Check the machine’s environment - high temperatures and high humidity can
increase the amount of background shading. (See Choosing a location on page
1-2.)
Install a new toner cartridge. (See Replacing the toner cartridge TN-2000 on page
11-25.)
Clean the primary corona wire on the drum unit. (See Cleaning the corona wire on
page 11-24.) If the print quality has not improved, install a new drum unit.
(See Replacing the drum unit (DR-2000) on page 11-28.)
Ghost
Make sure you use paper that meets our specifications. Rough-surfaced paper or
thick print media may cause this problem. (See About paper on page 1-9.)
Make sure that you choose the appropriate media type in the printer driver or in
the machine’s Paper Type menu setting. (See Basic tab in the Software User’s
Guide on the CD-ROM and Setting the Paper Type on page 2-4 in this User’s
Guide.)
Install a new drum unit. (See Replacing the drum unit (DR-2000) on page 11-28.)
Toner specks
Make sure that you use paper that meets our specifications. Rough-surfaced
paper may cause the problem. (See About paper on page 1-9.)
Clean the primary corona wire and the drum unit. (See Cleaning the corona wire
on page 11-24 and Cleaning the drum unit on page 11-17.) If the print quality has
not improved, install a new drum unit. (See Replacing the drum unit (DR-2000) on
page 11-28.)
Hollow print
Make sure that you use paper that meets our specifications. (See About paper on
page 1-9.)
Choose Thick paper mode in the printer driver or in the machine’s Paper Type
menu setting, or use thinner paper than you are currently using. (See Setting the
Paper Type on page 2-4 and Basic tab in the Software User’s Guide on the
CD-ROM.)
Check the machine’s environment because conditions such as high humidity can
cause hollow print. (See Choosing a location on page 1-2.)
Clean the primary corona wire on the drum unit. (See Cleaning the corona wire on
page 11-24.) If the print quality has not improved, install a new drum unit.
(See Replacing the drum unit (DR-2000) on page 11-28.)
ABCDEFGH
abcdefghijk
ABCD
abcde
01234
C
DE
F
d
ef
g
BC
b
c
d
2
3
ABCDEFGH
abcdefghijk
ABCD
abcde
01234
ABCDEFGH
abcdefghijk
ABCD
abcde
01234