
Installation Instructions


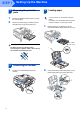

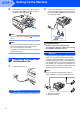


Table Of Contents
- Quick Setup Guide MFC-680CN
- Table of Contents
- Getting Started
- STEP 1 Setting Up the Machine
- 1 Removing the protective parts
- 2 Connecting the handset
- 3 Loading paper
- 4 Connecting the power cord and telephone line
- 5 Installing the ink cartridges
- 6 Print quality check
- 7 Setting the LCD contrast
- 8 Setting the date and time
- 9 Setting your station ID
- 10 Setting tone or pulse dialling mode
- 11 Setting the telephone line type
- 12 Choosing a Receive Mode
- 13 Setting up the TAD
- STEP 2 Installing the Driver & Software
- For Network Users
- Installing FaceFilter Studio Help
- Consumables
- brother UK/IRE/GEN/SAF
Setting Up the Machine
4
STEP 1
1
1 Removing the protective
parts
1 Remove the protective tape and film covering
the scanner glass.
2 Remove the foam bag (1) containing the ink
cartridges from on top of the paper tray.
Improper Setup
DO NOT connect the interface cable.
Connecting the interface cable is done during
the software installation process.
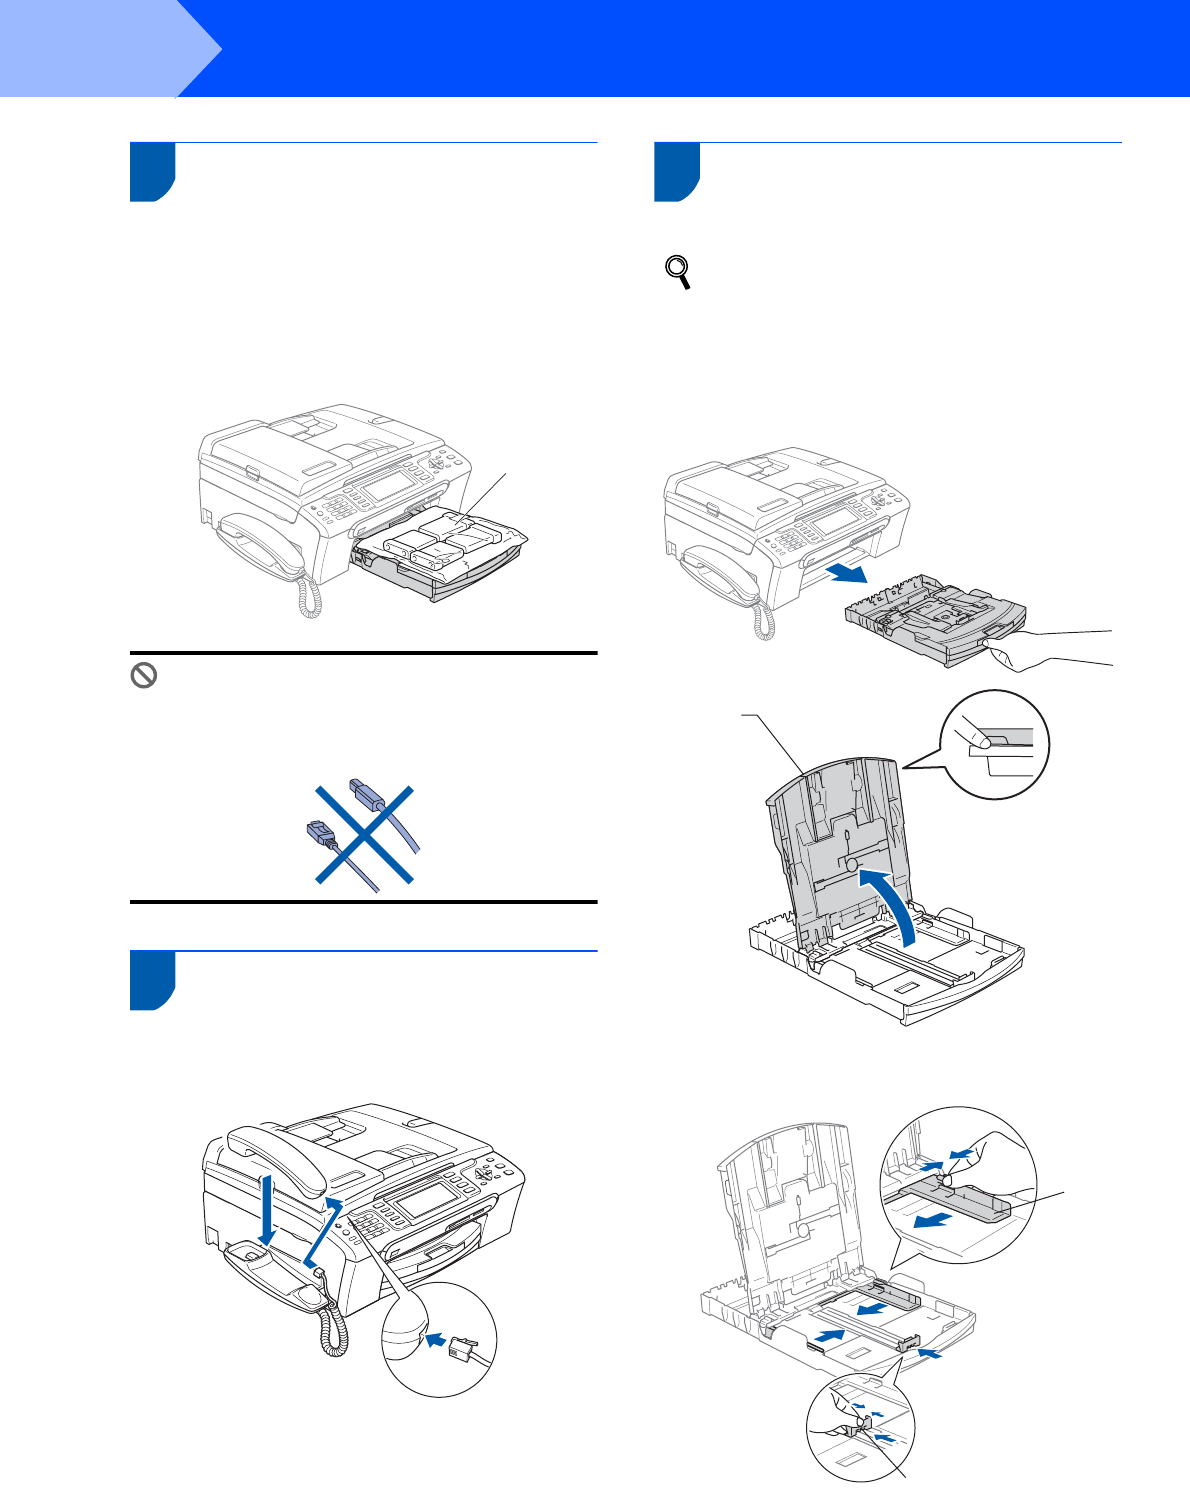
2 Connecting the handset
1 Connect the curled handset cord to the
handset.
3 Loading paper
You can load up to 100 sheets of 80 g/m
2
paper.
For details, see Acceptable paper and other
media in Chapter 2 of the User’s Guide.
1 Pull the paper tray completely out of the
machine and lift the output paper tray cover (1).
2 Press and slide the paper side guides (1) and
paper length guide (2) to fit the paper size.
1
1
1
2