
User Manual


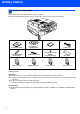
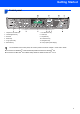


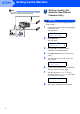
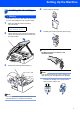

Table Of Contents
- Quick Setup Guide MFC-640CW
- Table of Contents
- Getting Started
- STEP1 Setting Up the Machine
- 1 Removing the protective parts
- 2 Installing the handset
- 3 Loading paper
- 4 Installing the phone line and power cord
- 5 Set Your Country (For Australia / New Zealand Customer Only)
- 6 Installing the ink cartridges
- 7 Print quality check
- 8 Setting the date and time
- 9 Setting your station ID
- 10 Choosing a Receive Mode
- 11 Setting up the TAD
- STEP2 Installing the Driver & Software
- For Network Users
- Consumables and Options
- brother ARL/ASA/NZ

Setting Up the Machine
6
STEP1
Note
If you are sharing one phone line with an external
telephone, connect it as shown below.
5 Set Your Country (For
Australia / New Zealand
Customer Only)
Warning
You must set your country so that the machine
works correctly.
1 Check that the power is turned on (by plugging
in the power cord)
The LCD shows:
Set Country
Press Set Key
2 Press Menu/Set.
The LCD shows:
Select ab & Set
Australia e
3 Press a or b to choose the country
(AUSTRALIA or NEWZEALAND).
4 Press Menu/Set when the LCD shows your
country.
5 The LCD prompts you to make sure of the
country again.
Australia?
1.Yes 2.No
6 Press 1 to go to step 7 or press 2 to go back to
step 1 to choose the country again.
7 After the LCD shows Accepted for two
seconds, it shows; Please Wait After about
30 seconds, the LCD shows:
No Cartridge
8 Go to step 6 ‘Installing the ink cartridges’.
(Example
for Australia)