
User Manual

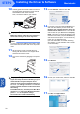
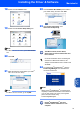
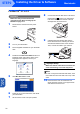
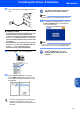


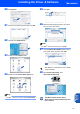
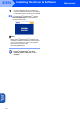
Table Of Contents
- Quick Setup Guide MFC-640CW
- Table of Contents
- Getting Started
- STEP1 Setting Up the Machine
- 1 Removing the protective parts
- 2 Installing the handset
- 3 Loading paper
- 4 Installing the phone line and power cord
- 5 Set Your Country (For Australia / New Zealand Customer Only)
- 6 Installing the ink cartridges
- 7 Print quality check
- 8 Setting the date and time
- 9 Setting your station ID
- 10 Choosing a Receive Mode
- 11 Setting up the TAD
- STEP2 Installing the Driver & Software
- For Network Users
- Consumables and Options
- brother ARL/ASA/NZ

Installing the Driver & Software
31
Macintosh
®
Wired
Network
Macintosh
®
18 Double-click the Utilities folder.
19 Double-click the Printer Setup Utility icon.
Note
For Mac
®
OS X 10.2.x users, open Print Center
icon.
20 Click Add.
21 Make the selection shown below. (For Mac
®
OS X 10.2.4 to 10.3 users)
Note
For Mac
®
OS X 10.4 users, go to step 22.
22 Choose Brother MFC-XXXX (where XXXX is
your model name), and then click Add.
23 Click Printer Setup Utility, then
Quit Printer Setup Utility.
The MFL-Pro Suite, Printer Driver,
Scanner Driver and ControlCenter2 have
been installed.
For more information about connecting the
machine to a Macintosh
®
network, see
Chapter 6 of the Network User’s Guide on the
CD-ROM.
24 To install Presto!
®
PageManager
®
, click the
Presto! PageManager icon and follow the
on-screen instructions.
Note
When Presto!
®
PageManager
®
is installed OCR
capability is added to the Brother ControlCenter2.
You can also easily scan, share, and organize
photos and documents using
Presto!
®
PageManager
®
.
Presto!
®
PageManager
®
has been
installed and the installation is now
complete.