
Manual


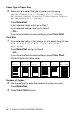
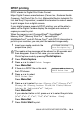
Table Of Contents
- USER’S GUIDE MFC-640CW
- Brother numbers
- Ordering accessories and supplies
- Safety precautions
- Choosing a location
- Quick Reference Guide
- How to access the complete User’s Guide
- How to access Brother Support (For Windows®)
- Table of Contents
- 1 Introduction
- 2 Getting started
- Initial Setup
- General Setup
- Setting the Mode Timer
- Setting the Paper Type
- Setting the Paper Size
- Setting the Ring Volume
- Setting the Beeper Volume
- Setting the Speaker Volume
- Setting the Handset Volume
- Choosing the Handset Volume (For Volume Amplify)
- Setting Volume Amplify
- Turning on Automatic Daylight Savings Time
- Setting the LCD Contrast
- 3 Setup Send
- 4 Setup Receive
- Basic receiving operations
- 5 Quick-Dial numbers and dialing options
- 6 Remote Fax Options (Black & White only)
- 7 Message Center
- Message Center mode
- Setting up the Message Center
- Recording Message Center Outgoing Message
- Activating Message Center mode
- Message indicator
- Playing voice messages
- Printing a fax message
- Erasing incoming messages
- Setting Maximum Time for incoming messages
- Setting Toll Saver
- ICM Recording Monitor
- Recording a conversation
- Record Fax/Tel Outgoing Announcement (F/T OGM)
- Message Center mode
- 8 Printing reports
- 9 Making copies
- 10 Walk-Up PhotoCapture Center™
- 11 Software and Network features
- 12 Important information
- 13 Troubleshooting and routine maintenance
- Appendix A
- Appendix B
- Glossary
- Specifications
- Index
- Remote Retrieval Access card
- brother US/CAN

WALK-UP PHOTOCAPTURE CENTER
™
10 - 6
Printing images
Before you can print an individual image, you have to know the
image number.
1
Print the index first. (See Printing the Index (Thumbnails) on
page 10-5.)
2
Make sure you have inserted the media card.
Press (
PhotoCapture). (See page 10-3.)
3
Press
▲ or ▼ to choose Print Images.
Press
Menu/Set.
4
Use the dial pad to enter the image
number that you want to print from
the Index page (Thumbnails).
Press
Menu/Set.
Repeat this step until you have entered all the image numbers
that you want to print.
5
After you have selected all the image numbers, press
Menu/Set again, and go to Step 6.
—OR—
If you have finished choosing settings, press
Color Start.
If your media card contains valid DPOF information, the LCD
shows DPOF Print:Yes, please go to DPOF printing on page
10-8.
You can enter all the numbers at one time by using the key for
a comma or the
# key for hyphen.
(For example, Enter
136 - to print images No.1, No.3 and
No.6. Enter
1#5 to print images No.1 to No.5).
Enter Image No.
No.:1,3