
Instruction Manual


Setting Up the Machine
9
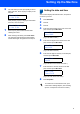
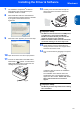
6 The LCD asks you if the print quality is OK for
black and color. Press 1 (Yes) or 2 (No) on the
dial pad.
Black OK?
1.Yes 2.No
After pressing 1 (Yes) or 2 (No) for both black
and color, the LCD shows:
Start Cleaning?
1.Yes 2.No
7 Press 1 (Yes), the machine will then start
cleaning the colors.
8 After cleaning is finished, press Color Start.
The machine starts printing the Print Quality
Check Sheet again and goes back to step 3.
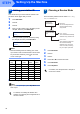
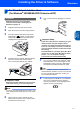
7 Setting the date and time
The machine displays the date and time, and prints it
on the fax you send.
1 Press Menu/Set.
2 Press 0.
3 Press 2.
4 Enter the last two digits of the year on the dial
pad, and then press Menu/Set.
Date/Time
Year:2005
(e.g. Enter 0 5 for 2005.)
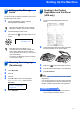
5 Enter the two digits for the month on the dial
pad, and then press Menu/Set.
Date/Time
Month:03
(e.g. Enter 0 3 for March.)
6 Enter the two digits for the day on the dial pad,
and then press Menu/Set.
Date/Time
Day:01
(e.g. Enter 0 1 for the first of the month.)
7 Enter the time in 24-hour format on the dial
pad, and then press Menu/Set.
Date/Time
Time:15:25
(e.g. Enter 1 5, 2 5 for 3:25 P.M.)
8 Press Stop/Exit.
To confirm the current date and time, print
out the Users Settings Report. (See "Printing
reports" in Chapter 8 of the User’s Guide.)