
Quick Setup Guide
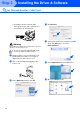
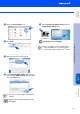

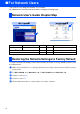
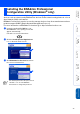
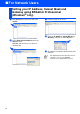
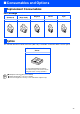

Table Of Contents
- Quick Setup Guide MFC-5440CN/MFC-5840CN
- Getting Started
- Table of Contents
- Step1 Setting Up the Machine
- 1 Removing the Protective Parts
- 2 Loading Paper
- 3 Installing the Phone Line and Power Cord
- 4 Installing the Ink Cartridges
- 5 Print Quality Check
- 6 Setting the Date and Time
- 7 Setting Your Station ID
- 8 Selecting a Receive Mode
- 9 Selecting Your Language (Canada only)
- 10 Sending in the Product Registration and Test Sheet (USA only)
- Step2 Installing the Driver & Software
- For Network Users
- Consumables and Options
- brother USA

31
8
Lift the scanner cover to release the lock.
Gently push the scanner cover support
down and close the scanner cover.
9
Turn on the machine by plugging in the
power cord.
0
Open the Chooser from the Apple menu.
A
Click the Brother Ink (IP) icon, and then
select BRN_xxxxxx.
Close the Chooser.
The setup is now complete.
■
xxxxxx are the last six digits of the Ethernet
address.
■
Please see Network User’s Guide Chapter
5 on the CD-ROM for more information
about connecting the MFC to a
Macintosh
®
network.
Installing the Driver & Software
Setting Up
the Machine
For
Network Users
Macintosh
®
Network