
Printer/Fax/Scanner/Copier USER'S GUIDE MFC-5460CN, MFC-5860CN
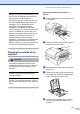
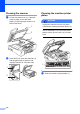


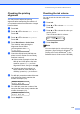
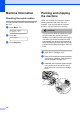
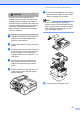
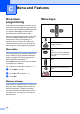
Table Of Contents
- USER’S GUIDE MFC-5460CN MFC-5860CN
- Brother numbers
- Ordering accessories and supplies
- Compilation and Publication Notice
- Table of Contents
- General
- 1 General Information
- 2 Loading documents and paper
- 3 General setup
- 4 Security features
- Fax
- 5 Sending a fax
- Entering Fax mode
- Broadcasting (Black & White only)
- Additional sending operations
- Sending faxes using multiple settings
- Contrast
- Changing Resolution
- Dual access (Black & White only)
- Real time transmission
- Overseas Mode
- Delayed Faxing (Black & White only)
- Delayed Batch Transmission (Black & White only)
- Checking and canceling waiting jobs
- Sending a fax manually
- Sending a fax at the end of a conversation
- Out of Memory message
- 6 Receiving a Fax
- 7 Telephone Services and External devices
- 8 Dialing and storing numbers
- 9 Remote fax options
- 10 Printing Reports
- 11 Polling
- 5 Sending a fax
- Copy
- Walk-up Photo Printing
- Software
- Appendixes
- A Safety and Legal
- Choosing a location
- To use the machine safely
- Important safety instructions
- Standard telephone and FCC Notices (These notices are in effect on models sold and used in the United States only.)
- Federal Communications Commission (FCC) Declaration of Conformity (USA only)
- Industry Canada Compliance Statement (Canada only)
- LAN connection
- Legal limitations for copying
- Trademarks
- B Troubleshooting and Routine Maintenance
- C Menu and Features
- D Specifications
- E Glossary
- F Index
- A Safety and Legal
- brother USA/CAN

Menu and Features
123
To access the menu mode:
a Press Menu.
b Choose an option.
Press 1 for General Setup menu.
Press 2 for Fax menu.
Press 3 for Copy menu.
Press 0 for Initial Setup menu.
You can scroll more quickly through
each menu level by pressing a or b for
the direction you want.
c Press OK when that option appears on
the LCD.
The LCD will then show the next menu
level.
d Press a or b to scroll to your next menu
selection.
e Press OK.
When you finish setting an option, the
LCD shows Accepted.