
User Manual

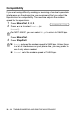
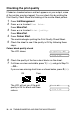
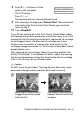

Table Of Contents
- USER’S GUIDE FAX-1840C/MFC-3240C
- APPROVAL INFORMATION
- Compilation and Publication Notice
- Safety precautions
- Choosing a location
- Quick Reference Guide
- Table of Contents
- 1 Introduction
- 2 Getting started
- 3 Setup Send
- How to enter Fax mode
- How to dial
- How to Fax (B&W and Colour)
- Basic sending operations
- Advanced sending operations
- Broadcasting (Not available for colour faxes)
- Overseas Mode
- Delayed Fax (Not available for colour faxes)
- Delayed Batch Transmission (Not available for colour faxes)
- Setup for Polled Transmit (Standard) (Not available for colour faxes)
- Setup for Polled Transmit with Secure Code (Not available for colour faxes)
- TX Lock (Key Lock for some countries)
- 4 Setup Receive
- Basic receiving operations
- Choosing the Receive Mode
- Setting the Ring Delay
- Setting the F/T Ring Time (Fax/Tel mode only)
- Fax Detect (MFC-3240C only)
- Fax Detect (FAX-1840C only)
- Printing a reduced incoming fax (Auto Reduction)
- Receiving a fax at the end of a conversation
- Printing a fax from the memory
- Reception into memory (Not available for colour fax reception)
- Polling
- Basic receiving operations
- 5 Quick-Dial numbers and dialling options
- 6 Remote Fax Options (Not available for colour faxes)
- 7 Printing reports
- 8 Making copies
- 9 Important information
- 10 Troubleshooting and routine maintenance
- Appendix A
- Telephone Service for Australia
- Telephone Service for New Zealand
- Telephone Service for Some Countries
- Advanced receiving operations
- Connecting an external device to your machine
- Appendix B
- Glossary
- Specifications
- Index
- Remote Retrieval Access card
- brother ARL/ASA/NZ

TROUBLESHOOTING AND ROUTINE MAINTENANCE 10 - 13
How to improve print quality
Cleaning the print head
To ensure good print quality, the machine will regularly clean the
print head. You can start the cleaning process manually if needed.
Clean the print head and ink cartridges if you get a horizontal line in
the text or graphics on your printed pages. You can clean Black only
or three colours at a time (Cyan/Yellow/Magenta), or all four colours
at once.
Cleaning the print head consumes ink. Cleaning too often uses ink
unnecessarily.
Caution
Do NOT touch the print head. Touching the print head may cause
permanent damage and may void the print head’s warranty.
1
Press
Ink Management
.
2
Press
▲
or
▼
to select
Cleaning
.
Press
Menu/Set
.
3
Press
▲
or
▼
to select
Black
,
Color
or
All
.
Press
Menu/Set
.
The machine will clean the print head. When cleaning is
finished, the machine will go back to standby mode
automatically.
■
If you clean the print head at least five times and the print
has not improved, call your Brother dealer for service.
■
The print head controls the flow of ink using tiny pumps to
produce characters or images onto the page.
■
We recommend having the machine powered up at all times.
The periodical cleaning is performed to prevent the drying up
of the ink in the head nozzles and is achieved by purging ink
from the print head. This process is performed automatically,
on average, every two days dependant on room
temperature. The machine is set so that this process occurs
in the early hours of the morning.
■
When the cleaning process is finished, the machine will
automatically return to its previous state.