
User Manual
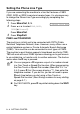
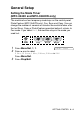
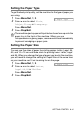
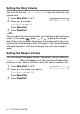
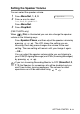

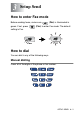

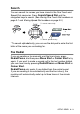
Table Of Contents
- USER'S GUIDE FAX-1840C/FAX-1940CN/MFC-3240C/MFC-3340CN
- APPROVAL INFORMATION
- Compilation and Publication Notice
- "EC" Declaration of Conformity
- Safety precautions
- Choosing a location
- Quick Reference Guide
- Table of Contents
- 1 Introduction
- 2 Getting started
- Initial Setup
- General Setup
- Setting the Mode Timer (MFC-3240C and MFC-3340CN only)
- Setting the Mode Timer (FAX-1835C, FAX-1840C and FAX-1940CN only)
- Setting the Paper Type
- Setting the Paper Size
- Setting the Ring Volume
- Setting the Beeper Volume
- Setting the Speaker Volume
- Turning on Automatic Daylight Savings Time
- Setting the LCD Contrast
- 3 Setup Send
- How to enter Fax mode
- How to dial
- How to Fax (B&W and Colour)
- Basic sending operations
- Advanced sending operations
- Broadcasting (Not available for colour faxes)
- Overseas Mode
- Delayed Fax (Not available for colour faxes)
- Delayed Batch Transmission (Not available for colour faxes)
- Setup for Polled Transmit (Standard) (Not available for colour faxes)
- Setup for Polled Transmit with Secure Code (Not available for colour faxes)
- TX Lock (FAX-1835C, FAX-1840C, MFC-3240C and MFC-3340CN only)
- Memory Security (FAX-1940CN only)
- 4 Setup Receive
- Basic receiving operations (FAX-1835C, FAX-1840C, MFC-3240C and MFC-3340CN only)
- Basic receiving operations (FAX-1940CN only)
- Choosing the Receive Mode
- Setting the Ring Delay
- Setting Toll Saver (TAD mode)
- Setting the F/T Ring Time (Fax/Tel mode only)
- Setting the Fax/Tel Announcement (FAX-1940CN only)
- Fax Detect (FAX-1835C, MFC-3240C and MFC-3340CN only)
- Fax Detect (FAX-1840C and FAX-1940CN only)
- Printing a reduced incoming fax (Auto Reduction)
- Receiving a fax at the end of a conversation
- Printing a fax from the memory
- Reception into memory (Not available for colour fax reception)
- Polling
- 5 Quick-Dial numbers and dialling options
- 6 Remote Fax Options (Not available for colour faxes)
- 7 TAD (Telephone Answering Device) (FAX-1940CN only)
- TAD mode
- Setting up the TAD
- Recording TAD Outgoing Message
- Activating TAD mode
- Message indicator
- Playing voice messages
- Printing a fax message
- Erasing incoming messages
- Setting Maximum Time for incoming messages
- Setting Toll Saver
- ICM Recording Monitor
- Recording a conversation
- Record Fax/Tel Outgoing Announcement (F/T OGM)
- TAD mode
- 8 Printing reports
- 9 Making copies
- 10 Walk-Up PhotoCapture Center™ (MFC-3340CN only)
- 11 Important information
- 12 Troubleshooting and routine maintenance
- Appendix A
- Appendix B
- Glossary
- Specifications
- Product description
- General
- Print media
- Copy
- PhotoCapture Center™ (MFC-3340CN only)
- Fax
- Scanner (MFC-3240C and MFC-3340CN only)
- Printer
- Interfaces
- Computer requirements
- Consumable items
- Network (LAN) (FAX-1940CN and MFC-3340CN only)
- Optional External Wireless Print/Scan Server (NC-2200w) (MFC-3240C and MFC-3340CN only)
- Index
- Remote Retrieval Access card (FAX-1940CN only)
- Remote Retrieval Access card (FAX-1835C, FAX-1840C, MFC-3240C and MFC-3340CN only)
- brother UK/IRE/SAF/PAN NORDIC

2 - 3 GETTING STARTED
Setting the Phone Line Type
If you are connecting the machine to a line that features a PABX
(PBX), ADSL or ISDN to send and receive faxes, it is also necessary
to change the Phone Line Type accordingly by completing the
following steps.
1
Press
Menu/Set
,
0
,
5
.
2
Press
▲
or
▼
to select
PBX
,
ADSL
,
ISDN
(or
Normal
).
Press
Menu/Set
.
3
Press
Stop/Exit
.
PABX and TRANSFER
The machine is initially set to be connected with PSTN (Public
Switched Telephone Network) lines. However, many offices use a
central telephone system or Private Automatic Branch Exchange
(PABX). Your machine can be connected to most types of PABX.
The machine’s recall feature supports timed break recall only (TBR).
TBR will work with most PABX systems allowing you to gain access
to an outside line, or transfer calls to another extension. The feature
works when the
R
key is pressed.
■
You can program a
R
keypress as part of a number stored
in a One-Touch or Speed-Dial location. When programming
the One-Touch or Speed-Dial number (Menu/Set 2-3-1 or
2-3-2) press
R
first (the screen displays "!"), then enter the
telephone number. If you do this, you do not need to press
R
each time before you dial using a One-Touch or
Speed-Dial location. (See Storing numbers for easy dialling
on page 5-1.)
■
For FAX-1840CN, press
R
key while holding down the
Shift
key.
5.Phone Line Set