
User Manual


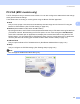
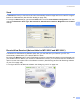
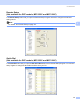

Table Of Contents
- SOFTWARE USER’S GUIDE
- Table of Contents
- Windows®
- 1 Printing
- 2 Scanning
- 3 ControlCenter3
- 4 Network Scanning (For models with built-in network support)
- 5 Remote Setup (Not available for DCP models, MFC-250C and MFC-290C)
- 6 Brother PC-FAX Software (MFC models only)
- 7 PhotoCapture Center™
- 8 Firewall settings (For Network users)
- Apple® Macintosh®
- 9 Printing and Faxing
- 10 Scanning
- 11 ControlCenter2
- 12 Network Scanning (For models with built-in network support)
- 13 Remote Setup & PhotoCapture Center™
- Index
- brother CHN-ENG

ControlCenter3
87
3
Send 3
The Send button lets you scan a document and automatically send the image as a fax from the PC using the
Brother PC-FAX software. (See PC-FAX sending on page 123.)
To change the Send settings, right-click the Send button and click ControlCenter Configuration. You can
change the Resolution, Scan Type, Document Size, Show Scanner Interface, Brightness and Contrast
settings.
Receive/View Received (Not available for MFC-250C and MFC-290C) 3
The Brother PC-FAX Receiving software option lets you view and store your faxes on your PC. It is
automatically installed when you install the MFL-Pro Suite.
By clicking the Receive button, the PC-FAX Receive function is activated and starts to receive fax data from
your Brother machine. Before you use the PC-FAX Receive function, you must select the PC-FAX Receive
option from the control panel menu of the Brother machine. (See Running the PC-FAX Receiving software
on your PC on page 139.)
To configure the PC-FAX Receive software, see Setting up your PC on page 139.