
User Manual

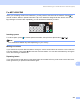


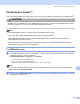
Table Of Contents
- SOFTWARE USER’S GUIDE
- Table of Contents
- Windows®
- 1 Printing
- 2 Scanning
- 3 ControlCenter3
- 4 Network Scanning (For models with built-in network support)
- 5 Remote Setup (Not available for DCP models, MFC-250C and MFC-290C)
- 6 Brother PC-FAX Software (MFC models only)
- 7 PhotoCapture Center™
- 8 Firewall settings (For Network users)
- Apple® Macintosh®
- 9 Printing and Faxing
- 10 Scanning
- 11 ControlCenter2
- 12 Network Scanning (For models with built-in network support)
- 13 Remote Setup & PhotoCapture Center™
- Index
- brother CHN-ENG

Remote Setup & PhotoCapture Center™
232
13
PhotoCapture Center™ 13
You can access a USB Flash memory drive or a memory card installed in the machine from a Macintosh
®
.
CAUTION
DO NOT start your Macintosh
®
with a USB Flash memory drive or a memory card installed in the media
drive of the machine. You could lose your data or damage the media.
Note
• The PhotoCapture Center™ will read only the media that was put in first.
• DCP-165C, DCP-185C and MFC-290C do not support CompactFlash
®
.
• DCP-145C and MFC-250C do not support CompactFlash
®
, Memory Stick
®
, Memory Stick Pro™,
SecureDigital or xD-Picture Card™.
• While the machine is printing from the PhotoCapture Center™, your Macintosh
®
cannot access the
PhotoCapture Center™ for any other operation.
For USB cable users 13
a Put a USB Flash memory drive, CompactFlash
®1
, Memory Stick
®
, Memory Stick Pro™, SecureDigital
2
or xD-Picture Card™
3
into your machine.
The Removable Disk icon appears on the Desktop.
1
This product also supports CompactFlash
®
type1.
2
This product supports SecureDigital High Capacity.
3
This product supports xD-Picture Card™ Type M / Type M
+
/ Type H (Large Capacity).
Note
If you create a name for the volume level of the USB Flash memory drive or memory card, the name
appears instead of “Removable Disk”.
b Double-click the Removable Disk icon. The files and folders on the USB Flash memory drive or memory
card appear on your screen.