
User Manual
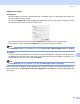

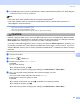
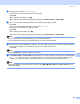
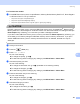
Table Of Contents
- SOFTWARE USER’S GUIDE
- Table of Contents
- Windows®
- 1 Printing
- 2 Scanning
- 3 ControlCenter3
- 4 Network Scanning (For models with built-in network support)
- 5 Remote Setup (Not available for DCP models, MFC-250C and MFC-290C)
- 6 Brother PC-FAX Software (MFC models only)
- 7 PhotoCapture Center™
- 8 Firewall settings (For Network users)
- Apple® Macintosh®
- 9 Printing and Faxing
- 10 Scanning
- 11 ControlCenter2
- 12 Network Scanning (For models with built-in network support)
- 13 Remote Setup & PhotoCapture Center™
- Index
- brother CHN-ENG

Scanning
182
10
Note
• If you choose colour in the quality setting, you cannot choose TIFF.
• If you choose monochrome in the quality setting, you cannot choose JPEG.
h The file name is set automatically. However, you can create a name of your choice using the character
keys on the control panel. You can only change the first 6 digits of the file name.
Press OK.
Note
Press to delete the letters you entered.
i Press Mono Start or Colour Start to start scanning. If you are using the scanner glass, the LCD displays
Next Page?. Press Yes or press No. After you finish scanning, make sure you choose No before
removing the USB Flash memory drive or memory card from the machine.
Note
Scan type depends on the settings you choose in step e to g, Mono Start or Colour Start does not
change the setting.
How to set a new default for Scan to Media 10
You can set your own default settings.
For 1 or 2 Line LCD models 10
Changing the default quality 10
a Press Menu.
b Press a or b to choose PhotoCapture.
Press OK.
c Press a or b to choose Scan to Media.
Press OK.
d Press a or b to choose Quality.
Press OK.
e Choose the quality you want.
Press OK.
f Press Stop/Exit.