
User Manual
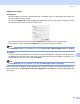

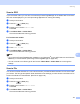
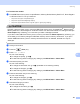
Table Of Contents
- SOFTWARE USER’S GUIDE
- Table of Contents
- Windows®
- 1 Printing
- 2 Scanning
- 3 ControlCenter3
- 4 Network Scanning (For models with built-in network support)
- 5 Remote Setup (Not available for DCP models, MFC-250C and MFC-290C)
- 6 Brother PC-FAX Software (MFC models only)
- 7 PhotoCapture Center™
- 8 Firewall settings (For Network users)
- Apple® Macintosh®
- 9 Printing and Faxing
- 10 Scanning
- 11 ControlCenter2
- 12 Network Scanning (For models with built-in network support)
- 13 Remote Setup & PhotoCapture Center™
- Index
- brother CHN-ENG

Scanning
173
10
Document Size 10
Choose one of the following sizes:
A3 297 × 420 mm
(Available on A3 scanning models only)
Ledger 11 × 17 in
(Available on A3 scanning models only)
JIS B4 257 × 364 mm
(Available on A3 scanning models only)
A4 210 × 297 mm
JIS B5 182 × 257 mm
Letter 8.5 × 11 in.
Legal 8.5 × 14 in.
(Available on ADF models and A3 scanning models only)
A5 148 × 210 mm
Executive 7.25 × 10.5 in.
Business Card
To scan business cards, choose the Business Card size, and then put the business card face down at
the top left of the scanner glass.
Photo 4 × 6in.
Index Card 5 × 8in.
Photo L 89 × 127 mm
Photo 2L 127 × 178 mm
Postcard 1 100 × 148 mm
Postcard 2 148 × 200 mm
Custom
After you choose a custom size, you can adjust the scanning area. Click and hold the mouse button as
you drag the mouse to crop the image.
Width: Enter the width of the custom size.
Height: Enter the height of the custom size.