
Copier User Manual
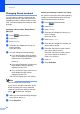

Table Of Contents
- Advanced User’s Guide MFC-8950DW/MFC-8950DWT
- User's Guides and where do I find them?
- Table of Contents
- 1 General Setup
- 2 Security features
- 3 Sending a fax
- Additional sending options
- Additional sending operations
- Sending a fax manually
- Sending a fax at the end of a conversation
- Dual access
- Broadcasting
- Real Time Transmission
- Overseas Mode
- Delayed Fax
- Delayed batch transmission
- Checking and canceling waiting jobs
- Setting your changes as the new default
- Restoring all fax settings to the factory settings
- Electronic cover page
- Destination Display
- Polling overview
- 4 Receiving a fax
- 5 Dialing and storing numbers
- 6 Printing reports
- 7 Making copies
- Copy settings
- Stop copying
- Improving copy quality
- Enlarging or reducing the image copied
- Duplex (2-sided) Copying
- Tray selection
- Adjusting Brightness and Contrast
- Sorting copies
- Making N in 1 copies (page layout)
- 2 in 1 ID Copy
- Setting your changes as the new default
- Restoring all copy settings to the factory settings
- Setting your favorites
- Copy settings
- A Routine maintenance
- B Options
- C Glossary
- Index

Chapter 5
48
Changing Group numbers 5
You can change a Group number that has
already been stored. If the Group has a fax
forwarding number, it will be dimmed on the
LCD. You cannot select the number to make
changes.
Changing a Group name, Resolution or
PDF type
a Press (Address Book).
b Press Edit.
c Press Change.
d Press a or b to display the Group you
want to change.
Press the Group.
e You can change the Group settings:
If you chose Name, enter the name
(up to 15 characters) by pressing the
buttons on the Touchscreen.
Press OK.
If you chose Resolution, press one of
the available resolution options
displayed on the LCD.
If you chose PDF type, press one of
the available file type options
displayed on the LCD.
The LCD will display your new setting.
Note
How to change the stored name:
If you want to change a character, press
d or c to position the cursor under the
character you want to change, and then
press . Re-enter the character.
f When you are finished making changes
to the Group, press OK.
g Press Stop/Exit.
Adding and deleting numbers in a Group
If a number in the Group has a fax forwarding
number, it will be dimmed on the LCD and
cannot be deleted from the Group.
a Press (Address Book).
b Press Edit.
c Press Change.
d Press a or b to display the Group you
want to change.
Press the Group.
e Press Add/Delete.
f Press a or b to display the number you
want to add or delete.
g Press the check box of each number
you want to add to check it.
Press the check box of each number
you want to delete to uncheck it.
Press OK to confirm.
h Press OK.
i Press Stop/Exit.