
Quick Start Manual


Table Of Contents
- YL4MFC_US.PDF
- Front Cover
- Inside Front Cover
- Brother Numbers
- Ordering Accessories and Supplies
- Quick Reference Guide
- How to Access the Complete Owner's Manual (For MFC-4800 Only)
- How to Access Brother Support (For MFC-4800 Only) (For Windows® Only)
- Download the Printer Driver from the Brother Web Site (For FAX-2900 and FAX-3800 Only)
- Table of Contents
- 1.Introduction
- 2.Assembly and Connections
- Packing List
- Choosing a Location
- Assembly
- Installing the Drum Unit Assembly (with Toner Cartridge)
- Setting Up the FAX/MFC
- Loading Paper
- Acceptable Paper
- Paper Capacity of Multi-purpose Sheet Feeder
- Connecting an External Telephone
- Connecting an External Telephone Answering Device (TAD)
- Special Line Considerations
- Multi-Line Connections (PBX)
- Custom Features on Your Phone Line
- 3.On-Screen Programming
- 4.Initial Setup
- Getting Started
- Setting the Paper Size
- Setting the Date and Time
- Setting the Station ID
- Setting the Ring Volume
- Setting the Beeper Volume
- Setting the Speaker Volume
- Setting the Handset Volume
- Choosing the Handset Volume (For Volume Amplify)
- Setting Volume Amplify
- Memory Storage
- Turning On Automatic Daylight Savings Time
- Toner Save
- Sleep Mode
- Setting Tone/Pulse Dialing Mode (For Canada Only)
- Getting Started
- 5.Setup Receive
- 6.Setup Send
- 7.Auto Dial Numbers and Dialing Options
- 8.Telephone Services
- 9.Remote Fax Options
- 10.Printing Reports
- 11.Making Copies
- 12.Important Information
- 13.Troubleshooting and Routine Maintenance
- Glossary
- Specifications
- Index
- Remote Retrieval Access Card
- Rear Cover
TROUBLESHOOTING AND ROUTINE MAINTENANCE
13 - 13
DIFFICULTY SUGGESTIONS
Print Quality Difficulties (
CONTINUED)
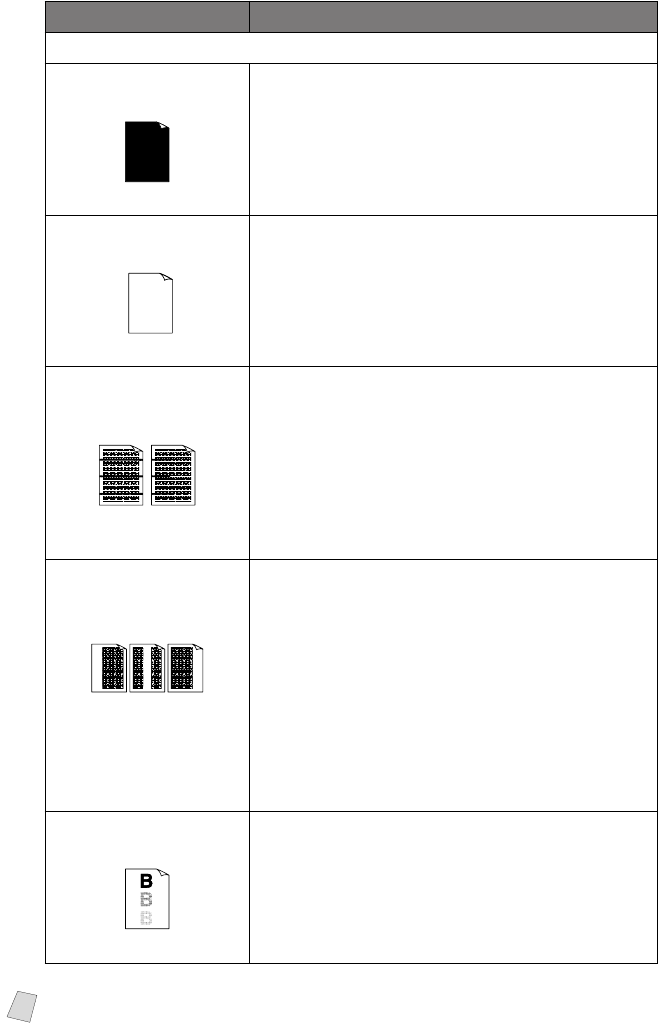
The whole page is
printed black.
Black Page
Wipe the electric terminals referring to page 13-17.
Also, do not use heat-sensitive paper as it will
cause this problem. After cleaning, if the printed
pages are still black and the LCD shows CHANGE
DRUM SOON, replace the drum unit with a new
one.
Nothing is printed on
the page.
White page
Make sure that the toner cartridge is not empty.
Wipe the electric terminals. (See
Routine
Maintenance,
page 13-16, Cleaning the Printer, page
13-17 and
Cleaning the Drum Unit, page 13-18.)
Make sure that a torn piece of paper does not
remain on the scanner window.
Printed pages are
marked at regular
intervals.
Example of Regular
Marks
Marks may disappear by themselves. Try copying
multiple pages to clear this problem. Marks may
occur if the FAX/MFC has not been used for a long
time. A possible cause is that the surface of the drum
is scratched. You must then replace the drum unit
with a new one. If the marks do not disappear, it may
be that the drum was marked or damaged by
excessive exposure to light. In this case, replace the
drum unit with a new one.
Printed pages are
blurred at the center or
at either edge.
Blurred Page
Certain environmental conditions such as humidity,
high temperatures, etc. may cause this condition to
occur. Make sure the
FAX/MFC
is placed on a flat,
horizontal surface. Remove the drum unit with the
toner cartridge installed. Try rocking them from side
to side. You may clear a blurred page by wiping the
scanner windows with a clean soft cloth. (See
Routine Maintenance, page 13-16, Cleaning the
Printer,
page 13-17 and Cleaning the Drum Unit,
page 13-18.) If a blurred page occurs after cleaning
and the LCD shows CHANGE DRUM SOON,
replace the drum unit with a new one.
Ghost images appear on
the printed page.
Ghost Images
Adjust the print conditions by setting the Print
Density function, page 5-4. Make sure you use
paper that meets the specifications. Rough surfaces
or thick media can cause a ghost image.
Note
The drum unit is a consumable item and it is necessary to replace it periodically.