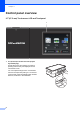
Basic User’s Guide DCP-J4120DW Version 0 UK
If you must contact Customer Service Please complete this information for future reference: Model Number: DCP-J4120DW Serial Number: 1 Date of Purchase: Place of Purchase: 1 The serial number is on the back of the unit. Retain this User's Guide with your sales receipt as a permanent record of your purchase, in the event of theft, fire or warranty service. Register your product online at http://www.brother.com/registration © 2014 Brother Industries, Ltd. All rights reserved.
You can use the following features! Mobile Connect Add Shortcuts Save your most frequently-used settings as Shortcuts. (See Online User’s Guide at solutions.brother.com/manuals.) Use Brother iPrint&Scan to print and scan images and files from mobile devices. (See Mobile Print/Scan Guide for Brother iPrint&Scan at solutions.brother.com/manuals.) Web Connect / Brother Apps Scan and upload images and files to popular web services directly from your machine.
User's Guides and where to find them Which Guide? What's in it? Where is it? Product Safety Guide Read this Guide first. Please read the Safety Instructions before you set up your machine. See this Guide for trademarks and legal limitations. Printed / In the box Quick Setup Guide Follow the instructions for setting up your machine, and installing the drivers and software for the operating system and connection type you are using.
The Online User’s Guide helps you get the most out of your machine.
If you have questions or problems, please take a look at your model’s FAQs. Provides several ways to search Displays related questions for additional information Receives regular updates based on customer feedback * The FAQ home page will vary depending on your model. Where can I find these FAQs? Brother Solutions Center http://support.brother.
Table of Contents 1 General information............ 1 7 How to use the documentation ....... 1 Symbols and conventions ............ 1 About Brother Utilities (Windows®) .................................... 1 Control panel overview ................... 2 2.7"(67.5 mm) Touchscreen LCD.............................................. 4 Entering Text ............................... 7 2 Loading paper ..................... 8 Before loading paper....................... 8 Loading paper in the paper tray ......
vi
1 General information How to use the documentation a 1 Thank you for buying a Brother product! Reading the documentation will help you make the most of your machine. Symbols and conventions Bold typeface identifies buttons on your computer screen. Italics Italicized typeface emphasizes an important point or refers you to a related topic. Courier New Text in the Courier New font identifies messages displayed on the machine’s Touchscreen LCD.
Chapter 1 Control panel overview 1 2.7"(67.5 mm) Touchscreen LCD and Touchpanel 1 1 1 2 2.7"(67.5 mm) Touchscreen LCD (Liquid Crystal Display) Access the menus and options you want by pressing them as they are displayed on the Touchscreen LCD. You can adjust the angle of the Touchscreen LCD and Touchpanel by lifting it. To lower this control panel, press the release button located behind it, as shown in the illustration.
General information 1 2 2 Touchpanel: Home Press to return to the Home screen. 3 Power On/Off Back Press to go back to the previous menu level. 3 Cancel Press to cancel an operation when lit. Press to turn the machine on. Press and hold down to turn the machine off. The Touchscreen LCD displays Shutting Down and stays on for a few seconds before turning off. If you turn the machine off using , it still periodically cleans the print head to maintain print quality.
Chapter 1 2.7"(67.5 mm) Touchscreen LCD Home Screen 2 1 1 1 There are three Home screens that you can access by pressing d or c. From the Home screens, you can access Wi-Fi setup, Shortcuts, Ink levels and Setup screens. Home Screen 1 1 1 3 2 5 4 This screen provides access to additional features, such as Web, Apps and A3 Copy Shortcuts operations. Home Screen 3 1 1 2 3 4 5 This screen displays the machine’s status when the machine is idle.
General information 2 Shortcuts Create Shortcuts for frequently-used operations, such as copying, scanning and using Web Connect. Three Shortcuts screens are available with space for up to four Shortcuts on each screen. For more information, see Online User’s Guide. 3 A3 Copy Shortcuts Use this preset shortcut to copy on A3 or Ledger size. (See Online User’s Guide.) Ink Save Copy Press to copy using the ink save mode. 6 Warning icon Ink 6 Displays the available ink volume.
Chapter 1 Settings screen When you press 1 Displays the date and time that has been set in the machine. (Settings), the Touchscreen LCD displays the machine’s status. Press to access the Date & Time menu. 5 Wi-Fi This screen provides access to all the machine’s settings. Press to set up a wireless network connection. 4 A four-level indicator 1 5 2 6 3 7 Press to access the Maintenance menu. Check and improve the print quality, clean the print head and check the available ink volume.
General information Entering Text 1 1 When you must enter text into the machine, a keyboard appears on the Touchscreen. Press to cycle between letters, numbers and special characters. NOTE • To change between lowercase or uppercase, press . • You can change the keyboard setting of the Touchscreen. (See Online User’s Guide.) Inserting spaces 1 To enter a space, press Space or you can press c to move the cursor. NOTE The characters that are available may differ depending on your country.
2 Loading paper Before loading paper 2 Load only one size of paper and one type of paper in the paper tray at a time. When loading a different paper size in the tray, you must also change the paper size setting in the machine. (See Set Paper Size and Type on page 13.) If the Check Paper setting is On, the machine displays a message asking if you want to change the paper type and paper size when you pull the paper tray out of the machine.
Loading paper When using A4, Letter or Executive size paper: a d 2 Fan the stack of paper well to avoid paper jams and misfeeds. Pull the paper tray completely out of the machine. 2 NOTE Always make sure the paper is not curled. b Open the output paper tray cover (1). e 1 c Load paper in the paper tray with the printing surface face down. Check that the paper is flat in the tray. Landscape orientation 2 Gently press and slide the paper guides (1) to fit the paper size.
Chapter 2 g Check that the paper is flat in the tray and below the maximum paper mark (1). Overfilling the paper tray may cause paper jams. j Pull out the paper support (1) until it locks into place, and then unfold the paper support flap (2). 1 2 1 k h Close the output paper tray cover. i Slowly push the paper tray completely into the machine. 10 Change the paper size setting in the machine’s menu, if needed. (See Set Paper Size and Type on page 13.
Loading paper Loading paper in the manual feed slot When using A3 or Ledger size paper: 2 a 2 Open the manual feed slot cover. Use the manual feed slot to load special print media, one sheet at a time. Paper size and loading orientation 2 2 The paper size determines the orientation when loading paper in the manual feed slot. Manual feed slot A4 Landscape orientation Letter Executive A3 Portrait orientation b Slide the manual feed slot paper guides to fit the paper width that you are using.
Chapter 2 c Load only one sheet of paper in the manual feed slot with the printing surface face up. Portrait orientation d 12 Using both hands, gently adjust the manual feed slot paper guides to fit the paper. e Using both hands, load one sheet of paper in the manual feed slot until the front edge touches the paper feed rollers. Let go of the paper when you hear the machine pull it in a short distance. The Touchscreen displays Manual Feed Slot ready.
Loading paper e NOTE • If the data will not fit on one sheet, the Touchscreen will prompt you to load another sheet of paper. Place another sheet of paper in the manual feed slot, and then press OK on the Touchscreen. Press . NOTE The machine ejects paper with the printed surface face up onto the paper tray at the front of the machine. When using glossy paper, remove each sheet at once to prevent smudging or paper jams.
Chapter 2 Check Paper setting 2 If the check paper setting is set to On, the machine displays a message asking if you want to change the paper type and paper size setting. This message will appear each time you pull the tray out of the machine. The default setting is On. a Press b c Press All Settings. DO NOT use the following kinds of paper: • Damaged, curled, wrinkled, or irregularly shaped paper 1 1 Press a or b to display General Setup. Press General Setup.
3 Loading documents How to load documents Using the scanner glass 3 How to load documents 3 a b 3 3 Lift the document cover. Place the document face down in the upper left corner of the scanner glass, aligned with the arrow. Use the scanner glass to copy, or scan single pages or pages of a book. Document Sizes Supported Length: Up to 297 mm Width: Up to 215.9 mm Weight: Up to 2 kg 1 3 1 c Document Cover Close the document cover.
4 Printing from a computer How to print a document The machine can receive and print data from your computer. Before you can print from a computer, you must install the printer driver. (See Online User’s Guide.) a Install the Brother printer driver from the CD-ROM or Brother Solutions Center. (See Quick Setup Guide.) b From your application, select the Print command.
5 Copying How to copy 5 5 a Place the document face down on the scanner glass. (See Using the scanner glass on page 15.) b Press Copy options overview 5 To change the copy options, press Copy, and then press Options. Press a or b to scroll through the copy settings. When the setting you want is displayed, press it and choose your option. When you have finished changing options, press OK. (Copy). For more information about changing the following copy options, see page 18.
Chapter 5 Paper Type 5 When copying on a special type of paper, set the machine for the type of paper you are using to get the best print quality. Paper Size 5 a Load your document. When copying on paper other than A4 size, you must change the Paper Size setting. You can only copy on A4, A5, A3, Photo (10 15 cm), Letter, Legal or Ledger paper. b Press a Load your document. c d e f g Enter the number of copies you want. b Press Press Options.
6 Scanning to a computer Before scanning c 6 To use the machine as a scanner, install a scanner driver. If the machine is on a network, configure it with a TCP/IP address. 6 If the ControlCenter4 Mode screen appears, click Advanced Mode, and then click OK. Install the scanner drivers from the CD-ROM. (See Quick Setup Guide.) Configure the machine with a TCP/IP address if network scanning does not work. (See Online User’s Guide.
Chapter 6 1 Select PDF (*.pdf) from the File Type drop-down list. h Choose the settings for Scan Type, Resolution, File Type, Scan Size and Remove Background Colour if required. i j Press OK. 2 Type a file name for the document. 3 Click Folder. You can save the file to the default folder, or select your preferred folder by clicking the (Browse) button. 4 Select a scanning resolution from the Resolution drop-down list. NOTE 5 Select the document size from the Document Size drop-down list.
7 Printing photos from a memory card or USB flash drive PhotoCapture Center operations (PHOTO mode) f View Photos 7 To print all the photos, press Print All. Press Yes to confirm. Go to step j. 7 g Press d or c to display the photo you want to print, and then press it. h Enter the number of copies: Press - or + on the Touchscreen. 7 Press the number of copies to display the dial pad on the Touchscreen, and then use it to enter the number of copies. Press OK.
Chapter 7 m n Press Start. Wait until the message on the Touchscreen disappears after printing, and then remove the memory card or USB flash drive from the media slot. PhotoCapture Center print settings overview You can temporarily change the print settings for the next print. The machine returns to its default settings after printing. NOTE You can save the print settings you use most often by setting them as the default. (See Online User’s Guide.
A Routine maintenance How to clean and check the machine Cleaning the scanner glass a b Unplug the machine from the electrical socket. Lift the document cover (1). Clean the scanner glass (2) and the white plastic (3) with a soft lint-free cloth moistened with a non-flammable glass cleaner. 1 3 2 A Checking the print quality A A A If faded or streaked colours and text appear on your printouts, some of the print head nozzles may be clogged.
g The Touchscreen displays a message asking about the print quality. Do one of the following: If all lines are clear and visible, press No to finish the Print Quality check, and then go to step k. If you can see missing short lines as shown in the illustration, press Yes. OK Poor IMPORTANT DO NOT touch the print head. Touching the print head may cause permanent damage and may void the print head's warranty. NOTE When a print head nozzle is clogged, the printed sample looks like this.
Routine maintenance Checking the print alignment A i For the “A” pattern, press a or b to display the number of the test print that has the least visible vertical stripes (1-9), and press it. Then press OK. In the example, number 6 is the best choice. j Do one of the following: If your printed text becomes blurred or images become faded, you may need to adjust the print alignment after transporting the machine. a Press . If you selected Basic alignment, repeat step i for patterns B to H.
B Troubleshooting B If you think there is a problem with your machine, check each of the items below first and follow the troubleshooting tips. You can correct most problems yourself. If you need additional help, the Brother Solutions Center offers the latest FAQs and troubleshooting tips. Visit http://support.brother.com. Identifying the problem First, check the following: The machine’s power cord is connected correctly and the machine is powered on. All of the protective parts have been removed.
Troubleshooting Error and maintenance messages B As with any sophisticated office product, errors may occur and supplies must be replaced. If this happens, your machine identifies the error or required routine maintenance and displays the appropriate message. The most common error and maintenance messages are shown in the following table. Error Message Cause Action B&W 1-sided Print Only One or more of the colour ink cartridges have reached the end of their life. Replace the ink cartridges.
Error Message Cause Action Cannot Detect You installed a new ink cartridge too quickly and the machine did not detect it. Take out the new ink cartridge and reinstall it slowly and firmly until the cartridge lever lifts. An ink cartridge is not installed correctly. (See Online User’s Guide.) A used ink cartridge was reinstalled. Remove the used ink cartridge and install a new one. If you are using non Brother Original ink, the machine may not detect the ink cartridge.
Troubleshooting Error Message Cause Action Image Too Long The proportions of your photo are irregular so effects could not be added. Choose a regularly proportioned image. Image Too Small The size of your photo is too small to trim. Choose a larger image. Ink Absorber Pad Full The ink absorber box or flushing box is full. These components are periodic maintenance items that may require replacement after a period of time to ensure optimum performance from your Brother machine.
Error Message Cause Action Ink Low One or more of the ink cartridges are near the end of their life. If one of the colour ink cartridges is near the end of its life. Order a new ink cartridge. You can continue printing until the Touchscreen displays Cannot Print. (See Online User’s Guide.) Low Temperature The room temperature is too low. After increasing the room temperature, allow the machine to warm up to room temperature. Try again when the machine has warmed up.
Troubleshooting Error Message Cause Action No Paper Fed The machine is out of paper, or paper is not correctly loaded in the paper tray. Do one of the following: Refill the paper tray, and then press OK on the Touchscreen. Remove and reload the paper, then press OK on the Touchscreen. (See Before loading paper on page 8.) The paper tray was not fully inserted. Remove the paper tray and reinstall it until it locks into place, and then press OK on the Touchscreen.
Error Message Cause Action Paper Tray not detected The paper tray is not completely inserted. Slowly push the paper tray completely into the machine. Jammed paper or a foreign object has prevented the paper tray from being inserted properly. Pull the paper tray out of the machine and remove the paper or foreign object. If you cannot find or remove the jammed paper, follow the steps. (See Printer jam or paper jam on page 34.) Slowly push the paper tray completely into the machine.
Troubleshooting Error Message Cause Action Wrong Paper The paper size setting does not match the size of paper in the tray. 1 The paper orientation is incorrect for the paper size. You did not set the paper guides in the tray to the indicators for the paper size you are using. Check that the paper size you choose on the Touchscreen matches the size of the paper in the tray. (See Set Paper Size and Type on page 13.
Error animations B d Lift the Jam Clear Flap, and remove the jammed paper. e Make sure you look carefully inside the machine above and below the Jam Clear Flap for scraps of paper. f Put the paper tray firmly back in the machine. Error animations display step-by-step instructions when paper gets jammed. You can read the steps at your own pace by pressing c to see the next step and d to see the previous step.
Troubleshooting g Using both hands, use the finger holds on each side of the machine to lift the scanner cover (1) into the open position. 1 IMPORTANT • If paper is jammed under the print head, unplug the machine from the power source, and then move the print head to reach the paper. • If the print head is in the right corner as shown in the illustration, you cannot move the print head. Reconnect the power cord. Hold down until the print head moves to the centre.
k Open the Jam Clear Cover (1) at the back of the machine. n Close the inside cover and Jam Clear Cover. Make sure the covers are closed completely. o Pull out the paper support (1) until it locks into place, and then unfold the paper support flap (2). 1 l Open the inside cover (1). 1 m Make sure you look carefully inside for jammed paper. If there is any jammed paper, slowly pull it out of the machine. 2 1 p Reconnect the power cord.
Troubleshooting c Open the inside cover (1). f Using both hands, use the finger holds on each side of the machine to lift the scanner cover (1) into the open position. 1 1 d Pull the jammed paper out of the machine. g Slowly pull the jammed paper (1) out of the machine. 1 e Close the inside cover and Jam Clear Cover. Make sure the covers are closed properly. B h Move the print head (if necessary) to reach any paper remaining in this area.
IMPORTANT • If paper is jammed under the print head, unplug the machine from the power source, and then move the print head to reach the paper. Additional paper jam clear operations a If you experience paper jams repeatedly (3 times or more), the Touchscreen displays a message asking if you want to remove paper scraps from the machine. Press Yes to return to the Home screen. b Press c d Press Maintenance. e f Press Remove Paper Scraps.
Troubleshooting Troubleshooting for Wireless LAN setup B Wireless LAN report B After you configure the wireless LAN settings of the machine, a wireless LAN report will be printed automatically. If the printed report shows that the connection failed, check the error code on the printed report and refer to the following instructions. Error code TS-01 Recommended Solutions The wireless setting is not activated, change the wireless setting to ON. Your wireless access point/router cannot be detected.
If you are having difficulty with your machine IMPORTANT Using non-Brother supplies may affect the print quality, hardware performance, and machine reliability. If you think there is a problem with your machine, check the following tables of troubleshooting tips. You can correct most problems by yourself. If you need additional help, the Brother Solutions Center offers the latest FAQs and troubleshooting tips. Visit http://support.brother.com. NOTE For technical help, contact Brother customer support.
Troubleshooting Print Quality Difficulties Difficulty Suggestions Poor print quality. Check the print quality. (See Checking the print quality on page 23.) Make sure that the Media Type setting in the printer driver or the Paper Type setting in the machine’s menu matches the type of paper you are using. (See Set Paper Size and Type on page 13.) (See Online User’s Guide.) Make sure that your ink cartridges are fresh.
Print Quality Difficulties (continued) Difficulty Suggestions The machine prints blank pages. Check the print quality. (See Checking the print quality on page 23.) Make sure you are using Brother Original Innobella ink. To prolong print head life, provide the best ink cartridge economy and maintain print quality, we do not recommend frequently unplugging the machine and/or leaving the machine unplugged for extended periods of time. We recommend using to power down the machine.
Troubleshooting Print Quality Difficulties (continued) Difficulty Suggestions The printouts are wrinkled. (Windows®) In the printer driver Advanced tab, click Colour Settings and clear Bi-Directional Printing. (Macintosh) In the printer driver, choose Print Settings, click Advanced, choose Other Print Options and clear Bi-Directional Printing. Make sure you are using Brother Original Innobella ink. Paper Handling Difficulties Difficulties Suggestions Photo paper does not feed correctly.
PhotoCapture Center Difficulties Difficulty Suggestions Removable Disk does not work correctly. 1 Take out the memory card or USB flash drive and put it back in again. 2 If you have tried “Eject” from within Windows®, take out the memory card or USB flash drive before you continue. 3 If an error message appears when you try to eject the memory card or USB flash drive, it means the card is being accessed. Wait a while, and then try again.
Troubleshooting Machine Information Checking the serial number B Press b c d e Press All Settings. f Press B The following reset operations are available: B 1 Machine Reset You can reset all the machine’s settings that you have changed, such as the date and time. You can see the machine’s serial number on the Touchscreen. a Reset operations overview 2 Network (Settings). Press a or b to display Machine Info. Press Machine Info.
C Index C P Cleaning scanner .................................................23 Control panel overview ..............................2 ControlCenter See Online User’s Guide. Copy paper size .............................................18 paper type .............................................18 using scanner glass ..............................15 Paper Check Paper setting ............................. 14 loading .................................................... 8 type .............................
Supplies Ink The machine uses individual Black, Yellow, Cyan and Magenta ink cartridges that are separate from the print head assembly. Service Life of Ink Cartridge The first time you install a set of ink cartridges the machine will use an amount of ink to fill the ink delivery tubes for high quality printouts. This process will only happen once. After this process is complete the cartridges provided with your machine will have a lower yield than regular capacity cartridges (65%).
Visit us on the World Wide Web http://www.brother.com This machine is approved for use in the country of purchase only. Local Brother companies or their dealers will support only machines purchased in their own countries. www.brotherearth.