
All in One Printer User Manual
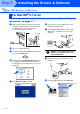
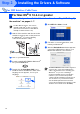
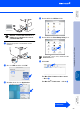
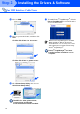
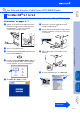
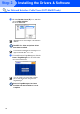
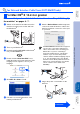
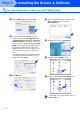
Table Of Contents
- Quick Setup Guide DCP-8060/DCP-8065DN
- Getting Started
- Table of Contents
- Step1 Setting Up the machine
- Step2 Installing the Drivers & Software
- Supplied CD-ROM “MFL-Pro Suite”
- For USB Interface Cable Users (For Windows® 98/98SE/Me/2000 Professional/XP/XP Professional x64 Edition)
- For Parallel Interface Cable Users (For Windows® 98/98SE/Me/2000 Professional/XP/XP Professional x64 Edition)
- For Windows NT® Workstation Version 4.0 Users
- For Network Interface Cable Users (DCP-8065DN only) (For Windows® 98/98SE/Me/NT/2000 Professional/XP/XP Professional x64 Edition)
- For USB Interface Cable Users
- For Network Interface Cable Users (DCP-8065DN only)
- For Network Users and Administrators (DCP-8065DN only)
- Options and Consumables
- brother ARL/ASA/NZ

19
■ After restarting the computer, the
Installation Diagnostics will run
automatically. If the installation is
unsuccessful, the installation results
window will be shown. If the Installation
Diagnostics shows a failure, please follow
the on-screen instruction or read on-line
help and FAQs in Start/All Programs
(Programs)/Brother/MFL-Pro Suite
DCP-XXXX (where XXXX is your model
name).
■ Once you are sure that you can print after
the installation, restart your Firewall
software.
■ Firewall settings on your PC may reject the
necessary network connection for Network
Scanning.
Follow the instructions below to configure
your Windows Firewall. If you are using a
personal Firewall software, see the User's
Guide for your software or contact the
software manufacturer.
■ Windows
®
XP SP2 users:
1 Click the Start button, Control Panel
and then Windows Firewall.
Make sure that Windows Firewall on the
General tab is set to On.
2 Click the Advanced tab and Settings...
button.
3 Click the Add button.
4 To add port 54925 for network scanning,
enter the information below:
1) In Description of service: - Enter any
description, for example “Brother
Scanner” (without the inverted
commas).
2) In Name or IP address (for example
192.168.0.12) of the computer
hosting this service on your
network: - Enter “Localhost” (without
the inverted commas).
3) In External Port Number for this
service: - Enter “54925” (without the
inverted commas).
4) In Internal Port number for this
service: - Enter “54925” (without the
inverted commas).
5) Make sure UDP is selected.
6) Click OK.
5 If you still have trouble with your network
connection, click the Add button.
6 To add port 137 for network scanning,
enter the information below:
1) In Description of service: - Enter any
description, for example “Brother Port”
(without the inverted commas).
2) In Name or IP address (for example
192.168.0.12) of the computer
hosting this service on your
network: - Enter “Localhost” (without
the inverted commas).
3) In External Port Number for this
service: - Enter “137” (without the
inverted commas).
4) In Internal Port number for this
service: - Enter “137” (without the
inverted commas).
5) Make sure UDP is selected.
6) Click OK.
7 Make sure that the new settings are
added and are checked, and then click
OK.
■ For network installations, the Repair
MFL-Pro Suite selection from the main
menu is not supported.
■ Network Scanning, Network Remote Setup,
Network PC-FAX Receiving are not
supported in Windows NT
®
4.0.
■ For configuration of advanced network
functions such as LDAP and Scan to FTP,
see the Software and Network Users
Guides located on the CD-ROM.
1
2
3
4
5
Setting Up
the machine
Installing the Drivers & Software
Windows
®
Network
Network
Administrators