
Owner's Manual


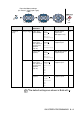
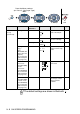


Table Of Contents
- Top Page
- Network User’s Guide
- USER'S GUIDE DCP-8040 DCP-8045D
- Brother numbers
- Ordering accessories and supplies
- Safety precautions
- Choosing a location
- Table of Contents
- 1 Introduction
- 2 Paper
- 3 On-screen programming
- 4 Getting started
- 5 Making copies
- 6 Using the DCP as a printer
- 7 Printer driver settings
- 8 How to scan using Windows®
- Scanning a document
- Scanning a document (For Windows® XP only)
- Using the scan key (For USB or Parallel interface cable users)
- Using ScanSoft® PaperPort® and OmniPage® OCR
- 9 Using the Brother Control Center (For Windows® 98/98SE/Me/2000 Professional and Windows NT® WS 4.0)
- 10 Using the Windows®-Based Brother SmartUI Control Center (For Windows® XP)
- 11 Using your DCP with a Macintosh®
- Setting up your USB-equipped Apple® Macintosh®
- Using the Brother printer driver with your Apple® Macintosh® (Mac OS® 8.6 - 9.2)
- Using the Brother Printer Driver with Your Apple® Macintosh® (Mac OS® X)
- Using the PS driver with your Apple® Macintosh®
- Using the Brother TWAIN scanner driver with your Macintosh®
- Using Presto!® PageManager®
- 12 Network Scanning (Windows® 98/98SE/Me/2000 Professional and XP only)
- 13 Important information
- 14 Troubleshooting and routine maintenance
- 15 Optional accessories
- Glossary
- Specifications
- Index
- brother USA
ON-SCREEN PROGRAMMING 3 - 2
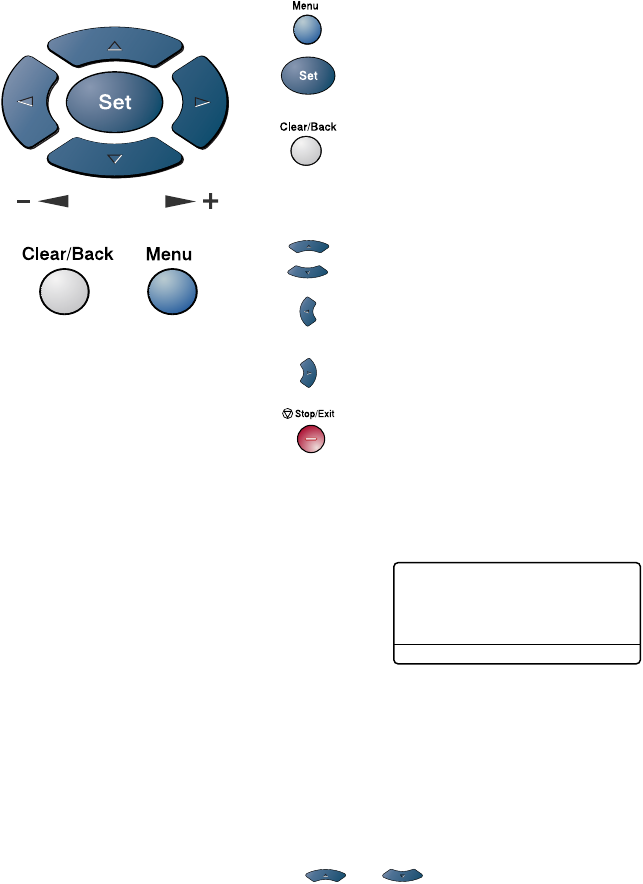
Navigation keys
You can access the menu mode by pressing
Menu
.
When you enter the menu, the LCD scrolls.
Press
1
for General Setup menu
—OR—
Press
2
for Copy menu
—OR—
Press
3
for Printer menu
—OR—
Press
4
for LAN menu
(Only for the optional LAN board (NC-9100h) is installed.)
—OR—
You can scroll more quickly through each menu level by pressing the
arrow for the direction you want: or .
Then set an option by pressing
Set
when that option appears on the
LCD.
*Access the menu
*Go to the next menu level
*Accept an option
*Exit the menu by pressing
repeatedly
*Go back to the previous
menu level
*Scroll through the current
menu level
*Go back to the previous
menu level
*Go forward to the next
menu level
*Exit the menu
1.General Setup
2.Copy
3.Printer
4.LAN
Select
▲▼
& Set