
Owner's Manual
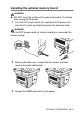
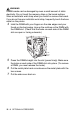
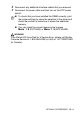

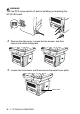
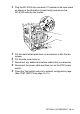
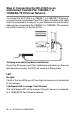
Table Of Contents
- Top Page
- Network User’s Guide
- USER'S GUIDE DCP-8040 DCP-8045D
- Brother numbers
- Ordering accessories and supplies
- Safety precautions
- Choosing a location
- Table of Contents
- 1 Introduction
- 2 Paper
- 3 On-screen programming
- 4 Getting started
- 5 Making copies
- 6 Using the DCP as a printer
- 7 Printer driver settings
- 8 How to scan using Windows®
- Scanning a document
- Scanning a document (For Windows® XP only)
- Using the scan key (For USB or Parallel interface cable users)
- Using ScanSoft® PaperPort® and OmniPage® OCR
- 9 Using the Brother Control Center (For Windows® 98/98SE/Me/2000 Professional and Windows NT® WS 4.0)
- 10 Using the Windows®-Based Brother SmartUI Control Center (For Windows® XP)
- 11 Using your DCP with a Macintosh®
- Setting up your USB-equipped Apple® Macintosh®
- Using the Brother printer driver with your Apple® Macintosh® (Mac OS® 8.6 - 9.2)
- Using the Brother Printer Driver with Your Apple® Macintosh® (Mac OS® X)
- Using the PS driver with your Apple® Macintosh®
- Using the Brother TWAIN scanner driver with your Macintosh®
- Using Presto!® PageManager®
- 12 Network Scanning (Windows® 98/98SE/Me/2000 Professional and XP only)
- 13 Important information
- 14 Troubleshooting and routine maintenance
- 15 Optional accessories
- Glossary
- Specifications
- Index
- brother USA
15 - 3 OPTIONAL ACCESSORIES
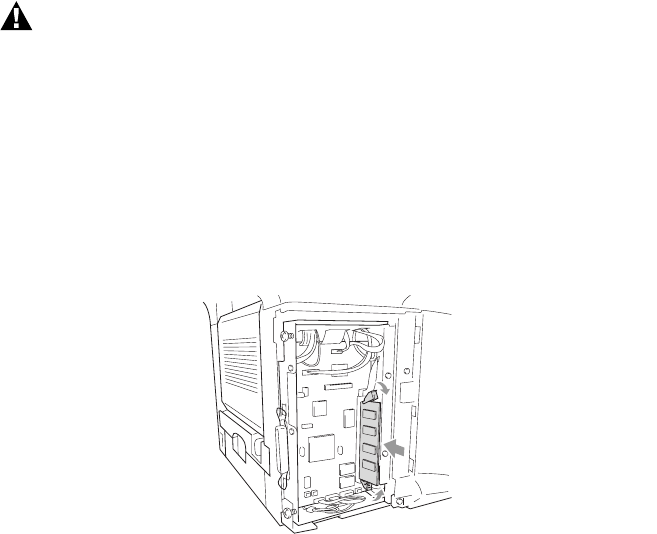
WARNI NG
DIMM boards can be damaged by even a small amount of static
electricity. Do not touch the memory chips or the board surface.
Wear an antistatic wrist strap when you install or remove the board.
If you do not have an antistatic wrist strap, frequently touch the bare
metal on the printer.
4
Hold the DIMM with your fingers on the side edges and your
thumb on the back edge. Line up the notches on the DIMM with
the DIMM slot. (Check that the locks on each side of the DIMM
slot are open or facing outwards.)
5
Press the DIMM straight into the slot (press firmly). Make sure
the locks on each side of the DIMM click into place. (To remove
a DIMM, you must release the locks.)
6
Put the metal plate back on and secure the metal plate with the
two screws.
7
Put the side cover back on.