
Owner's Manual
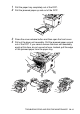
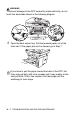
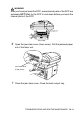
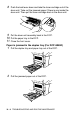

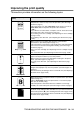
Table Of Contents
- Top Page
- Network User’s Guide
- USER'S GUIDE DCP-8040 DCP-8045D
- Brother numbers
- Ordering accessories and supplies
- Safety precautions
- Choosing a location
- Table of Contents
- 1 Introduction
- 2 Paper
- 3 On-screen programming
- 4 Getting started
- 5 Making copies
- 6 Using the DCP as a printer
- 7 Printer driver settings
- 8 How to scan using Windows®
- Scanning a document
- Scanning a document (For Windows® XP only)
- Using the scan key (For USB or Parallel interface cable users)
- Using ScanSoft® PaperPort® and OmniPage® OCR
- 9 Using the Brother Control Center (For Windows® 98/98SE/Me/2000 Professional and Windows NT® WS 4.0)
- 10 Using the Windows®-Based Brother SmartUI Control Center (For Windows® XP)
- 11 Using your DCP with a Macintosh®
- Setting up your USB-equipped Apple® Macintosh®
- Using the Brother printer driver with your Apple® Macintosh® (Mac OS® 8.6 - 9.2)
- Using the Brother Printer Driver with Your Apple® Macintosh® (Mac OS® X)
- Using the PS driver with your Apple® Macintosh®
- Using the Brother TWAIN scanner driver with your Macintosh®
- Using Presto!® PageManager®
- 12 Network Scanning (Windows® 98/98SE/Me/2000 Professional and XP only)
- 13 Important information
- 14 Troubleshooting and routine maintenance
- 15 Optional accessories
- Glossary
- Specifications
- Index
- brother USA
TROUBLESHOOTING AND ROUTINE MAINTENANCE 14 - 14
Improving the print quality
This section provides information on the following topics:
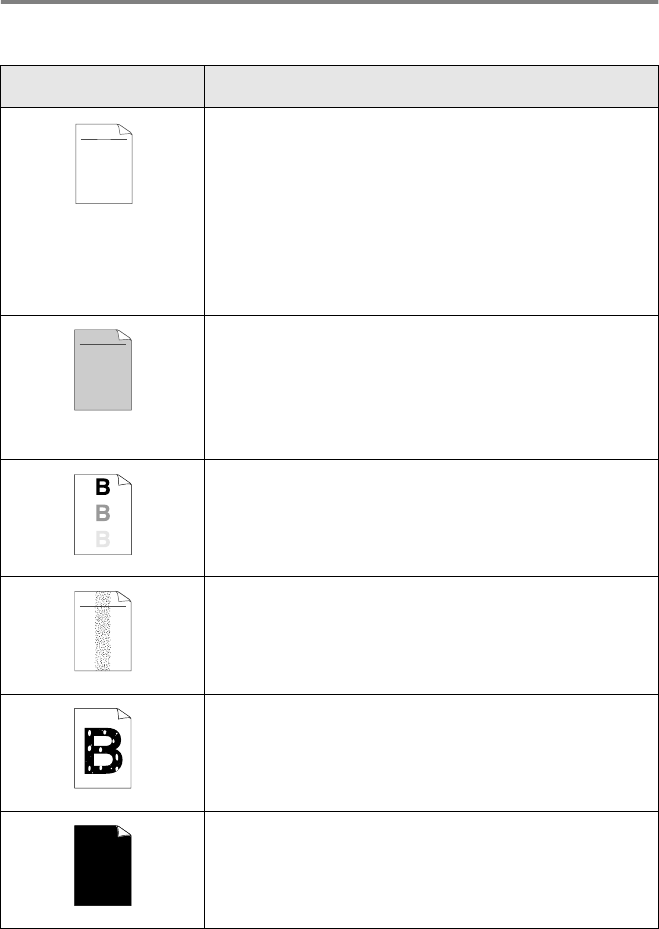
Examples of poor print
quality
Recommendation
Faint
Check the printer’s environment. Conditions such as humidity, high
temperatures, and so on may cause this print fault. (See Choosing a
location on page x.)
If the whole page is too light, Toner Save mode may be on. Turn off
Toner Save mode in the printer Properties tab of the driver.
—OR—
If your DCP is not connected to a computer, turn off Toner Save mode
in the DCP itself. (See
Toner Save
on page 4-4.)
Try installing a new toner cartridge. (See
Replacing the toner cartridge
on page 14-24.)
Try installing a new drum unit. (See
Replacing the drum unit
on page
14-30.)
Gray background
Make sure that you use paper that meets the recommended
specifications. (See About paper on page 2-1.)
Check the printer’s environment - high temperatures and high humidity
can increase the amount of background shading. (See Choosing a
location on page x.)
Use a new toner cartridge. (See Replacing the toner cartridge on page
14-24.)
Use a new drum unit. (See Replacing the drum unit on page 14-30.)
Ghost
Make sure you use paper that meets our specifications. Rough-surfaced
paper or thick print media may cause this problem.
Make sure that you choose the appropriate media type in the printer
driver. (See
About paper
on page 2-1.)
Try using a new drum unit. (See Replacing the drum unit on page
14-30.)
Toner specks
Make sure that you use paper that meets our specifications.
Rough-surfaced paper may cause the problem. (See About paper on
page 2-1.)
The drum unit may be damaged. Put in a new drum unit. (See Replacing
the drum unit
on page 14-30.)
Hollow print
Make sure that you use paper that meets our specifications. (See About
paper on page 2-1.)
Choose Thick paper mode in the printer driver, or use thinner paper
than you are currently using.
Check the printer’s environment because conditions such as high
humidity can cause hollow print. (See Choosing a location on page x.)
All black
You may clear the problem by cleaning the primary corona wire inside
the drum unit by sliding the blue tab. Make sure you return the blue tab
to the home position (
▲
). (See Cleaning the drum unit on page 14-23.)
The drum unit may be damaged. Put in a new drum unit. (See Replacing
the drum unit on page 14-30.)
ABCDEFGH
abcdefghijk
ABCD
abcde
01234
C
DE
F
d
ef
g
BC
b
c
d
2
3
ABCDEFGH
abcdefghijk
ABCD
abcde
01234
ABCDEFGH
abcdefghijk
ABCD
abcde
01234