
Owner's Manual
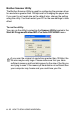

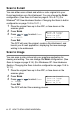
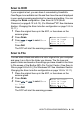
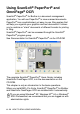
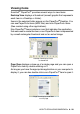
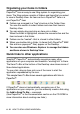

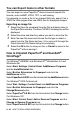
Table Of Contents
- Top Page
- Network User’s Guide
- USER'S GUIDE DCP-8040 DCP-8045D
- Brother numbers
- Ordering accessories and supplies
- Safety precautions
- Choosing a location
- Table of Contents
- 1 Introduction
- 2 Paper
- 3 On-screen programming
- 4 Getting started
- 5 Making copies
- 6 Using the DCP as a printer
- 7 Printer driver settings
- 8 How to scan using Windows®
- Scanning a document
- Scanning a document (For Windows® XP only)
- Using the scan key (For USB or Parallel interface cable users)
- Using ScanSoft® PaperPort® and OmniPage® OCR
- 9 Using the Brother Control Center (For Windows® 98/98SE/Me/2000 Professional and Windows NT® WS 4.0)
- 10 Using the Windows®-Based Brother SmartUI Control Center (For Windows® XP)
- 11 Using your DCP with a Macintosh®
- Setting up your USB-equipped Apple® Macintosh®
- Using the Brother printer driver with your Apple® Macintosh® (Mac OS® 8.6 - 9.2)
- Using the Brother Printer Driver with Your Apple® Macintosh® (Mac OS® X)
- Using the PS driver with your Apple® Macintosh®
- Using the Brother TWAIN scanner driver with your Macintosh®
- Using Presto!® PageManager®
- 12 Network Scanning (Windows® 98/98SE/Me/2000 Professional and XP only)
- 13 Important information
- 14 Troubleshooting and routine maintenance
- 15 Optional accessories
- Glossary
- Specifications
- Index
- brother USA
HOW TO SCAN USING WINDOWS
®
8 - 18
Scan to OCR
If your original is text, you can have it converted by ScanSoft
®
OmniPage
®
to an editable text file and then have the result displayed
in your word processing application for viewing and editing. You can
change the
Scan
configuration. (See
Scan to OCR (Word
Processor) on page 9-12 to 9-13.) (For Windows
®
XP: See Hardware
Section: Changing the Scan to button configuration on page 10-5 to
10-11.)
1
Place the original face up in the ADF, or face down on the
scanner glass.
2
Press
Scan
.
3
Press or to select
Scan
to OCR
.
Press
Set
.
The DCP will start the scanning process.
Scan to File
You can scan a black and white or a color original into your computer
and save it as a file in the folder you choose. The file type and
specific folder are based on the settings you have chosen in the Scan
to File screen of the Brother MFL-Pro Control Center. (See Scan to
File
on page 9-8 to 9-9.) (For Windows
®
XP: See
Hardware Section:
Changing the Scan to button configuration on page 10-5 to 10-11.)
1
Place the original face up in the ADF, or face down on the
scanner glass.
2
Press
Scan
.
3
Press or to select
Scan
to File
.
Press
Set
.
The DCP will start the scanning process.
▲
Scan to E-mail
Scan to Image
Scan to OCR
▼
Scan to File
Select
▲▼
& Set
▲
Scan to E-mail
Scan to Image
Scan to OCR
▼
Scan to File
Select
▲▼
& Set