Quick Setup Guide DCP-750CW Before you can use the machine, you must set up the hardware and install the software. Please read this Quick Setup Guide for the correct setup procedure and installation instructions. STEP 1 Setting Up the Machine STEP 2 Installing the Driver & Software Setup is Complete! Keep this Quick Setup Guide, the User’s Guide and the supplied CD-ROM in a convenient place for quick and easy reference at all times.
Symbols used in this guide Warning Warnings tell you what to do to prevent possible personal injury. Caution Improper Setup Improper Setup icons alert you to Cautions specify procedures you must devices and operations that are not follow or avoid to prevent possible damage to the machine or other objects. compatible with the machine.
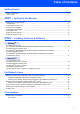
Table of Contents Getting Started Carton components ...................................................................................................................................... 2 Control panel................................................................................................................................................ 3 STEP1 – Setting Up the Machine Removing the protective parts .....................................................................................................
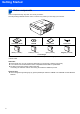
Getting Started 1 Carton components Carton components may vary from one country to another. Save all packing materials and the carton in case for any reason you must ship your machine. Quick Setup Guide CD-ROM User’s Guide Power Cord Black (LC1000BK) Yellow (LC1000Y) Cyan (LC1000C) Magenta (LC1000M) Ink Cartridges An interface cable is not a standard accessory. You need to purchase an appropriate USB 2.0 interface cable or network cable. USB cable Please make sure you use a USB 2.
Getting Started Control panel 1 Number of Copies key 6 Ink Management key 2 Menu keys 7 Scan key 3 Start keys 8 PhotoCapture key 4 Stop/Exit key 9 Warning LED 5 On/Off key 10 LCD (Liquid Crystal Display) For the details of the control panel, see Control panel overview in Chapter 1 of the User’s Guide.
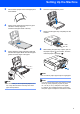
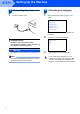
STEP1 Setting Up the Machine 1 1 1 2 Removing the protective parts 2 You can load up to 100 sheets of 80 g/m2 (20 lb) paper. For details, see Acceptable paper and other media in Chapter 2 of the User’s Guide. Remove the protective tape and film covering the scanner glass. Remove the foam bag containing the ink cartridges from on top of the paper tray. Loading paper 1 Improper Setup Pull the paper tray completely out of the machine and lift the output paper tray cover (1).
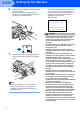
Setting Up the Machine 3 4 5 Fan the stack of paper well to avoid paper jams and misfeeds. Gently put the paper into the paper tray print side down and top edge first. Check that the paper is flat in the tray. Gently adjust the paper side guides with both hands to fit the paper. Make sure that the paper guides touch the edges of the paper. 6 7 8 Close the output paper tray cover. Slowly push the paper tray completely into the machine.
STEP1 3 1 Setting Up the Machine Connecting the power cord Connect the power cord. 4 1 Choosing your language After connecting the power cord, the LCD shows: Select Language English Français Deutsch Nederlands Italiano Press a or b to choose your language and press OK. 2 Improper Setup English Yes No DO NOT connect the interface cable. Connecting the interface cable is done during the software installation process. Warning The machine must be fitted with an earthed plug.
Setting Up the Machine 5 Installing the ink cartridges 4 Take out the ink cartridge. 5 Carefully remove the protective yellow cap (1). Warning If ink gets in your eyes, wash them out with water at once, and if irritation occurs consult a doctor. 1 Make sure that the power is turned on. The LCD shows: No Cartridge Black Yellow Cyan Magenta 2 Open the ink cartridge cover (1). 1 3 Pull all the lock release levers down and remove the yellow protective part (1).
STEP1 6 Setting Up the Machine Install each ink cartridge in the direction of the arrow on the label. Take care to match the colour of the lock release lever (1) with the cartridge colour (2), as shown in the diagram below. The machine will clean the ink tube system for use for the first time. This process will occur only once, the first time ink cartridges are installed. The cleaning process will last approximately four minutes.
Setting Up the Machine 6 Print quality check 4 The LCD shows: Is Quality OK? 1 After the cleaning cycle is finished, the LCD shows: Yes iPress No iPress Set Paper and Press 5 2 3 Make sure paper is loaded in the paper tray. Press Colour Start. The machine starts printing the Print Quality Check Sheet (only during initial ink cartridge installation). Check the quality of the four colour blocks on the sheet.
STEP1 7 Setting Up the Machine Setting the LCD Contrast You can adjust the LCD contrast for a sharper and more vivid display. If you are having difficulty reading the LCD, try changing the contrast setting. 1 2 3 4 5 6 Press Menu. 8 Setting the date and time Setting the date and time allows the machine to clean the print head regularly and maintain optimum print quality. It also allows the machine to name files created when using the Scan to Card feature. Press a or b to choose General Setup.
Setting Up the Machine 7 Press a repeatedly to enter the two digits for the hour in 24-hour format, and then press c to next. Date/Time Time: 15:XX (e.g. Enter 1 5 for 3:00 P.M.) 8 Press a repeatedly to enter the two digits for the minutes, and then press OK. Date/Time Time: 15:25 (e.g. Enter 1 5, 2 5 for 3:25 P.M.) Note You can increase or decrease the number rapidly by holding down a or b. 9 Press Stop/Exit. Note If you want to start again, press Stop/Exit to go back to step 1.
Supplied CD-ROM ‘MFL-Pro Suite’ 1 Supplied CD-ROM ‘MFL-Pro Suite’ Windows® Install MFL-Pro Suite You can install the MFL-Pro Suite software and multifunction drivers. Install Other Drivers or Utilities You can install additional MFL-Pro Suite software utilities, install without PaperPort® SE, or install the printer driver only. User’s Guide View the Software User’s Guide and Network User’s Guide in HTML format.
STEP 2 Installing the Driver & Software Follow the instructions on this page for your operating system and interface. For the latest drivers and documentations and to find the best solution for your problem or question, access the Brother Solutions Center directly from the driver or visit http://solutions.brother.com. Windows® For USB Interface Users (For Windows® 98/98SE/Me/2000 Professional/XP/XP Professional x64 Edition) ....
STEP2 Installing the Driver & Software Windows® 1 Windows® USB For USB Interface Users (For Windows® 98/98SE/Me/2000 Professional/XP/XP Professional x64 Edition) Important 4 The CD-ROM main menu will appear. Click Install MFL-Pro Suite. Make sure that you have finished the instructions from Step 1 Setting Up the Machine on page 4 through 11. Note • Please close any applications running before installing MFL-Pro Suite. • Make sure there are no memory cards in the media drive of the machine.
Installing the Driver & Software Choose Local Connection, and then click Next. The installation continues. 10 Using both hands, use the plastic tabs on both sides of the machine to lift the scanner cover until it locks securely into the open position. Windows® USB 5 Windows® 6 After reading and accepting the ScanSoft® PaperPort® SE License Agreement, click Yes. 11 Connect the USB cable to the USB socket marked with a symbol.
STEP2 Installing the Driver & Software 13 Lift the scanner cover to release the lock ( ). ). Windows® USB Gently push the scanner cover support down ( ) and close the scanner cover ( 14 Turn on the machine by connecting the power cord. Windows® 16 Click Finish to restart your computer. (After restarting the computer, for Windows® 2000 Professional/XP/XP Professional x64 Edition, you must be logged on with Administrator rights.
Installing the Driver & Software Windows® For Wired Network Interface Users (For Windows® 98/98SE/Me/2000 Professional/XP/XP Professional x64 Edition) Important 4 1 2 Windows® Wired Network Make sure that you have finished the instructions from Step 1 Setting Up the Machine on page 4 through 11. Carefully guide the network cable into the trench as shown below, following the trench around and toward the back of the machine. Then, connect the cable to your network.
STEP2 Installing the Driver & Software Windows® Wired Network Improper Setup If you have setup wireless networking on your machine before and you setup the wired network, you should check that the machine’s Network I/F is Wired LAN. The wireless network interface will be inactive with this setting. On your machine, press Menu. Press a or b to choose LAN and press OK. Press a or b to choose Network I/F and press OK. Press a or b to choose Wired LAN and press OK. 7 Turn on your computer.
Installing the Driver & Software Windows® 13 When the Brother MFL-Pro Suite Software 17 When the Brother and ScanSoft On-Line 14 The installation of the Brother drivers will 18 Click Finish to®restart your computer. automatically start. The installation screens appear one after another. Please wait, it will take a few seconds for all the screens to appear. Registration screen is displayed, make your selection and follow the on-screen instructions.
STEP2 Installing the Driver & Software Windows® Wired Network 2 Click the Advanced tab and Settings... button. Note • MFL-Pro Suite includes the Network Printer Driver, Network Scanner Driver, Brother ControlCenter3, ScanSoft® PaperPort® SE with OCR and True Type® fonts. PaperPort® SE is a document management application for scanning and viewing documents.
Installing the Driver & Software Windows® For Wireless Network Users (For Windows® 98/98SE/Me/2000 Professional/XP/XP Professional x64 Edition in infrastructure mode) Connect your wireless machine and wireless network together: install the printer driver in infrastructure mode To achieve optimum results with normal every day document printing, place the Brother machine as close to the network access point (router) as possible with minimal obstructions.
STEP2 Installing the Driver & Software Windows® Confirm your network environment The setup process will be different depending on your network environment. Windows® Wireless Network Installation using SecureEasySetup™. If your wireless access point (A) supports SecureEasySetup™, you do not need to use a computer to configure the machine. The access point (router) and your machine can automatically negotiate using the SecureEasySetup™ procedure. For instructions, go to page 23.
Installing the Driver & Software Windows® Using the SecureEasySetup™ software to configure your machine for a wireless network Important Improper Setup Make sure that you have finished the instructions from Step 1 Setting Up the Machine on page 4 through 11. 2 3 4 Note Routers or access points that support SecureEasySetup™ have the SecureEasySetup™ symbol as shown below. 5 1 Turn on the machine by connecting the power cord.
STEP2 Installing the Driver & Software Connected is displayed when the print server is successfully connected to your router or access point. You can now use your machine in a wireless network. Connection Error is displayed when the print server has not successfully connected to your router or access point. Try starting from step 2 again. If the same message is displayed again, reset the print server back to the default factory settings and try again.
Installing the Driver & Software Windows® Using the Setup Wizard from the control panel LAN menu for wireless network configuration 2 Important Turn on the machine by connecting the power cord. 1 Write down the wireless network settings of your access point or wireless router. Improper Setup If you have previously configured the wireless settings of the machine you must reset the network (LAN) settings before you can configure the wireless settings again. On your machine, press Menu.
STEP2 5 Installing the Driver & Software The machine will search for available SSIDs. If a list of SSIDs is displayed, use the a or b keys to choose the SSID you wrote down in step 1, then press OK. Go to step 9. Note It will take a few seconds to display a list of available SSIDs. 6 Windows® Wireless Network 7 If your access point is set to not broadcast the SSID you will have to manually add the SSID name. Go to step 6. Select using a or b and press OK. Go to step 7.
Installing the Driver & Software Wireless setup is now complete. A four level indicator on the bottom of your machine’s LCD will show the wireless signal strength of your access point or router. To install the MFL-Pro Software suite, continue to step 13. Windows® 16 Choose Wireless Network Connection, and then click Next. 13 Turn on your computer. ® (For Windows 2000 Professional/XP/ XP Professional x64 Edition, you must be logged on with Administrator rights.
STEP2 Installing the Driver & Software 21 The installation of the Brother drivers will automatically start. The installation screens appear one after another. Please wait, it will take a few seconds for all the screens to appear. Improper Setup • DO NOT try to cancel any of the screens during this installation. • If your wireless settings fail, an error message will appear during the installation of MFL-Pro Suite and the installation will be terminated.
Installing the Driver & Software Windows® 6 Add port 137 for network scanning, enter the information below: 1) (Any description) 2) Localhost 3) 137 4) 137 5) Select UDP Then, click OK. 7 Make sure if the new settings are added and are checked, and then click OK. The MFL-Pro Suite has been installed and the installation is now complete. • MFL-Pro Suite includes the Network Printer Driver, Network Scanner Driver, Brother ControlCenter3, ScanSoft ® PaperPort® SE with OCR and True Type® fonts.
STEP2 Installing the Driver & Software Macintosh® For USB Interface Users (For Mac OS® X 10.2.4 or greater) Important 3 Make sure that you have finished the instructions from Step 1 Setting Up the Machine on page 4 through 11. Carefully guide the USB cable into the trench as shown below, following the trench around and toward the back of the machine. Then, connect the cable to your computer. Note For Mac OS® X 10.2.0 to 10.2.3 users, upgrade to Mac OS® X 10.2.4 or greater.
Installing the Driver & Software 5 6 7 Turn on your Macintosh ®. Put the supplied CD-ROM into your CD-ROM drive. Macintosh® 11 For Mac OS® X 10.2.4 to 10.2.8 users: Click Add. Double-click the Start Here OSX icon to install. 12 Choose USB. 8 Choose Local Connection, and then click Next. Follow the on-screen instruction. 13 Choose DCP-XXXX (where XXXX is your Macintosh® USB model name), and then click Add. Note Please wait, it will take a few seconds for the software to install.
STEP2 Installing the Driver & Software 15 To install Presto!® PageManager®, click the Presto! PageManager icon and follow the on-screen instructions. Note When Presto!® PageManager® is installed OCR capability is added to the Brother ControlCenter2. You can easily scan, share and organize photos and documents using Presto!® PageManager®. Macintosh® USB Presto!® PageManager® has been installed and the installation is now complete.
Installing the Driver & Software Macintosh® For Wired Network Interface Users (For Mac OS® X 10.2.4 or greater) Important Improper Setup Make sure that you have finished the instructions from Step 1 Setting Up the Machine on page 4 through 11. Using both hands, use the plastic tabs on both sides of the machine to lift the scanner cover until it locks securely into the open position. Note If both USB and LAN cables are being used, guide both cables through the trench with one on top of the other.
STEP2 5 6 7 Macintosh® Wired Network 8 9 Installing the Driver & Software Turn on your Macintosh ®. • If this screen appears click OK. Put the supplied CD-ROM into your CD-ROM drive. Double-click the Start Here OSX icon to install. Choose Wired Network Connection, and then click Next. Follow the on-screen instructions. Please wait, it will take a few seconds for the software to install. After the installation, click Restart to finish installing the software.
Installing the Driver & Software 12 Choose DCP-XXXX (where XXXX is your model name), and then click Add. Go to step 14. 13 For Mac OS® X 10.4 users: Choose DCP-XXXX (where XXXX is your model name), and then click Add. Macintosh® 15 To install Presto!® PageManager®, click the Presto! PageManager icon and follow the on-screen instructions. Note When Presto!® PageManager ® is installed OCR capability is added to the Brother ControlCenter2.
STEP2 Installing the Driver & Software Macintosh® For Wireless Network Users (For Mac OS® X 10.2.4 or greater in infrastructure mode) Connect your wireless machine and wireless network together: install the printer driver in infrastructure mode First you must configure the wireless network settings of your machine to communicate with your network access point (router). After the machine is configured to communicate with your access point (router) computers on your network will have access to the machine.
Installing the Driver & Software Macintosh® Confirm your network environment The setup process will be different depending on your network environment. Installation using SecureEasySetup™. If your wireless access point (A) supports SecureEasySetup™, you do not need to use a computer to configure the machine. The access point (router) and your machine can automatically negotiate using the SecureEasySetup™ procedure. For instructions, go to page 38.
STEP2 Installing the Driver & Software Macintosh® Using the SecureEasySetup™ software to configure your machine for a wireless network Important 1 Make sure that you have finished the instructions from Step 1 Setting Up the Machine on page 4 through 11. 2 The SecureEasySetup™ software allows you to configure the wireless network easier than configuring it manually. By pushing a button on the wireless router or access point, you can complete setup and secure the wireless network.
Installing the Driver & Software Macintosh® Using the Setup Wizard from the control panel LAN menu for wireless network configuration Important Note Make sure that the machine is turned on by connecting the power cord. Make sure that you have finished the instructions from Step 1 Setting Up the Machine on page 4 through 11. Improper Setup Write down the wireless network settings of your access point or wireless router.
STEP2 6 7 8 Installing the Driver & Software Enter the SSID you wrote down in step 1 using a, b and OK keys to choose each letter or number. You can use the and keys to move the cursor left and right. For example, to enter the letter a, press the a key once. To enter the number 3, hold down the a key until it appears. The letters appear in this order: lower case, upper case, numbers and then special letters. (For more information, see Entering Text on page 46.
Installing the Driver & Software 14 Double-click the Start Here OSX icon to install. Macintosh® Note • If the machine is configured for your network, choose the machine from the list, and then click OK. This window will not appear if there is only one machine connected on the network, it will be chosen automatically.Go to step 18. 15 Choose Wireless Network Connection, and then click Next. • If this screen appears click OK. box, and then click Next. Follow the on-screen instructions.
STEP2 Installing the Driver & Software 19 For Mac OS® X 10.2.4 to 10.3.x users: Make the selection shown below. Macintosh® The MFL-Pro Suite, Brother printer driver, scanner driver and Brother ControlCenter2 have been installed and the installation is now complete. 23 To install Presto!® PageManager®, click the Presto! PageManager icon and follow the on-screen instructions. 20 Choose DCP-XXXX (where XXXX is your model name), and then click Add. Go to step 22. Note 21 For Mac OS® X 10.
For Network Users BRAdmin Professional configuration utility (For Windows® users) The BRAdmin Professional utility for Windows® is designed to manage your Brother network connected devices such as network-ready Multifunction devices and /or network-ready printers in a Local Area Network (LAN) environment. For more information on BRAdmin Professional, visit us at http://solutions.brother.com. Installing the BRAdmin Professional configuration utility 1 2 2 Put the supplied CD-ROM into your CD-ROM drive.
For Network Users BRAdmin Light configuration utility (For Mac OS® X users) The Brother BRAdmin Light software is a Java™ application that is designed for the Apple Mac OS® X environment. It supports some of the features of the Windows BRAdmin Professional software. For example, using the BRAdmin Light software, you can change some network settings on Brother’s network ready printers and multifunction devices. The BRAdmin Light software will be installed automatically when you install the MFL-Pro Suite.
For Network Users How to set the machine’s network settings to wireless LAN or wired LAN To connect your Brother machine to a wireless or wired network you must configure the machine from the machine’s control panel for the network type you are using. For wireless LAN On your machine, press Menu. Press a or b to choose LAN and press OK. Press a or b to choose Network I/F and press OK. Press a or b to choose WLAN and press OK. The wired network interface will become inactive with this setting.
For Network Users Entering Text Press a or b repeatedly to select a character from the list below: abcdefghijklmnopqrstuvwxyzABCDEFGHIJKLMNOPQRSTUVWXYZ0123456789 (space)!"#$%&'()l+,-./:;<=>?@[\]^_`{|}˜ Press or repeatedly to move the cursor. Note Making corrections If you entered an incorrect letter and want to change it, press or to position the cursor under the incorrect letter. Use the a and b keys to change to the correct letter, then press repeatedly to move the cursor back to the end of the text.
Consumables 1 Replacement consumables When the time comes to replace ink cartridges, an error message will be indicated on the LCD. For more information about the ink cartridges for your machine, visit http://solutions.brother.com or contact your local Brother re-seller.
Trademarks The Brother logo is a registered trademark of Brother Industries, Ltd. Brother is a registered trademark of Brother Industries, Ltd. Multi-Function Link is a registered trademark of Brother International Corporation. Windows and Microsoft are registered trademarks of Microsoft in the U.S. and other countries. Macintosh and True Type are registered trademarks of Apple Computer, Inc. PaperPort is a registered trademark of ScanSoft, Inc.
LP3688004 UK Printed in China