USER’S GUIDE DCP-7010 DCP-7025 Version C
If you need to call Customer Service Please complete the following information for future reference: Model Number: DCP-7010 and DCP-7025 (Circle your model number) Serial Number:* Date of Purchase: Place of Purchase: * The serial number can be displayed on the LCD screen (Menu, 3, 1 (for DCP-7010) and Menu 4, 1 (for DCP-7025)). Retain your sales receipt as a permanent record of your purchase, in the event of theft, fire or warranty service. Register your product on-line at http://www.brother.
Compilation and Publication Notice Under the supervision of Brother Industries Ltd., this manual has been compiled and published, covering the latest product descriptions and specifications. The contents of this manual and the specifications of this product are subject to change without notice.
ii
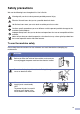
Safety precautions We use the following icons throughout this User’s Guide. Warnings tell you what to do to prevent possible personal injury. Electrical Hazard icons alert you to a possible electrical shock. Hot Surface icons warn you not to touch machine parts that are hot. Cautions specify procedures you must follow or avoid to prevent possible damage to the machine or other objects. Improper Setup icons alert you to devices and operations that are not compatible with the machine.
WARNING The fuser unit is marked with a caution label. Please do not remove or damage the label. To prevent injuries, be careful not to put your hands on the edge of the machine under the document cover or scanner cover. To prevent injuries, be careful not to put your fingers in the area shaded in the illustration. When you move the machine, grasp the side hand holds that are under the scanner. DO NOT carry the machine by holding it at the bottom. Do not use a vacuum cleaner to clean up scattered toner.
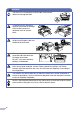
Table of Contents 1 Introduction Using this Guide ..................................................................................................1-1 Choosing a location .............................................................................................1-2 Control panel overview ........................................................................................1-3 Load document....................................................................................................
6 Troubleshooting and routine maintenance Troubleshooting ...................................................................................................6-1 Error messages .............................................................................................6-1 Document jams (DCP-7025 only) ..................................................................6-3 Paper jams ....................................................................................................
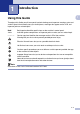
1 Introduction 1 Using this Guide Throughout this Guide you will see special symbols alerting you to important warnings, notes and actions. Special fonts identify keys you should press, messages that appear on the LCD, and important points or related topics. Bold Bold typeface identifies specific keys on the machine’s control panel. Italics Italicized typeface emphasizes an important point or refers you to a related topic. Courier Courier type face identifies the messages on the LCD of the machine.
Chapter 1 Choosing a location Place your machine on a flat, stable surface that is free of vibration and shocks, such as a desk. Put the machine near a standard, grounded electrical socket. Choose a location where the temperature remains between 10°C and 32.5°C. CAUTION ■ Avoid placing your machine in a high-traffic area. ■ Do not place your machine near heaters, air conditioners, water, chemicals, or refrigerators. ■ Do not expose your machine to direct sunlight, excessive heat, moisture, or dust.
Introduction Control panel overview 1 Stack 100% Copies:01 Auto 1 Copy keys (Temporary settings): Options You can quickly and easily select temporary settings for copying. Enlarge/Reduce Lets you enlarge or reduce copies depending on the ratio you select. Contrast Lets you select the copy quality for your type of document. Number of Copies Use this key to make multiple copies. 2 Menu Mode: 3 Scan Lets you access Scan mode. 4 Start Lets you start making copies or start scanning.
Chapter 1 Load document You can make copies and scan from the ADF (automatic document feeder) and from the scanner glass. 1 Fan the pages well. Make sure you put the documents face up, top edge first in the ADF until you feel them touch the feed roller. 2 Adjust the paper guides to fit the width of your documents. 3 Unfold the ADF document output support flap. Note ADF is not available for DCP-7010.
Introduction Using the scanner glass You can use the scanner glass to copy or scan pages of a book or one page at a time. Documents can be up to 215.9 mm wide and 297 mm long. 3 Close the document cover. 1 CAUTION If the document is a book or is thick, do not slam the cover or press on it. Note DCP-7025 only: To use the scanner glass, the ADF must be empty. 1 2 Lift the document cover. Using the document guidelines on the left, centre the document face down on the scanner glass.
Chapter 1 About paper Choosing acceptable paper Recommended Paper To get the best print quality, we suggest using the following paper. Paper Type Plain paper Item Xerox Premier 80 g/m2 Xerox Business 80 g/m2 M-real DATACOPY 80 g/m2 IGEPA X-Press 80 g/m2 Recycled paper Xerox Recycled Supreme Transparency 3M CG 3300 Labels Avery laser label L7163 ■ Use paper that is made for plain-paper copying. ■ Use paper that is 75 to 90 g/m2. ■ Use neutral paper. Do not use acidic or alkaline paper.
Introduction CAUTION 1 Do not use the following types of paper or envelopes, they may cause a paper jam and damage your machine.
Chapter 1 How to load paper 3 Fan the stack of paper well to avoid paper jams and mis-feeds. 4 Put paper in the paper tray. To load paper or other media in the paper tray 1 Pull the paper tray completely out of the machine. Maximum Paper Mark 2 While pressing the paper guide release lever, slide the adjusters to fit the paper size. Check that the guides are firmly in the slots.
Introduction To load paper or other media in the manual feed slot You can load envelopes and special print media one at a time into this slot. Use the manual feed slot to print or copy on labels, envelopes or thicker paper. 1 Slide the paper guides to fit the paper size. Note When you put paper in the manual feed slot, please remember the following: ■ The side to be printed on must be face up. ■ Put the leading edge (top of the paper) in first and push it gently into the slot.
2 Getting started Initial Setup Setting the Paper Size Setting the Paper Type To get the best print quality, set the machine for the type of paper you are using. 1 Press Menu and or 1.General Setup . to select You can use seven sizes of paper for printing copies: Letter, A4, A5, A6, B5, B6 and Executive. When you change the size of paper you load in the paper tray, you will need to change the setting for paper size at the same time so your machine can fit a reduced copy on the page.
Getting started Setting the Beeper Volume Toner Save You can change the beeper volume. The default setting is Med. When the beeper is on, the machine will beep when you press a key or make a mistake. You can conserve toner using this feature. When you set Toner Save to On, print appears lighter. The default setting is Off. 1 Press Menu and or 1.General Setup. to select Press Set. 2 Press 1 Press Set. Press or High or Off. Press Set. 4 Press or to select 4.Ecology. to select 3.Beeper.
Chapter 2 Sleep Time Setting the LCD Contrast Setting the Sleep Time reduces power consumption by turning off the fuser inside the machine while it is idle. You can choose how long the machine is idle (from 00 to 99 minutes) before it goes into sleep mode. The timer is automatically reset when the machine receives PC data or makes a copy. The factory setting is 05 minutes. While the machine is in sleep mode you will see Sleep on the LCD.
3 Making copies Using the machine as a copier You can use your machine as a copier, making up to 99 copies at a time. Making multiple copies 1 2 The printable area of your machine begins at approximately 2 mm from both sides and 3 mm from the top or bottom of the paper. Load your document. Press Number of Copies repeatedly until the number of copies you want appears (up to 99). —OR— Press Number of Copies, and then press or hold or to increase or decrease the number of copies.
Chapter 3 Using the Temporary Copy keys When you want to quickly change the copy settings temporarily for the next copy, use the Temporary Copy keys. You can use different combinations. Enlarging or reducing the image copied You can select the following enlargement or reduction ratios. Auto* sets the machine to calculate the reduction ratio that best fits the size of paper. Custom(25-400%) allows you to enter a ratio from 25% to 400%.
Making copies 3 Press or to select the enlargement or reduction ratio you want. Adjusting contrast Press Set. You can change the contrast to help an image look sharper and more vivid. —OR— You can select Custom(25-400%) and press Set. Press or to enter an enlargement or reduction ratio from 25% to 400%. Press Set. 1 2 Press Contrast. 3 Contrast ▼ 3 Note - Press + ▲ to increase the contrast. —OR— Enlargement or reduction ratio can also be increased or decreased by holding down or .
Chapter 3 Changing the temporary copy settings Use the Options key to quickly set the following copy settings temporarily for the next copy. Press Menu Selections Options Select & Set Page Select & Set Quality Auto Text Photo 3-5 Stack/Sort (DCP-7025 only) Stack Sort 3-5 Page Layout Off(1 in 1) 2 in 1 (P) 2 in 1 (L) 4 in 1 (P) 4 in 1 (L) Poster(3 x 3) 3-5 Note The factory settings are shown in Bold. After you choose your settings by pressing Set, the LCD shows Set temporarily.
Making copies Quality Making N in 1 copies (Page Layout) You can select the copy quality. The default setting is Auto. You can reduce the amount of copies by using the N in 1 copy feature. This allows you to copy two or four pages onto one page, allowing you to save paper. Auto Suitable for documents that contain both text and photographs. Text Suitable for documents containing only text. ■ Please make sure paper size is set to A4 or Letter. Photo Suitable for copying photographs.
Chapter 3 If you are using the scanner glass: 6 After the machine scans the page, the LCD shows: Next Page? ▲ Yes ▼ No Press 7 Place document face down on the scanner glass in the direction shown below. 2 in 1 (P) 2 in 1 (L) to scan the next page. Put the next document on the scanner glass. 4 in 1 (P) Set Next Page Then Press Set Press Set. Repeat Steps 6 and 7 for each page of the layout. 8 After all the pages of the document have been scanned, press to end.
Making copies Making a poster (Page Layout) You can create a poster. When you use the Poster feature your machine divides your document into sections, then enlarges the sections so you can assemble them into a poster. If you want to print a poster, use the scanner glass. Note Changing the default copy settings You can save the copy settings you use most often by setting them as default. These settings will remain until you change them again. ■ Please make sure paper size is set to A4 or Letter.
Chapter 3 Adjusting contrast You can change the contrast to help an image look sharper and more vivid. 1 Press Menu and 2.Copy. or to select Press Set. 2 Press or to select 2.Contrast. Press Set. Press to increase the contrast. —OR— Press 3-8 If the Out of Memory message appears when you are scanning the first page of your document, press Stop/Exit and wait until the other operations in process finish and then try again.
4 Software Features The User’s Guide on the CD-ROM includes the Software User’s Guide for features available when connected to a computer (for example, Printing and Scanning). The availability of the features listed below varies by model: ■ Using the machine as a Printer (See Chapter 1 in the Software User’s Guide on the CD-ROM.) ■ How to Scan (See Chapter 2 in the Software User’s Guide on the CD-ROM.) ■ Using ControlCenter2.0 (See Chapter 3 in the Software User’s Guide on the CD-ROM.
5 Important information IEC 60825-1 Specification Disconnect device This machine is a Class 1 laser product as defined in IEC 60825-1 specifications. The label shown below is attached in countries where required. This product must be installed near an electrical socket that is easily accessible. In case of emergency, you must disconnect the power cord from the electrical socket to shut off the power completely.
Important information Radio interference (220-240V Model Only) This product complies with EN55022(CISPR Publication 22)/Class B. Before this product is used, ensure that you use the following interface cables. 1 2 A shielded parallel interface cable with twisted-pair conductors and that is marked "IEEE 1284 compliant". The cable must not exceed 2.0 meters in length. A USB cable. The cable must not exceed 2.0 meters in length.
Chapter 5 A B C D Do not allow anything to rest on the power cord. Do not place this product where people can walk on the cord. Do not place anything in front of the machine that will block printing. Do not place anything in the path of printing. Wait until pages have exited the machine before picking them up. Unplug this product from the power socket and refer servicing to Authorized Service Personnel under the following conditions: • When the power cord is damaged or frayed.
6 Troubleshooting and routine maintenance Troubleshooting Error messages As with any sophisticated office product, errors may occur. If this happens, your machine identifies the problem and displays an error message. The most common error messages are shown below. You can correct most problems by yourself. If you need more help, the Brother Solutions Center offers latest FAQs and troubleshooting tips. Visit us at http://solutions.brother.com.
Chapter 6 ERROR MESSAGES ERROR MESSAGE CAUSE ACTION Machine too Hot The inside of the machine is too hot. Listen to the machine to check that the cooling fan is spinning. Make sure that the air vents are not covered up or blocked. If the fan is spinning and air vents are clear, you should let the machine cool down for several minutes before using it again. If the fan is not spinning, turn off the machine and then on again. No cartridge The toner cartridge is not installed properly.
Troubleshooting and routine maintenance Document jams (DCP-7025 only) If the document is jammed, follow the steps below. Document is jammed in the top of the ADF unit 1 Take out any paper from the ADF that is not jammed. 2 3 Open the ADF cover. Document is jammed inside the ADF unit 1 Take out any paper from the ADF that is not jammed. 2 3 Lift the document cover. Pull the jammed document out to the right. Pull the jammed document out to the left. 6 4 5 Close the document cover.
Chapter 6 Paper jams 4 Pull out the drum unit and toner cartridge assembly. The jammed paper may be pulled out with the toner cartridge and drum unit assembly, or this may release the paper so you can pull it up and out of the paper tray opening. 5 If you cannot remove the drum unit and toner cartridge assembly easily, do not use extra force. Instead, lift the scanner cover and use both hands to carefully pull the jammed paper up and out of the output tray opening.
Troubleshooting and routine maintenance CAUTION To prevent damage to the machine caused by static electricity, do not touch the electrodes shown in the following diagram. 6 7 8 Put the drum unit and toner cartridge assembly back in the machine. Close the front cover. Paper is jammed at back of the machine 1 Open the front cover. 2 Pull out the drum unit and toner cartridge assembly. 3 Open the back cover. 6 Put the paper tray in the machine.
Chapter 6 4 Pull the tab toward you to open the rear chute cover. 5 Pull the jammed paper out of the fuser unit. If the jammed paper cannot be pulled out easily, push down the blue tab with one hand as you gently pull the paper out with other hand. 6 Close the back cover. 6-6 7 Put the drum unit and toner cartridge assembly back into the machine. 8 Close the front cover.
Troubleshooting and routine maintenance Paper is jammed inside the drum unit and toner cartridge assembly 1 2 4 Put the toner cartridge back into the drum unit until you hear it lock into place. If you put it in properly, the lock lever will lift automatically. 5 Put the drum unit and toner cartridge assembly back in the machine. Open the front cover. Pull out the drum unit and toner cartridge assembly. 6 6 3 Close the front cover.
Chapter 6 If you are having difficulty with your machine If you think there is a problem with your machine, check the chart below and follow the troubleshooting tips. The Brother Solutions Center offers the latest FAQs and troubleshooting tips. Visit us at http://solutions.brother.com. DIFFICULTY SUGGESTIONS Printing Difficulties Poor print quality See Improving the print quality on page 6-11. Vertical black lines. Sometimes you may see vertical streaks/black lines on the printed pages.
Troubleshooting and routine maintenance DIFFICULTY SUGGESTIONS Scanning Difficulties TWAIN errors appear while scanning. Make sure the Brother TWAIN driver is selected as the primary source. In PaperPort®, click Scan in the File menu and select the Brother TWAIN driver. Software Difficulties Cannot install software or print. Run the Repair MFL-Pro Suite program on the CD-ROM. This program will repair and reinstall the software. Cannot perform ‘2 in 1 or 4 in 1’ printing.
Chapter 6 DIFFICULTY SUGGESTIONS Paper Handling Difficulties The machine does not load paper. The LCD shows No Paper Fed or Paper Jam. If there is no paper, load a new stack of paper into the paper tray. If there is paper in the paper tray, make sure it is straight. If the paper is curled, you should straighten it. Sometimes it is helpful to remove the paper, turn the stack over and put it back into the paper tray. Reduce the amount of paper in the paper tray, and then try again.
Troubleshooting and routine maintenance Improving the print quality This section provides information on the following topics: Examples of poor print quality ABCDEFGH CDEF abcdefghijk defg ABCD abcde 01234 Faint Recommendation Check the machine’s environment. Conditions such as humidity, high temperatures, and so on may cause this print fault. (See Choosing a location on page 1-2.) If the whole page is too light, Toner Save mode may be on.
Chapter 6 Examples of poor print quality Recommendation Clean the primary corona wire on the drum unit. (See Cleaning the corona wire on page 6-19.) If the print quality has not improved, install a new drum unit. (See Replacing the drum unit (DR-2000) on page 6-23.) All black Cleaning the drum unit 78.5 mm 78.5 mm White Spots on black text and graphics at 78.5 mm intervals 78.5 mm 78.
Troubleshooting and routine maintenance Examples of poor print quality ABCDEFGH abcdefghijk ABCD abcde 01234 Black toner marks across the page Recommendation Make sure that you use paper that meets our specifications. (See About paper on page 1-6.) If you use label sheets for laser printers, the glue from the sheets may sometimes stick to the OPC drum surface. Clean the drum unit. (See Cleaning the drum unit on page 6-12.
Chapter 6 Examples of poor print quality Recommendation Check the paper type and quality. High temperatures and high humidity will cause paper to curl. Curl or wave If you don’t use the machine very often, the paper may have been in the paper tray too long. Turn over the stack of paper in the paper tray. Also, fan the paper stack and then rotate the paper 180° in the paper tray. Make sure that paper is loaded properly. B DEFGH abc efghijk Check the paper type and quality.
Troubleshooting and routine maintenance How to change the LCD language You can change the LCD language. 1 Press Menu and or 1.General Setup. to select Press Set. 2 Press or to select 0.Local Language. Press Set. 3 Press or language. Press Set. 4 Press Stop/Exit. to select your Packing and shipping the machine When you transport the machine, use the packing materials that came with your machine. If you do not pack the machine properly, you could void your warranty.
Chapter 6 9 Pack the drum unit and toner cartridge assembly, AC power cord and printed materials in the original carton as shown below: Routine maintenance CAUTION The drum unit contains toner, so handle it carefully. If toner scatters and your hands or clothes get dirty, immediately wipe or wash it off with cold water. Cleaning the outside of the machine CAUTION 0 Close the carton and tape it shut. ■ Use neutral detergents.
Troubleshooting and routine maintenance 2 Wipe the outside of the machine with a soft cloth to remove dust. Cleaning the scanner glass Turn off the machine’s power switch and lift the document cover. Clean the scanner glass and the white plastic surface underneath the document cover with isopropyl alcohol and soft lint-free cloth. Document Cover 3 Remove anything that is stuck inside the paper tray. 4 Wipe the inside and the outside of the paper tray with a soft cloth to remove dust.
Chapter 6 Cleaning the laser scanner window CAUTION CAUTION To prevent damage to the machine from static electricity, do not touch the electrodes shown below. ■ Do not use isopropyl alcohol to clean the laser scanner window. ■ Do not touch the laser scanner window with your fingers. 1 2 Before you clean the inside of the machine, turn off the machine’s power switch. Open the front cover and pull out the drum unit and toner cartridge assembly.
Troubleshooting and routine maintenance 4 Put the drum unit and toner cartridge assembly back into the machine. Cleaning the corona wire We recommend placing the drum unit and toner cartridge assembly on a cloth or large disposable paper to avoid spilling and scattering toner. 1 5 6 Open the front cover and pull out the drum unit and toner cartridge assembly. Close the front cover. Turn on the machine’s power switch.
Chapter 6 Replacing the toner cartridge (TN-2000) The toner cartridge can print up to 2,500 pages. When the toner cartridge is running low, the LCD shows Toner Low. Actual page count will vary depending on your average type of document (i.e., standard letter, detailed graphics). How to replace the toner cartridge WARNING Just after you use the machine, some internal parts of the machine will be extremely HOT! Never touch the shaded parts shown in the illustration.
Troubleshooting and routine maintenance 2 Hold down the lock lever on the left and pull the toner cartridge out of the drum unit. CAUTION ■ Place the drum unit on a drop cloth or large piece of disposable paper to avoid spilling and scattering the toner. ■ Handle the toner cartridge carefully. If toner scatters on your hands or clothes, immediately wipe it off or wash it with cold water. 3 Unpack the new toner cartridge.
Chapter 6 5 Remove the protective cover. 6 Insert the new toner cartridge in the drum unit until it clicks into place. If you put it in properly, the lock lever will lift automatically. 7 Clean the primary corona wire inside the drum unit by gently sliding the blue tab from right to left several times. Return the blue tab to the Home position (▼) before reinstalling the drum unit and toner cartridge assembly. 8 Install the drum unit and toner cartridge assembly into the machine.
Troubleshooting and routine maintenance Replacing the drum unit (DR-2000) The machine uses a drum unit to create print images on paper. If the LCD shows Change Drum Soon, the drum unit is near the end of its life and it is time to buy a new one. Even if the LCD shows Change Drum Soon, you may be able to continue printing without having to replace the drum unit for a while.
Chapter 6 2 Hold down the lock lever on the left and pull the toner cartridge out of the drum unit. 4 Install the drum unit and toner cartridge assembly in the machine. 5 Press Options. Replace Drum? ▲ Yes ▼ No To confirm you are installing a new drum, press . Note ■ Discard the used drum unit according to local regulations, keeping it separate from domestic waste. You can also check our ecology website www.brothergreen.co.uk for recycling information.
Troubleshooting and routine maintenance Machine Information 3 Press Set. Checking the Serial Number Page Counter Total: XXXXX You can view the machine’s serial number on the LCD. 1 Press Menu and or 3.Machine Info. or 4.Machine Info. Page Counter List: XXXXX to select Page Counter Print: XXXXX Press Set. 2 Page Counter Copy: XXXXX Press or to select 1.Serial No. 4 Machine Info. 1.Serial No. Press Stop/Exit.
A Appendix On-screen programming Menu Mode Your machine is designed to be easy to use with LCD on-screen programming. User-friendly programming helps you take full advantage of all the menu selections your machine has to offer. Since your programming is done on the LCD, we have created step-by-step on-screen instructions to help you program your machine. All you need to do is follow the instructions as they guide you through the menu selections and programming options.
Appendix You can scroll more quickly through each menu level by pressing the arrow for the direction you want: or . Select an option by pressing Set when that option appears on the LCD. The LCD will then show the next menu level. Press or selection. to scroll to your next menu Press Set. When you finish setting an option, the LCD shows Accepted.
Select Set to accept Select to exit Main Menu Submenu Menu Selections Options Descriptions Page 1. General Setup 1. Paper Type — Thin Plain Thick Thicker Transparency Recycled Paper Sets the type of paper in the paper tray. 2-1 2. Paper Size — A4 Letter Executive A5 A6 B5 B6 Sets the size of the paper in 2-1 the paper tray. 3. Beeper — High Med Low Off Adjusts the volume level of the beeper. 2-2 4. Ecology 1. Toner Save On Off Increases the life of the toner cartridge. 2-2 2.
Appendix Main Menu Submenu Menu Selections Options Descriptions Page 3. Printer 1. Emulation — Auto HP LaserJet BR-Script 3 Selects the emulation mode. 2. Print Options 1. Internal Font — Prints a list of the machine’s internal fonts or current printer settings. See Software User’s Guide on the CD-ROM (DCP-7025 only) 2. Configuration — 3. Reset Printer — — Returns the PCL settings to the original factory default settings. 3. Machine Info. 1. Serial No.
S Specifications Product description General Memory Capacity 16 MB (DCP-7010) 32 MB (DCP-7025) Automatic Document Feeder (ADF) (DCP-7025 only) Up to 35 pages Paper Tray 250 Sheets (80 g/m2) Printer Type Laser Print Method Electrophotography by semiconductor laser beam scanning LCD (Liquid Crystal Display) 16 characters × 2 lines Power Source 220 - 240 V 50/60 Hz Power Consumption Copying: Average 460 W Sleep: Average 10 W Standby: Average 75 W Dimensions DCP-7010 DCP-7025 294 mm 253 mm
Specifications Temperature Operating: Storage: 10 - 32.
Copy Color/Monochrome Monochrome Document Size ADF Width: 147.3 mm to 215.9 mm (For DCP-7025 only) ADF Height: 147.3 mm to 356 mm (For DCP-7025 only) Scanner Glass Width: Max. 215.9 mm Scanner Glass Height: Max.
Specifications Printer Emulation Brother Printing System for Windows® PCL6 and BR-Script (PostScript®) Level 3 (DCP-7025 only) Printer Driver Support for Windows® 98/98SE/Me/2000 Professional/XP/ Windows NT® Workstation Version 4.0 Support for Mac OS® 9.1 - 9.2/Mac OS® X 10.2.4 or greater Resolution HQ1200 (Max. 2400 x 600 dots per inch (dpi)) Print Quality Normal printing mode Economy printing mode (save toner usage) Print Speed up to 20 pages/minute (A4 size) * Based on Brother standard pattern.
Computer requirements Minimum System Requirements Computer Platform & Operating System Version Processor Minimum Speed Minimum RAM Recommended RAM Available Hard Disk Space for Drivers for Applications Windows® Operating System Pentium® II or equivalent 32 MB 64 MB 90 MB 130 MB 64 MB 128 MB 128 MB 256 MB 150 MB 220 MB 64 MB 80 MB 200 MB 98, 98SE Me NT® Workstation 4.0 2000 Professional XP 1 Apple ® Macintosh® Operating System Mac OS® 9.1 - 9.
Specifications Consumable items Toner Cartridge Life (TN-2000) Standard Toner Cartridge: Up to 2,500 pages* *(when printing letter or A4 size paper at 5% print coverage) Note Toner life expectancy will vary depending upon the type of average print job. Drum Unit Life Expectancy (DR-2000) Up to 12,000 pages Note There are many factors that determine the drum life, such as temperature, humidity, type of paper, toner you use and number of pages per print job.
Optional External Print Server (NC-2100p) NC-2100p External Print Server (Optional) Connecting the optional External Print Server (NC-2100p) to the Parallel port of your machine will allow you to print over a wired Ethernet network. Support for Windows® 98/98SE/Me/2000/XP/ Windows NT® Workstation Version 4.0 Mac OS® X 10.2.
I Index A J ADF (automatic document feeder) .......... 1-4 ADF cover ............................................... 6-3 Jams document ..............................................6-3 paper ....................................................6-3 C Cleaning corona wire ........................................ 6-19 drum unit ............................................ 6-12 laser scanner window ........................ 6-18 scanner glass ..................................... 6-17 Consumable items .....
T Temporary copy settings ......................... 3-2 Toner cartridge replacing ............................................. 6-20 Toner Save .............................................. 2-2 Troubleshooting ...................................... 6-1 document jam ....................................... 6-3 error messages on LCD ....................... 6-1 if you are having difficulty with copy quality ....................................... 6-8 paper handling ................................
UK/IRE/SAF