LinkMAX HSA300 User Manual LinkMAX HSA300 User Manual BroadMax Technology Limited BMTBEHSA304 Edition V1.
LinkMAX HSA300 User Manual Table of Contents 1 Introduction................................................................................................................................ 7 Features ............................................................................................................................................. 7 System Requirements ...................................................................................................................... 7 Using this Document .
LinkMAX HSA300 User Manual The Home Tab and System View Table ........................................................................................ 30 Changing the System Date and Time ........................................................................................... 32 Changing the System Date and Time ........................................................................................... 32 Changing Your Login Password ....................................................................
LinkMAX HSA300 User Manual The basic rule: Performing 1:1 translations................................................................................... 64 The filter rule: Configuring a basic rule with additional criteria ...................................................... 65 The bimap rule: Performing two-way translations ......................................................................... 67 The pass rule: Allowing specific addresses to pass through untranslated..............................
LinkMAX HSA300 User Manual 14 Configuring EOA Interfaces............................................................................................ 92 Overview of EOA ............................................................................................................................. 92 Viewing Your EOA Setup ............................................................................................................... 93 Adding EOA Interfaces..................................................
LinkMAX HSA300 User Manual Displaying the Alarm Monitor in a Separate Window................................................................ 123 A IP Addresses, Network Masks, and Subnets.................................................................. 124 IP Addresses.................................................................................................................................. 124 Structure of an IP address...........................................................................
LinkMAX HSA300 User Manual 1 Introduction Congratulations on becoming the owner of HSA300 ADSL Ethernet bridge/router. Your LAN (local area network) will now be able to access the Internet using your high-speed ADSL connection. This User Guide will show you how to install and set up HSA300 ADSL Bridge/Router, and how to customize its configuration to get the most out of your new product.
LinkMAX HSA300 User Manual Using this Document Notational conventions ! Acronyms are defined the first time they appear in text and in the glossary (Appendix D). ! For brevity, HSA300 is referred to as “the router.” ! The terms LAN and network are used interchangeably to refer to a group of Ethernet-connected computers at one site. Typographical conventions ! Italics are used to identify terms that are defined in the glossary (Appendix D).
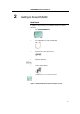
LinkMAX HSA300 User Manual 2 Getting to Know HSA300 Parts Check In addition to this document, your HSA300 should arrive with the following: • The LinkMAX HSA300 • 6 ft straight Ethernet cable (RJ45/RJ45) • 6 ft Phone line cable (RJ11/RJ11) • Optional USB cable • Power supply adaptor • CD ROM contains User’s manual and USB driver Figure 1.
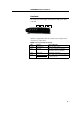
LinkMAX HSA300 User Manual Front Panel The front panel contains lights called LEDs that indicate the status of the unit. 1 2 3 4 HSA300 is equipped with 4 LEDs at its front panel, representing the status of the device (see figure above). Figure 2. Front panel LEDs functionality Label Function Status if LED is ON 1. Power Power Indicator Power up, ready to service 2. Line ADSL Link LED steady: ADSL link is in operation LED blinking: ADSL link is initializing 3.
LinkMAX HSA300 User Manual Rear Panel The rear panel contains the ports for the unit's data and power connections. 1 2 3 4 Figure 3. Rear Panel Connections Label Function 1.Power Connects to the supplied power adapter cable 2.USB Connects to the USB port on your PC 3.LAN Connects the device to your PC's Ethernet port, or to the uplink port on your LAN's hub, using the cable provided 4.
LinkMAX HSA300 User Manual 3 Quick Start This Quick Start provides basic instructions for connecting HSA300 to a computer or LAN and to the Internet. ! Part 1 describes setting up the hardware. ! Part 2 describes how to configure Internet properties on your computer(s) and how to install the software for using a computer attached to the USB port. ! Part 3 shows you how to configure basic settings on HSA300 to get your LAN connected to the Internet.
LinkMAX HSA300 User Manual Step 2. Connect the Ethernet cable. If you are connecting a LAN to HSA300 ADSL/Ethernet router, attach one end of a provided Ethernet cable to a regular hub port and the other to the LAN port on HSA300. If you are using HSA300 with a single computer and no hub, you must use a “straight” Ethernet cable (provided) to attach the PC directly to the device. The straight cable is wired differently than the cable you would use to connect to a hub.
LinkMAX HSA300 User Manual Part 2 — Configuring Your Computers Part 2 of the Quick Start provides instructions for configuring the Internet settings on your computers to work with HSA300. Before you begin By default, HSA300 automatically assigns all required Internet settings to your PCs. You need only to configure the PCs to accept the information when it is assigned.
LinkMAX HSA300 User Manual Next, configure the PCs to accept IP information assigned by HSA300: 8. Open the Control Panel window, and then click the Network icon. 9. Select the network component labeled TCP/IP, and then . click If you have multiple TCP/IP listings, select the listing associated with your network card or adapter. 10. In the TCP/IP Properties dialog box, click the IP Address tab. 11. Click the radio button labeled Obtain an IP address automatically. 12.
LinkMAX HSA300 User Manual 7. Open the Control Panel window, and then double-click the Network icon. 8. In the Network dialog box, click the Protocols tab. 9. In the Protocols tab, select TCP/IP, and then click . 10. In the Microsoft TCP/IP Properties dialog box, click the radio button labeled Obtain an IP address from a DHCP server. twice to confirm and save your changes, 11. Click and then close the Control Panel. Windows 2000 PCs: First, check for the IP protocol and, if necessary, install it: 1.
LinkMAX HSA300 User Manual 11. In the Internet Protocol (TCP/IP) Properties dialog box, click the radio button labeled Obtain an IP address automatically. Also click the radio button labeled Obtain DNS server address automatically. 12. Click twice to confirm and save your changes, and then close the Control Panel. Windows Me PCs 1. In the Windows task bar, click the Start button, point to Settings, and then click Control Panel. 2. Double-click the Network and Dial-up Connections icon. 3.
LinkMAX HSA300 User Manual 13. Click twice to confirm and save your changes, and then close the Control Panel. Assigning static Internet information to your PCs In some cases, you may want to assign Internet information to some or all of your PCs directly (often called “statically”), rather than allowing HSA300 to assign it.
LinkMAX HSA300 User Manual Configuring a computer connected to the USB port If HSA300 includes a USB port for connecting to a PC, you must install the provided USB driver software on the PC. The driver enables Ethernet-over-USB communication with HSA300. Configuring the USB computer is a two-part process: ! In Part 1, you install the USB driver on the PC. ! In Part 2, you configure the IP properties on the USB PC. Part 1. Installing the USB Driver: 1.
LinkMAX HSA300 User Manual 4. Click to display the Software License Agreement dialog box, as shown in Figure 55. Figure 5. USB Driver Installation: Software License Agreement 5. After reviewing the license agreement, click continue. to 6. If a Microsoft digital signature dialog box displays, click to continue. The installation program will begin copying the necessary installation files to the required locations. When finished, the Setup Complete dialog box will display, as shown in Figure6.
LinkMAX HSA300 User Manual 7. Click . A DSL Installer dialog box displays while the program searches for your USB hardware. After a few seconds, a second dialog box displays to prompt you to attach the USB cable, as shown in Figure7. Figure 7. USB Driver Installation: DSL Installer 8. Attach the USB cable to HSA300 and to your PC. The USB cable provided has a flat connector on one end (called Type A) and a square connector on the other (Type B).
LinkMAX HSA300 User Manual 10. Click to restart your computer. When your computer finishes rebooting, make sure that the GlobeSpan installer program displays as an item on your Windows Start menu: 11. Click the Start button, point to Programs » GlobeSpan DSL Modem, and click on Configure. The DSL Modem Installer dialog box should display, as shown in Figure9. Figure 9. DSL Modem Installer Dialog Box This step is only verification. You do not need to access the configuration program at this time. 12.
LinkMAX HSA300 User Manual Part 2. Configuring IP properties on the USB PC. Now that the USB driver installation is complete, you must configure the USB PC so that its IP properties place it on the same subnet as HSA300’s USB port. There are two ways to do this: ! HSA300 is configured to assign an appropriate IP address to the USB PC. If you want to use this automatic assignment feature, called “DHCP server,” you must configure the USB PC to accept dynamically assigned IP information.
LinkMAX HSA300 User Manual Part 3 — Configuring HSA300 In Part 3, you log into the program on HSA300 and configure basic settings for your Internet connection. Your ISP should provide you with the necessary information to complete this step. Logging in to HSA300 Quick Setup HSA300 provides a preinstalled software program called Configuration Manager which enables you to configure the operation of the device via your Web browser.
LinkMAX HSA300 User Manual Configure each of the Quick Start settings as instructed by your ISP: DNS Settings ! DNS Proxy Selection: This setting determines how HSA300 will obtain DNS server addresses. The DNS server matches the user-friendly website names you type into your browser with the sites’ numeric IP addresses. Choose User Configured if you know the DNS server addresses; otherwise choose AutoDiscovery.
LinkMAX HSA300 User Manual Default Router Settings In addition to handling the DSL connection to your ISP, the HSA300 ADSL/Ethernet router can provide a variety of services to your network. The device is preconfigured with default settings for use with a typical home or small office network. Table 1 lists some of the most important default settings; these and other features are described fully in the subsequent chapters.
LinkMAX HSA300 User Manual 4 Getting Started with the Configuration Manager HSA300 includes preinstalled program called the Configuration Manager, which provides an interface to the software installed on the device. It enables you to configure the device settings to meet the needs of your network. You access it through your web browser from any PC connected to HSA300 via the LAN port. This chapter describes how to use the Configuration Manager.
LinkMAX HSA300 User Manual Figure 11. Login Screen 2. Enter your user name and password, and then click . 3. The first time you log into the program, use these defaults: Note Default User Name: root Default Password: root You can change the password at any time (see Changing Your Login Password on page 33). The user name cannot be changed. The System View page displays each time you log into the program (shown in Figure on page 29).
LinkMAX HSA300 User Manual Functional Layout Configuration Manager tasks are grouped into categories, which you can access by clicking the tabs at the top of each page. Each tab, except for the Home tab which displays when you first log in, displays the available tasks horizontally the top of the page. You can click on these to display the specific configuration options. Tab Tab Tab Task bar A separate page displays for each task in the task bar.
LinkMAX HSA300 User Manual The Home Tab and System View Table The Home Tab displays when you first access the program: Only one topic page — the System View page — is available on the Home tab. Figure 12. System View Page The System View table provides a snapshot of your system configuration, and provides links to the software pages that enable you to configure each setting (if available). The following table describes the various sections of the system view table.
LinkMAX HSA300 User Manual Table Heading Description LAN Interfaces Displays the software names and various settings for the device interfaces that communicate directly with your network. These typically include at least one Ethernet interface, named eth-0, and may include a USB interface named usb-0. You can configure some properties of these interfaces, as described in Chapter 5.
LinkMAX HSA300 User Manual Changing the System Date and Time The device keeps a record of the current date and time, which it uses to calculate and report various performance data. Note Changing HSA300 date and time does not affect the date and time on your PCs. Follow these instructions to change the date and time: 1. At the bottom of the System View page, click . The System – Modify page displays in a separate browser window: Figure 13. System – Modify Page 2.
LinkMAX HSA300 User Manual Changing Your Login Password The first time you log into the Configuration Manager, you use the default user ID and password (root and root). The system allows only one user ID and password. Only the password can be changed. Note This user ID and password is only used for logging into the Configuration Manager; it is not the same as the login you may use to connect to your ISP (described in Chapter 12). To change the Configuration Manager login password: 1.
LinkMAX HSA300 User Manual Committing Your Changes and Rebooting the Device Committing your changes Whenever you use the Configuration Manager to change system settings, the changes are initially placed in temporary storage (called random access memory or RAM). Your changes are made effective when you submit them, but will be lost if the device is reset or turned off. To save your changes for future use, you can use the commit function.
LinkMAX HSA300 User Manual Rebooting the device using Configuration Manager To reboot the device, display the Commit and Reboot page, select the appropriate reboot mode from the drop-down menu, and then click . You can select from the following three options when rebooting: WARNING Option Description Reboot from Last Configuration Reboots the device using the current settings in permanent memory, including any changes you just committed.
LinkMAX HSA300 User Manual 5 Setting the LAN IP Address This chapter describes how to configure the interfaces on the ADSL/Ethernet router that communicate with your LAN and USB computers. Ethernet, USB, or Both? If you are using the ADSL/Ethernet router with multiple PCs on your LAN, you must connect the LAN via an Ethernet hub to the device's LAN port, called eth-0.
LinkMAX HSA300 User Manual Configuring the LAN IP Address The LAN IP address identifies the LAN port (eth-0) as a node on your network; that is, its IP address must be in the same subnet as the PCs on your LAN. Definition A network node can be thought of as any interface where a device connects to the network, such as HSA300’s LAN port and the network interface cards on your PCs. See Appendix 0 for an explanation of subnets..
LinkMAX HSA300 User Manual The LAN Configuration table displays the following settings: Setting Description System Mode The preconfigured mode for your device, such as Routing or Bridging mode. This setting is not user configurable. LAN IP Address The IP address your computers use to identify the device’s LAN port. Note that the public IP address assigned to you by your ISP is not your LAN IP address. The public IP address identifies the WAN (ADSL) port on your ADSL/Ethernet router to the Internet.
LinkMAX HSA300 User Manual requested IP address from the DHCP server. This is referred to as a "Configured IP Address" in the program. If the configured IP address is not available from the DHCP server, the server will distribute another address to the LAN port. Even if another number is assigned, the same configured IP address will continue to display in this field. For a description of how DHCP works, see Chapter 7. 3. Click .
LinkMAX HSA300 User Manual Configuring the USB Port IP Address 1. If the LAN Configuration page is not already displaying, click the LAN tab. 2. In the USB Configuration table, enter the IP Address and Network Mask for the USB port. The IP address must place the USB port in the same subnet as the USB computer; If you are using both the LAN port and the USB port, however, the USB port and USB computer must not be in the same subnet as the LAN port or the computers attached to it.
LinkMAX HSA300 User Manual 6 Viewing System IP Information and Performance Statistics The interfaces on HSA300 that communicate with other network and Internet devices are identified by unique Internet protocol (IP) addresses. You can use the Configuration Manager to view the list of IP addresses that your device uses, and to view other system and network performance data. See Appendix 0 for a description of IP addresses and masks.
LinkMAX HSA300 User Manual Viewing IP Global Statistics You can view statistics on the processing of Internet protocol packets (a packet is a collection of data that has been bundled for transmission). You will not typically need to view this data, but you may find it helpful when working with your ISP to diagnose network and Internet data transmission problems. on the IP To view global IP statistics, click Address Table page. Figure 8 shows the IP Global Statistics page: Figure 18.
LinkMAX HSA300 User Manual 7 Configuring Dynamic Host Configuration Protocol You can configure your network and HSA300 to use the Dynamic Host Configuration Protocol (DHCP). This chapter provides an overview of DHCP and instructions for implementing it on your network. Overview of DHCP What is DHCP? DHCP is a protocol that enables network administrators to centrally manage the assignment and distribution of IP information to computers on a network.
LinkMAX HSA300 User Manual HSA300 DHCP modes The device can be configured as a DHCP server, DHCP relay agent, or, in some cases, a DHCP client. ! If you configure the device as a DHCP server, it will maintain the pool of addresses and distribute them to your LAN computers. If the pool of addresses includes private IP addresses, you must also configure the Network Address Translation service, so that the private addresses can be translated to your public IP address on the Internet.
LinkMAX HSA300 User Manual Configuring DHCP Server Note By default, the device is configured as a DHCP server, with a predefined IP address pool of 192.168.0.3 through 192.168.0.34 (subnet mask 255.255.255.0). To change this range of addresses, see “Viewing, modifying, and deleting address pools” on page 50. First, you must configure your PCs to accept DHCP information assigned by a DHCP server: 1. Open the Windows Control Panel and display the computer's Networking properties.
LinkMAX HSA300 User Manual Figure 20.
LinkMAX HSA300 User Manual 4. Enter the Start IP Address, End IP Address, Net Mask, and Gateway Address fields are required; the others are optional. The following table describes each field. Field Description Start/End IP Addresses Specify the lowest and highest addresses in the pool. Mac Address Use this field only if you want to assign a specific IP address to a specific computer (that is, you are creating an exception to the dynamic assignment of addresses).
LinkMAX HSA300 User Manual Field Description SMTP...SWINS (optional) The IP addresses of devices that perform various services for computers that receive IP addresses from this pool (such as the SMTP, or Simple Mail Transfer Protocol, server which handles e-mail traffic). Contact your ISP for these addresses. 5. Click . A confirmation page displays briefly to indicate that the pool has been added successfully. After a few seconds, the DHCP Server Pool – Add page displays with the newly added pool.
LinkMAX HSA300 User Manual To exclude an address from distribution, type it in the fields provided and click . Click after entering your changes. Be sure to use the Commit feature to save your changes to permanent memory, as described on page 34. Viewing current DHCP address assignments When HSA300 functions as a DHCP server for your LAN, it keeps a record of any addresses it has leased to your computers.
LinkMAX HSA300 User Manual Configuring DHCP Relay Some ISPs perform the DHCP server function for their customers’ home/small office networks. In this case, you can configure the device as a DHCP relay agent. When a computer on your network requests Internet access, HSA300 contacts your ISP to obtain an IP address (and other information), and then forwards that information to the computer. First, you must configure your PCs to accept DHCP information assigned by a DHCP server: 1.
LinkMAX HSA300 User Manual A page displays to confirm your changes, and then the program returns to the DHCP Relay Configuration page. 6. Follow the instructions in “Setting the DHCP Mode” on page 51 to set the DHCP mode to DHCP Relay. Setting the DHCP Mode You should set the DHCP mode only after you have configured DHCP relay or DHCP server settings. See “Configuring DHCP Server” on page 45 or “Configuring DHCP Relay” on page 50 for additional instructions.
LinkMAX HSA300 User Manual 8 Configuring Network Address Translation This chapter provides an overview of Network Address Translation (NAT) and instructions for modifying the default configuration on your device. Overview of NAT Network Address Translation is a method for disguising the private IP addresses you use on your LAN as the public IP address you use on the Internet. You define NAT rules that specify exactly how and when to translate between public and private IP addresses.
LinkMAX HSA300 User Manual and source port number back to the original values (having kept track of the changes it made earlier), and then routes the packet to the originating computer. NAT rules such as these provide several benefits: ! They eliminate the need for purchasing multiple public IP addresses for computers on your LAN. You can make up your own private IP addresses at no cost, and then have them translated to the public IP address when your computers access the Internet.
LinkMAX HSA300 User Manual Viewing NAT Global Settings and Statistics To view your NAT settings, log into Configuration Manager, click the Services tab. The NAT Configuration page displays by default, as shown in Figure 24. Figure 24.
LinkMAX HSA300 User Manual Field Description packets. GRE Timeout (sec) Same as TCP Idle Timeout, but for GRE packets. Default Nat Age (sec) For all other NAT translation sessions, the number of seconds after which a translation session will no longer be valid. NAPT Port Start/End When an napt rule is defined, the source ports will be translated to sequential numbers in this range. If you change any values, click , and then click the Admin tab and commit your changes to permanent system memory .
LinkMAX HSA300 User Manual Viewing NAT Rules and Rule Statistics To view the NAT rules currently defined on your system, select NAT Rule Entry in the NAT Options drop-down list. The NAT Rule Configuration page displays, as shown in Figure 26. Figure 26. NAT Rule Configuration Page The NAT Rule Configuration table displays a row containing basic information for each rule. For a description of these fields, refer to the instructions for adding rules (pages 61 through 70).
LinkMAX HSA300 User Manual Viewing Current NAT Translations To view a list of NAT translations that have recently been performed and which remain in effect (for any of the defined rules), select NAT Translations from the NAT Options drop-down list. The NAT Translations page displays, as shown in Figure 28: Figure 28.
LinkMAX HSA300 User Manual Figure 29. NAT Translation – Details Page In addition to the information displayed in the NAT Translations table, this table displays the following for the selected current translation sessions: Field Description Translated InAddress The public IP address to which the private IP address was translated. In Address The private IP address that was translated. Out Address The IP address of the outside destination (web, ftp site, etc.
LinkMAX HSA300 User Manual Adding NAT Rules This section explains how to create rules for the various NAT flavors. Note You cannot edit existing NAT rules. To change a rule setup, delete it and add a new rule with the modified settings. The napt rule: Translating between private and public IP addresses Follow these instructions to create a rule for translating the private IP addresses on your LAN to your public IP address.
LinkMAX HSA300 User Manual of IP addresses. Be sure to assign the Rule ID so that the higher priority rules are invoked before lower-priority rules. It is recommended that you select rule IDs as multiples of 5 or 10 so that, in the future, you can insert a rule between two existing rules. Once a data packet matches a rule, the data is acted upon according to that rule and is not subjected to higher-numbered rules. 4.
LinkMAX HSA300 User Manual 10. Click the Admin tab, and then click Commit and Reboot in the task bar. 11. Click memory. to save your changes to permanent The rdr rule: Allowing external access to a LAN computer You can create an rdr rule to make a computer on your LAN, such as a Web or FTP server, available to Internet users without requiring you to obtain a public IP address for that computer.
LinkMAX HSA300 User Manual Figure 31. NAT Rule – Add Page (rdr Flavor) Follow these instructions to add an rdr rule (see steps 1-4 under "The napt rule" on page 61 for specific instructions corresponding to steps 1 and 2 below): 1. Display the NAT Rule – Add Page, select RDR as the Rule Flavor, and enter a Rule ID. 2. Select the interface on which this rule will be effective. 3. Select a protocol to which this rule applies, or choose ALL.
LinkMAX HSA300 User Manual If you have multiple WAN (PPP) interfaces, this rule will not be enforced for data that arrives on other PPP interfaces. This rule will not be enforced for data that arrives on WAN interfaces not specified here. If you have multiple WAN interfaces and want the rule to be enforced on more than one of them (or all), type the starting and ending IP addresses of the range. 6.
LinkMAX HSA300 User Manual The basic rule: Performing 1:1 translations The basic flavor translates the private (LAN-side) IP address to a public (WAN-side) address, like napt rules. However, unlike napt rules, basic rules do not also translate the port numbers in the packet header; they are passed through untranslated. Therefore, the basic rule does not provide the same level of security as the napt rule. Figure 32 shows the fields used for adding a basic rule. Figure 32.
LinkMAX HSA300 User Manual assigned statically to your PCs, or assigned dynamically using DHCP. 5. In the Global Address From and Global Address To fields, type the starting and ending address that identify the pool of public IP addresses that the private addresses should be translated to. Or, type the same address in both fields (if you also specified a single address in step 4). 6. Follow steps 7-12 under "The napt rule" on page 61 to submit your changes.
LinkMAX HSA300 User Manual 3. Select a protocol to which this rule applies, or choose ALL. This selection specifies which type of Internet communication will be subject to this translation rule. You can select ALL if the rule applies to all data. Or, select TCP, UDP, ICMP, or a number from 1-255 that represents the IANA-specified protocol number. 4.
LinkMAX HSA300 User Manual apply to accesses to the specified server type at the specified IP address or network. 7. Follow steps 7-12 under "The napt rule" on page 61 to submit your changes. The bimap rule: Performing two-way translations Unlike the other NAT flavors, the bimap flavor performs address translations in both the outgoing and incoming directions.
LinkMAX HSA300 User Manual 4. In the Global Address field, type the address that you want to serve as the publicly known address for the LAN computer. 5. Follow steps 7-12 under "The napt rule" on page 61 to submit your changes. The pass rule: Allowing specific addresses to pass through untranslated You can create a pass rule to allow a range of IP addresses to remain untranslated when another rule would otherwise do so. Figure 35.
LinkMAX HSA300 User Manual 9 Configuring DNS Server Addresses About DNS Domain Name System (DNS) servers map the user-friendly domain names that users type into their Web browsers (e.g., "yahoo.com") to the equivalent numerical IP addresses that are used for Internet routing. When a PC user types a domain name into a browser, the PC must first send a request to a DNS server to obtain the equivalent IP address.
LinkMAX HSA300 User Manual Configuring DNS Relay When you specify the device's LAN port IP address as the DNS address, then the ADSL/Ethernet automatically performs “DNS relay”; i.e., because the device itself is not a DNS server, it forwards domain name lookup requests from the LAN PCs to a DNS server at the ISP. It then relays the DNS server’s response to the PC. When performing DNS relay, HSA300 must maintain the IP addresses of the DNS servers it contacts.
LinkMAX HSA300 User Manual a. Click the Services tab, and then click DNS in the task bar. The DNS Configuration page displays. Figure 36. DNS Configuration Page b. Type the IP address of the DNS server in an empty row and click . You can enter only two addresses. c. Click the Enable radio button, and then click . 3. Click the Admin tab, and then click Commit & Reboot in the task bar. 4. Click memory.
LinkMAX HSA300 User Manual 10 Configuring IP Routes You can use Configuration Manager to define specific routes for your Internet and network data. This chapter describes basic routing concepts and provides instructions for creating routes. Note that most users do not need to define IP routes.
LinkMAX HSA300 User Manual Hops and gateways Each time Internet data is passed from one Internet address to another, it is said to take a hop. A hop can be a handoff to a different port on the same device, to a different device on the same network, or to a device on an entirely different network. When a hop passes data from one type of network to another, it uses a gateway.
LinkMAX HSA300 User Manual Viewing the IP Routing Table All IP-enabled computers and routers maintain a table of IP addresses that are commonly accessed by their users. For each of these destination IP addresses, the table lists the IP address of the first hop the data should take. This table is known as the device’s routing table. To view HSA300’s routing table, click the Routing tab. The IP Route page displays by default, as shown in Figure 37: Figure 37.
LinkMAX HSA300 User Manual The following table defines the fields in the IP Routing Table. Field Description Destination Specifies the IP address of the destination computer. The destination can specified as the IP address of a specific computer or an entire network. It can also be specified as all zeros to indicate that this route should be used for all destinations for which no other route is defined (this is the route that creates the default gateway).
LinkMAX HSA300 User Manual Adding IP Routes Follow these instructions to add an IP route to the routing table. 1. From the IP Route Table page, click . The IP Route – Add page displays, as shown in Figure 38. Figure 38. IP Route – Add Page 2. Specify the destination, network mask, and gateway or next hop for this route. For a description of these fields, refer to the table on page 77. To create a route that defines the default gateway for your LAN, enter 0.0.0.
LinkMAX HSA300 User Manual 11 Configuring the Routing Information Protocol HSA300 can be configured to communicate with other routing devices to determine the best path for sending data to its intended destination. Routing devices communicate this information using a variety of IP protocols. This chapter describes how to configure HSA300 to use one of these, called the Routing Information Protocol (RIP).
LinkMAX HSA300 User Manual Configuring HSA300’s Interfaces with RIP The following instructions describe how to enable RIP on HSA300. Note In order for HSA300 to communicate with other devices using RIP, you must also enable the other devices to use the protocol. See the product documentation for those devices. 1. Log into the Configuration Manager, click the Services tab, and then click RIP in the task bar. The RIP Configuration page displays, as shown in Figure 39. Figure 39.
LinkMAX HSA300 User Manual alternative routes, the one with the lowest hop count is considered the fastest path. For example, if you assign this port a metric of 1, then RIP will add 1 to the hop count when calculating a route that passes through this port. If you know that communication via this interface is slower than through other interfaces on your network, you can assign it a higher metric value than the others. You can select any integer from 1 to 15. 5. Select a Send Mode and a Receive Mode.
LinkMAX HSA300 User Manual Viewing RIP Statistics From the RIP Configuration page, you can click to view statistics on attempts to send and receive route table data over RIP-enabled interfaces on HSA300. Figure 40. RIP Global Statistics Page to reset all statistics to 0 and You can click to display any newly accumulated data.
LinkMAX HSA300 User Manual 12 Configuring the ATM VCC As your LAN computers access the Internet via HSA300, data is exchanged with your ISP through a complex network of telephone switches, Internet routers, servers, and other specialized hardware. These various devices communicate using a common language, or protocol, called Asynchronous Transfer Mode (ATM).
LinkMAX HSA300 User Manual The ATM VCC Configuration table displays the following fields (contact your ISP to determine these settings): Field Description Interface The name of the lower-level interface on which this VC operates. The low-level interface names are preconfigured in the software and identify the type of traffic that can be supported, such as data or voice. Internet data services typically use an AAL5-type interface.
LinkMAX HSA300 User Manual 2. Select an interface name from the VCC Interface drop-down list. 3. Enter the VPI and VCI values assigned by your ISP, and select the mux type from the drop-down list. 4. Click . 5. On the confirmation page, click ATM VCC Configuration page. to return to the 6. Click the Admin tab, and then click Commit & Reboot in the task bar. 7. Click memory. to save your changes to permanent The new interface should now display in the ATM VCC Configuration table.
LinkMAX HSA300 User Manual Modifying ATM VCCs Your device may already be preconfigured with the necessary ATM VCC properties, or the table may contain placeholder values that you must change before using the device. Contact your ISP to determine your ATM VCC values. Follow these instructions to modify a preconfigured VCC: 1. From the ATM VCC Configuration page, click in the Actions column for the interface you want to modify. The ATM VCC Interface – Modify page displays, as shown in Figure . Figure 43.
LinkMAX HSA300 User Manual 13 Configuring PPP Interfaces When powered on, HSA300 initiates a connection through your DSL line to your ISP.
LinkMAX HSA300 User Manual You can configure the following settings on the PPP Configuration page: ! Inactivity TimeOut (mins): The time in minutes that must elapse before a PPP connection times-out due to inactivity. ! Ignore WAN to LAN traffic: When enabled, data traffic traveling in the incoming direction—from the WAN port to the LAN port—will not count as activity on the WAN port; i.e., it will not prevent the connection from being terminated if inactive for the specified time.
LinkMAX HSA300 User Manual Field Description Use DHCP When set to Enable, the device will acquire additional IP information from the ISP's DHCP server. The PPP connection itself acquires the device's IP address, mask, DNS address, and default gateway address. With Use DHCP enabled, the device will acquire IP addresses for various other server types (WINS, SMTP, POP3, etc. -- these server types are listed on the DHCP Server Configuration page).
LinkMAX HSA300 User Manual Figure 45. PPP – Detail Page In addition to the properties defined on page 86, the Detail page displays these fields: Field Description Status Indicates whether the interface has been specified in the system as: o Enabled: A connection will be established for use when the device is turned on or rebooted. o Disabled: The PPP interface cannot currently be used. o Start On Data: The PPP connection will be made only when data is sent to the interface (e.g.
LinkMAX HSA300 User Manual Field Description Last Fail Cause Indicates the action that ended the previous PPP session: o No Valid PADO Recvd: The unit initiated a PPoE handshake but did not receive a packet in reply from the ISP. o No Valid PADS Recvd: After the initial handshake, the unit did not receive a confirmation packet from the ISP. o Stopped by User: The user stopped the connection (for example, by changing the Configuration Manager settings for the PPP interface.
LinkMAX HSA300 User Manual Adding a PPP Interface Definition If you intend to use more than one type of service from your ISP, the device may be configured with multiple PPP interfaces, each with unique logon and other properties. Follow this procedure to define properties for a PPP interface: 1. From the PPP Configuration Page, click . The PPP Interface – Add page displays, as shown in Figure 46. Figure 46. PPP Interface – Add Page 2.
LinkMAX HSA300 User Manual 5. Click the Admin tab, and then click Commit & Reboot in the task bar. 6. Click memory. to save your changes to permanent Modifying and Deleting PPP Interfaces To modify a PPP interface, display the PPP Configuration page and in the Action(s) column for the interface you want to modify. click The PPP Interface – Modify page displays, as shown in Figure 47. Figure 47.
LinkMAX HSA300 User Manual 14 Configuring EOA Interfaces This chapter describes how to configure an Ethernet-over-ATM interface on HSA300, if one is needed to communicate with your ISP. Overview of EOA The Ethernet-over-ATM (EOA) protocol is commonly used to carry data between local area networks that use the Ethernet protocol and wide-area networks that use the ATM protocol. Many telecommunications industry networks use the ATM protocol.
LinkMAX HSA300 User Manual Viewing Your EOA Setup To view your current EOA configuration, log into Configuration Manager, click Advanced in the task bar, and then click EOA. Figure 48 shows the EOA configuration page. Figure 48. EOA Page The EOA table contains a row for each EOA interface currently defined on the device. The table may contain no entries if your ISP does not use the EOA protocol.
LinkMAX HSA300 User Manual Field Description Config IP Address and Net Mask The IP address and network mask you want to assign to the interface. If the interface will be used for bridging with your ISP and you will not be using HSA300 as a router on your LAN, then you do not need to specify IP information. If you enable DHCP for this interface, then the Configured IP address will serve only as a request to the DHCP server.
LinkMAX HSA300 User Manual 4. From the IPF Type drop-down list, select the level of IP Firewall to be used on this interface, as defined above. 5. In the Lower Interface field, select the lower-level interface name over which this protocol is being configured. Typically, an EOA interface is configured to operate over an aal5 interface, such as aal5-0. If you are using HSA300 as a bridge only, skip to step 7. 6.
LinkMAX HSA300 User Manual 15 Configuring IPoA Interfaces This chapter describes how to configure an IPoA (Internet Protocolover-ATM) interface on HSA300. An IPoA interface can be used to exchange IP packets over the ATM network, without using an underlying Ethernet over ATM (EOA) connection. Typically, this type of interface is used only in product development and test environments, to eliminate unneeded variables when evaluating IP layer processing.
LinkMAX HSA300 User Manual Field Description IPF Type The type of IP Firewall protections that are in effect on the interface (public, private, or DMZ): o A public interface connects to the Internet (IPoA interfaces are typically public). Packets received on a public interface are subject to the most restrictive set of firewall protections defined in the software. o A private interface connects to your LAN, such as the Ethernet interface.
LinkMAX HSA300 User Manual Figure 51. IPoA Interface – Add Page 2. Select the next available interface name from the IPoA Interface drop-down list. 3. In the Configured IP Address and Net Mask boxes, type the address and mask that you want to assign to the IPoA interface. 4. Select the level of firewall security to apply to the interface by selecting the IPF Type as Public, Private, or DMZ. 5.
LinkMAX HSA300 User Manual 16 Configuring Bridging HSA300 can be configured to act as a bridging device between your LAN and your ISP. Bridges are devices that enable two or more networks to communicate as if they are two segments of the same physical LAN. This chapter describes how to configure HSA300 to operate as a bridge.
LinkMAX HSA300 User Manual Bridges vs. Routers: The essential difference between a bridge and a router is that a router uses a higher-level protocol (such as the IP) to determine how to pass data. IP data packets contain IP addresses that specifically identify the destination computer. Routers can read this information and pass the data to the destination computer, or determine which next router to send the data to if the destination is not on a connected network.
LinkMAX HSA300 User Manual Defining Bridge Interfaces To enable bridging, you simply specify the device interfaces on which you want to bridge data, and then enable bridging mode: 1. Log into Configuration Manager and click the Bridging tab. The Bridge Configuration page displays, as shown in Figure 52. Figure 52. Bridge Configuration page The table may be empty if bridging has not yet been configured. 2. Select the interface names on which you want to perform bridging and click .
LinkMAX HSA300 User Manual 3. Click the Enable radio button to turn on bridging. 4. Click . A page will briefly display to confirm your changes, and will return you to the Bridge Configuration page. 5. Click the Admin tab, and then click Commit & Reboot in the task bar. 6. Click memory. to save your changes to permanent Deleting a Bridge Interface To make an interface non-bridgeable, display the Bridge Configuration page and click next to the interface you want to delete.
LinkMAX HSA300 User Manual 17 Configuring Firewall Settings Configuration Manager provides built-in firewall functions, enabling you to protect the system against denial of service (DoS) attacks and other types of malicious accesses to your LAN. You can also specify how to monitor attempted attacks, and who should be automatically notified. Configuring Global Firewall Settings Follow these instructions to configure global firewall settings: 1.
LinkMAX HSA300 User Manual 2. Configure any of the following settings that display in the Firewall Global Information table: Field Description Black List Status If you want the device to maintain and use a black list, click Enable. Click Disable if you do not want to maintain a list. Black List Period(min) Specifies the number of minutes that a computer's IP address will remain on the black list (i.e.
LinkMAX HSA300 User Manual Field Description Log Destination Specifies how attempted violations of the firewall settings will be tracked. Records of such events can be sent via Ethernet to be handled by a system utility Ethernet to (Trace) or can e-mailed to specified administrators. E-mail ID of Admin 1/2/3 Specifies the e-mail addresses of the administrators who should receive notices of any attempted firewall violations. Type the addresses in standard internet e-mail address format, e.g.
LinkMAX HSA300 User Manual Managing the Black List If data packets are received that violate the firewall settings or any of the IP Filter rules, then the source IP address of the offending packets can be blocked from such accesses for a specified period of time. You can enable or disable use of the black list using the settings described above. The source computer remains on the black list for the period of time that you specify.
LinkMAX HSA300 User Manual 18 Configuring IP Filters The IP filter feature enables you to create rules that control the forwarding of incoming and outgoing data between your LAN and the Internet. This chapter explains how to create IP filter rules. Overview The IP filter feature enables you to control the types of data being passed between the Internet and your network.
LinkMAX HSA300 User Manual edit ( rule.
LinkMAX HSA300 User Manual Configuring IP Filter Global Settings The IP Filter Configuration page enables you to configure several global IP Filter settings, and displays a table showing all existing IP Filter rules. The global settings that you can configure are: ! Security Level: This setting determines which IP Filter rules take effect, based on the security level specified in each rule. For example, when High is selected, only those rules that are assigned a security value of High will be in effect.
LinkMAX HSA300 User Manual Creating IP Filter Rules To create an IP filter rule, you set various criteria that must be met in order for the rule to be invoked. Use these instructions to add a new IP filter rule, and refer to the examples on page 115 for assistance: 1. On the main IP Filter page, click . The IP Filter Rule − Add page displays, as shown in Figure 56. Figure 56.
LinkMAX HSA300 User Manual Enter or select data for each field that applies to your rule. The following table describes the fields: Field Description Rule ID Each rule must be assigned a sequential ID number. Rules are processed from lowest to highest on each data packet, until a match is found. It is recommended that you assign rule IDs in multiples of 5 or 10 (e.g., 10, 20, 30) so that you leave enough room between them for inserting a new rule if necessary.
LinkMAX HSA300 User Manual Field Description Black List Status Specifies whether or not a violation of this rule will result in the offending computer's IP address being added to the Black List, which blocks the ADSL/Ethernet router from forwarding packets from that source for a specified period of time. See Chapter 1 Error! Not a valid result for table. for instructions. Log Tag A description of up to 16 characters to be recorded in the log in the event that a packet violates this rule.
LinkMAX HSA300 User Manual Field Description Protocol The basic IP protocol criteria that must be met for rule to be invoked. Using the options in the drop-down list, you can specify that packets must contain the selected protocol (eq), that they must not contain the specified protocol (neq), or that the rule can be invoked regardless of the protocol (any).
LinkMAX HSA300 User Manual Field Description ICMP Code Specifies whether the value in the code field in ICMP packet headers will be used as a criteria. The code value can be any decimal value from 0-255. You can specify that the value must equal (eq) or not equal (neq) the specified value, or you can select any to enable the rule to be invoked on all ICMP packets. This field will be dimmed (unavailable for entry) unless you specify ICMP as the protocol.
LinkMAX HSA300 User Manual 2. When you are done selecting criteria, ensure that the Enable radio button is selected at the top of the page, and then click . After a confirmation page displays, the IP Filter Configuration page will redisplay with the new rule showing in the table. If the security level of the rule matches the globally configured setting, a green ball in the Status column for that rule, indicating that the rule is now in effect.
LinkMAX HSA300 User Manual able to access FTP Internet sites (and any others that use destination port numbers other than 80). Example 2. Blocking Telnet accesses to HSA300: 1. Add a new rule for packets incoming on the ppp-0 interface. 2. Specify that the packet must contain the TCP protocol, and must be destined for port 23, the well-known port number used for the Telnet protocol. 3. Enable the rule by clicking the radio button at the top of the page. 4. Click changes.
LinkMAX HSA300 User Manual Viewing IP Filter Statistics For each rule, you can view statistics on how many packets were accepted or denied. Display the IP Filter Configuration page, and then click in the row corresponding to the rule. The IP Filter Rule – Statistics page displays, as shown in Figure 58. Figure 58. IP Filter Rule – Statistics Page to reset the count to zero and You can click to display newly accumulated data.
LinkMAX HSA300 User Manual The IP Filter Session table displays the following fields for each current IP session: Field Description Session Index The ID assigned by the system to the IP session (all sessions, whether or not they are affected by an IP filter rule, are assigned a session index). Time to expire The number of seconds in which the connection will automatically expire Protocol The underlying IP protocol used on the connection, such as TCP, UDP, IGMP, etc.
LinkMAX HSA300 User Manual 19 Viewing DSL Parameters To view configuration parameters and performance statistics for HSA300’s DSL line, log into Configuration Manager, and then click the WAN tab. The DSL Status page displays by default, as shown in Figure 60. Figure 60. DSL Status Page The DSL Status page displays current information on the DSL line performance. The page refreshes according to the setting in the Refresh drop-down list, which you can configure.
LinkMAX HSA300 User Manual Figure 61. DSL Parameters Page ! The DSL Parameters and Status table displays settings preconfigured by the product manufacturer or your ISP. ! The Config Data table lists various types of error and defects measurements found on the DSL line. You cannot modify this data. to display DSL From the DSL Status page, you can click line performance statistics, as shown in Figure 62. Figure 62.
LinkMAX HSA300 User Manual The DSL Statistics page reports error data relating to the last 15 minute interval, the current day, and the previous day. At the bottom of the page, the Detailed Interval Statistic table displays links you can click on to display detailed data for each 15 minute interval in the past 24 hours. For example, when you click on 1-4, data displays for the 16 intervals (15-minutes each) that make up the previous 4 hours. Figure 63 shows an example. Figure 63.
LinkMAX HSA300 User Manual 20 Viewing System Alarms You can use the Configuration Manager to view information about alarms that occur in the system. Alarms, also called traps, are caused by a variety of system events, including connection attempts, resets, and configuration changes. Although you will not typically need to view this information, it may be helpful in working with your ISP to troubleshoot problems you encounter with the device.
LinkMAX HSA300 User Manual Displaying the Alarm Monitor in a Separate Window If you want to display an automatically updating Alarm table, you can click to display a separate Alarm Monitor window, as shown in Figure 65. Figure 65. Alarm Monitor Window You can click on the Refresh Rate drop-down list to select a recurring time interval after which the page will redisplay with new data. You can leave the Alarm Monitor window open and active even after closing the Configuration Manager.
LinkMAX HSA300 ADSL Ethernet Router User’s Guide A Appendix A. IP Addresses, Network Masks, and Subnets IP Addresses, Network Masks, and Subnets IP Addresses This section pertains only to IP addresses for IPv4 (version 4 of the Internet Protocol). IPv6 addresses are not covered. Note This section assumes basic knowledge of binary numbers, bits and bytes. For details on this subject, see Appendix 0.
LinkMAX HSA300 ADSL Ethernet Router User’s Guide Appendix A. IP Addresses, Network Masks, and Subnets Network classes The three commonly used network classes are A, B, and C. (There is also a class D but it has a special use beyond the scope of this discussion.) These classes have different uses and characteristics. Class A networks are the Internet's largest networks, each with room for over 16 million hosts. Up to 126 of these huge networks can exist, for a total of over 2 billion hosts.
LinkMAX HSA300 ADSL Ethernet Router User’s Guide Appendix A. IP Addresses, Network Masks, and Subnets uses the remaining 7 bits in field4 for its host IDs, which range from 0 to 127 (instead of the usual 0 to 255 for a class C address). Similarly, to split a class C network into four subnets, the mask is: 255.255.255.192 or 11111111. 11111111. 11111111.11000000 The two extra bits in field4 can have four values (00, 01, 10, 11), so there are four subnets.
LinkMAX HSA300 ADSL Ethernet Router User’s Guide B Appendix B. Binary Numbers Binary Numbers Binary Numbers In everyday life, we use the decimal system of numbers. In decimal, numbers are written using the ten digits 0, 1, 2, 3, 4, 5, 6, 7, 8, and 9. Computers, however, do not use decimal. Instead, they use binary. Definition binary numbers Hint Binary numbers are numbers written using only the two digits 0 and 1, e.g., 110100. Does "base ten" sound familiar? (Think grade school.
LinkMAX HSA300 ADSL Ethernet Router User’s Guide C Appendix C. Troubleshooting Troubleshooting This appendix suggests solutions for problems you may encounter in installing or using HSA300, and provides instructions for using several IP utilities to diagnose problems. Contact Customer Support if these suggestions do not resolve the problem. Problem Troubleshooting Suggestion Internet Access PC cannot access Internet PCs cannot display web pages on the Internet.
LinkMAX HSA300 ADSL Ethernet Router User’s Guide Appendix C. Troubleshooting Problem Troubleshooting Suggestion Cannot access the Configuration Manager program from your browser. Use the ping utility, discussed in the following section, to check whether your PC can communicate with HSA300’s LAN IP address (by default 192.168.0.1). If it cannot, check the Ethernet cabling. Verify that you are using Internet Explorer v5.0 or later, or Netscape Navigator v4.7 or later.
LinkMAX HSA300 ADSL Ethernet Router User’s Guide Appendix C. Troubleshooting Diagnosing Problem using IP Utilities ping Ping is a command you can use to check whether your PC can recognize other computers on your network and the Internet. A ping command sends a message to the computer you specify. If the computer receives the message, it sends messages in reply. To use it, you must know the IP address of the computer you are trying to communicate with.
LinkMAX HSA300 ADSL Ethernet Router User’s Guide Appendix C. Troubleshooting nslookup You can use the nslookup command to determine the IP address associated with an internet site name. You specify the common name, and the nslookup command looks up the name in on your DNS server (usually located with your ISP). If that name is not an entry in your ISP’s DNS table, the request is then referred to another higher-level server, and so on, until the entry is found.
LinkMAX HSA300 ADSL Ethernet Router User’s Guide D Appendix D. Glossary Glossary 10BASE-T A designation for the type of wiring used by Ethernet networks with a data rate of 10 Mbps. Also known as Category 3 (CAT 3) wiring. See also data rate, Ethernet. 100BASE-T A designation for the type of wiring used by Ethernet networks with a data rate of 100 Mbps. Also known as Category 5 (CAT 5) wiring. See also data rate, Ethernet.
LinkMAX HSA300 ADSL Ethernet Router User’s Guide Appendix D. Glossary from a shared pool of IP addresses; after a specified time limit, DHCP returns the address to the pool. DHCP relay Dynamic Host Configuration Protocol relay A DHCP relay is a computer that forwards DHCP data between computers that request IP addresses and the DHCP server that assigns the addresses. Each of HSA300's interfaces can be configured as a DHCP relay. See DHCP.
LinkMAX HSA300 ADSL Ethernet Router User’s Guide Appendix D. Glossary FTP File Transfer Protocol A program used to transfer files between computers connected to the Internet. Common uses include uploading new or updated files to a web server, and downloading files from a web server. GGP Gateway to Gateway Protocol. An Internet protocol that specifies how gateway routers communicate with each other. Gbps Abbreviation for Gigabits (“GIG-uh-bits”) per second, or one billion bits per second.
LinkMAX HSA300 ADSL Ethernet Router User’s Guide Appendix D. Glossary ISP Internet Service Provider A company that provides Internet access to its customers, usually for a fee. LAN Local Area Network A network limited to a small geographic area, such as a home, office, or small building. LED Light Emitting Diode An electronic light-emitting device. The indicator lights on the front of HSA300 are LEDs.
LinkMAX HSA300 ADSL Ethernet Router User’s Guide Appendix D. Glossary ping Packet Internet (or Inter-Network) Groper A program used to verify whether or not the host associated with an IP address is online. It can also be used to reveal the IP address for a given domain name. port A physical access point to a device such as a computer or router, through which data flows into and out of the device. POTS Plain Old Telephone Service Traditional analog telephone service using copper telephone lines.
LinkMAX HSA300 ADSL Ethernet Router User’s Guide Appendix D. Glossary SNMP Simple Network Management Protocol The TCP/IP protocol used for network management. splitter A device that splits off the voice component of the DSL signal to a separate line, so that data and telephone service each have their own wiring and jacks. The splitter is installed by your telephone company where the DSL line enters your home.
LinkMAX HSA300 ADSL Ethernet Router User’s Guide Appendix D. Glossary 5 (CAT 5) is used for 100BASE-T networks. See also 10BASE-T, 100BASE-T, Ethernet. upstream The direction of data transmission from the user to the Internet. USB Universal Serial Bus A serial interface that lets you connect devices such as printers, scanners, etc. to your computer by simply plugging them in. HSA300 is equipped with a USB interface for connecting to a stand-alone PC.
LinkMAX HSA300 ADSL Ethernet Router User’s Guide Index Index 100BASE-T, 149 Commit & Reboot page, 40 10BASE-T, 149 Computers ADSL, 149 ADSL cable, 16 configuring IP information, 18 Configuration Manager ADSL port, 16 overview, 33 Alarm Monitor window, 138 troubleshooting, 146 Alarm page, 137 Alarms defined, 137 Analog, 149 Asynchronous Transfer Mode.
LinkMAX HSA300 ADSL Ethernet Router User’s Guide viewing assigned addresses, 57 DHCP Server defined, 51 Index settings, 118 Firewall Blacklisted Hosts page, 120 Firewall Configuration page, 117 DHCP Server Pool—Add page, 54 Front panel, 12 Diagnosing problems FTP, 151 after installation, 31 Gatewas Digital, 150 DNS, 55, 79, 150 relay, 80 in DHCP pools, 55 Gateway defined, 84 DNS Configuration page, 81 Gigabit, 151 Domain name, 55, 150 Hardware connections, 15, 16 download, 150 Home Tab, 36
LinkMAX HSA300 ADSL Ethernet Router User’s Guide Windows NT 4.
LinkMAX HSA300 ADSL Ethernet Router User’s Guide Index NAT Rule—Add page - rdr, 71 EOA, 106 NAT Translation – Details page, 67 EOA Interface - Add, 107 NAT Translations page, 66 Firewall Blacklisted Hosts, 120 Navigating, 35 Firewall Configuration, 117 Netmask. See Network mask IP Address Table, 49 Network. See LAN IP Filter Configuration, 122 Network Address Translation.
LinkMAX HSA300 ADSL Ethernet Router User’s Guide checking for, 11 Index viewing statistics, 92 PASS - NAT flavor, 77 RIP Configuration page, 90 Password RIP Global Statistics page, 92 changing, 39 RJ-11, 153 default, 34 RJ-45, 153 recovering, 146 Routing, 153 PC configuration, 18 Routing Information Protocol.
LinkMAX HSA300 ADSL Ethernet Router User’s Guide Index installing, 17 configuring multiple, 49 installing driver, 23 IP address, 49 USB port configuring IP information, 43, 47 User Password Configuration page, 39 Username default, 34 Web browser, 155 requirements, 9 version requirements, 33 Web browsers compatible versions, 33 VC, 155 Web page, 155 VCI, 155 Web site, 155 VPI, 155 Windows NT WAN, 155 WAN interface configuring IP information, 19 World Wide Web, 155 144