
User manual
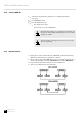

Table Of Contents
- Table of contents
- 1 General notes
- 2 Safety instructions
- 3 Features
- 4 Installation
- 5 Starting up
- 6 Connections and controls
- 7 Operating
- 8 MIDI and DMX channel settings
- 9 Quick Start Guide for the main functions
- 10 Technical specifications
- 11 Plug and connection assignments
- 12 Protecting the environment

3. Press and hold [UP] if you want to increase the intensity. Press and hold
[DOWN] if you want to decrease the intensity.
4. Press the [FLASH] button of the corresponding DMX channel of the scene to be
changed. While doing this, press and hold [UP] or [DOWN] pressed.
5. Press the respective [FLASH] until you are satised with your new scene.
6. Repeat steps 2, 3, 4 and 5 until all steps have been edited.
7. Exit the Edit mode. To do so, press [REC EXIT] while keeping [RECORD] pressed.
7.3 Operation
7.3.1 Starting a programme
1.
Press [MODE SELECT] to select [CHNS
〈
〉
SCENES] .
2. To call up the page where your desired programme is stored, press [PAGE].
3. Slide [MASTER B] to position 10.
4. To initiate the programme, slide the corresponding channel fader (13-24) to
position 10.
The ‘fade time’ of the programme depends on the set ‘fade time’ on
[FADE]. You can also press and hold [FLASH] to initiate the pro‐
gramme.
5. Use the channel fader to set the intensity of the corresponding programme.
7.3.2 Sound control
1. Use the built-in microphone or connect an external audio source via an RCA
plug.
2.
Select the desired programme
Ä
Chapter 7.3.1 ‘Starting a programme’
on page 21.
3. Press [AUDIO].
ð
The LED lights up.
Audio mode is activated.
4. Use [AUDIO LEVEL] to adjust the sensitivity.
5. To exit Audio mode, press [AUDIO] again.
ð
The LED turns o.
‘Audio’ mode is disabled.
Operating
DMX DC-1224
21
DMX controller