
User Manual

13
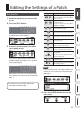
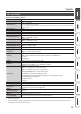
Editing the Settings of a Patch
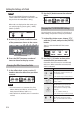
Icon Explanation
–
Specify the parameters that are
controlled by footswitches (CTL 1–4)
connected to the CTL IN jacks.
–
ASSIGN lets you make more detailed
settings.
For example, use ASSIGN if you
want another parameter to also
be operated at the same time in
addition to the parameter operation
of number switch [1].
You can make eight settings for each
patch.
–
Specify the MIDI messages that
are transmitted when you switch
patches.
You can make four settings for each
patch.
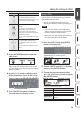
3. Press the [ENTER] button to enter the
edit screen.
When page tabs are displayed on the screen,
you can switch pages by pressing the [< PAGE]
[PAGE >] buttons.
4. Use the [1]–[3] knobs to edit the value
of the parameters shown in the screen.
5. Press the [EXIT] button a number of
times to return to the play screen.
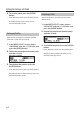
Saving a Patch
If you want to save the patch that you created,
execute the Write operation.
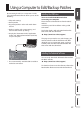
* You can use dedicated software to save,
exchange, initialize, or back up patches (p. 17).
NOTE
5 If you do not save the patch, the edited
settings will be lost when you turn o the
power or switch to another patch.
5 When you save, the patch that had been in
the save-destination is overwritten.
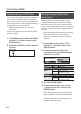
1. Press the [EXIT] button and [ENTER]
button simultaneously.
The WRITE UTILITY screen appears.
2. Choose “WRITE” with the [1]–[3] knobs,
and press the [ENTER] button.
3. Choose the patch write destination
(01-1–50-4) with the [1] knob, and press
the [ENTER] button.
Here you can edit the name.
Controller Operation
[1] knob Changes the character
[2] knob Moves the cursor
[3] knob Selects the type of characters
[EDIT] button
Delete the character at the cursor
location
[MENU] button Insert a space at the cursor location