
User Manual

11
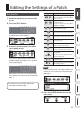
Editing the Settings of a Patch
Basic Operation
1. Recall the patch that you want to edit
(p. 10).
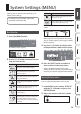
2. Press the [EDIT] button.
The eect chain screen appears.
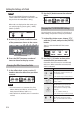
3. Use the [1] knob to choose the eect
you’re going to edit.
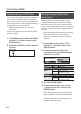
You can press the [ON/OFF] button to turn
on/o the eect where the cursor is located
(shown highlighted).
Eects that are turned on are indicated with
icons. Eects that are turned o are indicated
with “
5
.”
For details on the parameter, refer to the
“Parameter Guide” (PDF le).
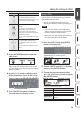
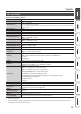
Icon Explanation
Choose from a variety of eect types.
You can also choose the same eect
for FX1 and FX2.
Choose from various types of
modulation eect.
You can also choose the same eect
for MOD1 and MOD2.
–
Turn loop eects on/o.
Choose from various types of delay.
Choose from various types of reverb.
Noise suppressor
Control the volume.
* This cannot be turned o.
Adjust the tonal character of
patches, and make other settings.
(PATCH LVL)
Specify the patch level (the volume
of the patch).
When the cursor is moved here, the
[3] knob adjusts this.
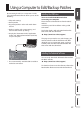
Specify how sound is output from
the OUTPUT jacks.
Refer to “Changing the CTL/ASSIGN/
MIDI Settings” (p. 12).
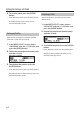
MEMO
If you’ve selected FX1, FX2, MOD1, MOD2, DLY,
or REV, you can use the [3] knob to choose its
eect type.
4. Press the [ENTER] button to enter the
edit screen.