
Operating instructions


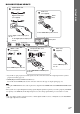
Table Of Contents
- WARNING
- About This Operating Instructions
- About the S-AIR function
- Playable Discs
- Getting Started
- Sound Adjustment
- Disc
- Tuner
- Control for HDMI/External Audio Device
- Using the Control for HDMI Function for “BRAVIA” Sync
- Using the DIGITAL MEDIA PORT Adapter
- Using an S-AIR Product
- Inserting the wireless transmitter/transceiver
- Establishing sound transmission between the unit and S-AIR sub unit (ID setting)
- Enjoying the system’s sound in another room
- Enjoying the S-AIR receiver while the unit is in standby mode
- Identifying the unit with a specific S-AIR sub unit (Pairing operation)
- If sound transmission is unstable
- Other Operations
- Additional Information
21
GB
Getting Started
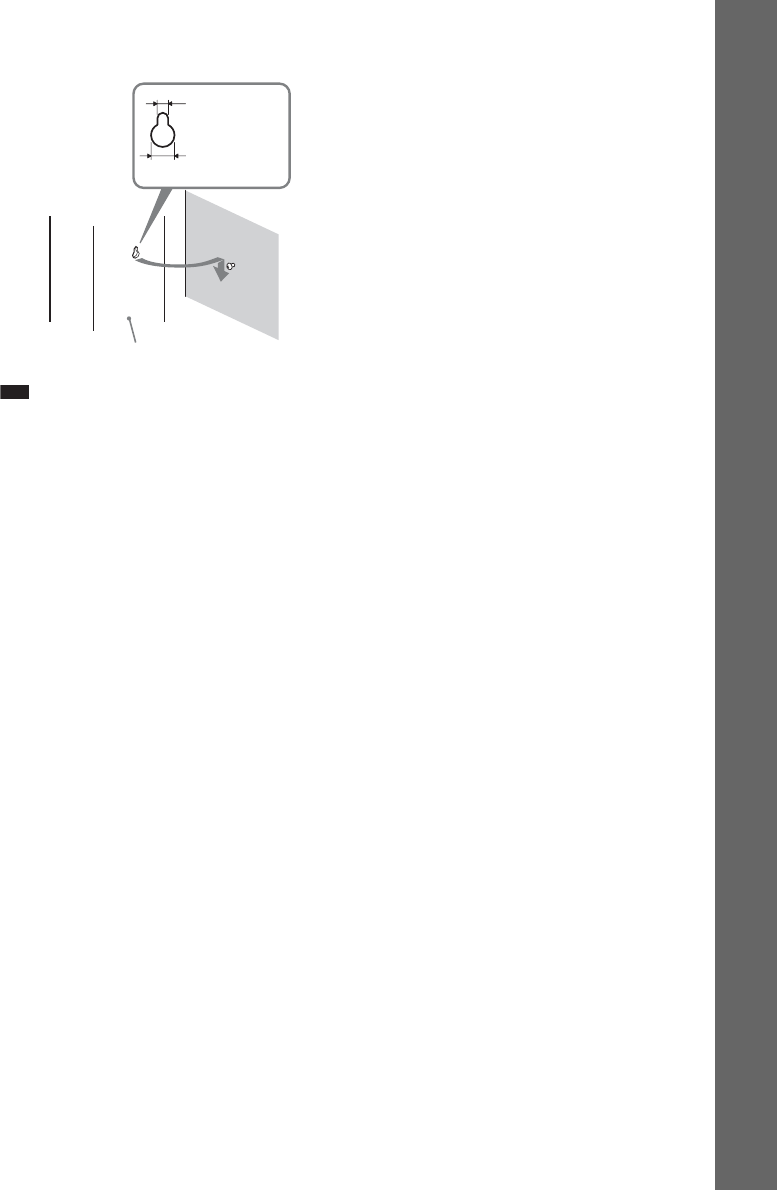
3 Hang the speakers on the screws.
Note
• Use screws that are suitable for the wall material and strength. As a plaster board wall is especially fragile, attach
the screws securely to a beam and fasten them to the wall. Install the speakers on a vertical and flat wall where
reinforcement is applied.
• Contact a screw shop or installer regarding the wall material or screws to be used.
• Sony is not responsible for accident or damage caused by improper installation, insufficient wall strength or
improper screw installation, natural calamity, etc.
5 mm
(
7
/
32
inch)
10 mm
(
13
/
32
inch)
Hole on the back of
the speaker
Rear of the speaker