
Operating instructions
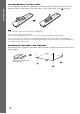
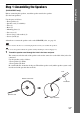
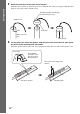
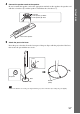
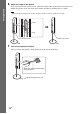
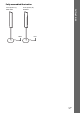
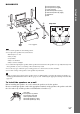
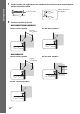
Table Of Contents
- WARNING
- About This Operating Instructions
- About the S-AIR function
- Playable Discs
- Getting Started
- Sound Adjustment
- Disc
- Tuner
- Control for HDMI/External Audio Device
- Using the Control for HDMI Function for “BRAVIA” Sync
- Using the DIGITAL MEDIA PORT Adapter
- Using an S-AIR Product
- Inserting the wireless transmitter/transceiver
- Establishing sound transmission between the unit and S-AIR sub unit (ID setting)
- Enjoying the system’s sound in another room
- Enjoying the S-AIR receiver while the unit is in standby mode
- Identifying the unit with a specific S-AIR sub unit (Pairing operation)
- If sound transmission is unstable
- Other Operations
- Additional Information
20
GB
Getting Started
1 Prepare screws (not supplied) that are suitable for the hole on the back of each speaker.
See the illustrations below.
2 Fasten the screws to the wall.
DAV-HDX275/DAV-HDX276
DAV-HDX475
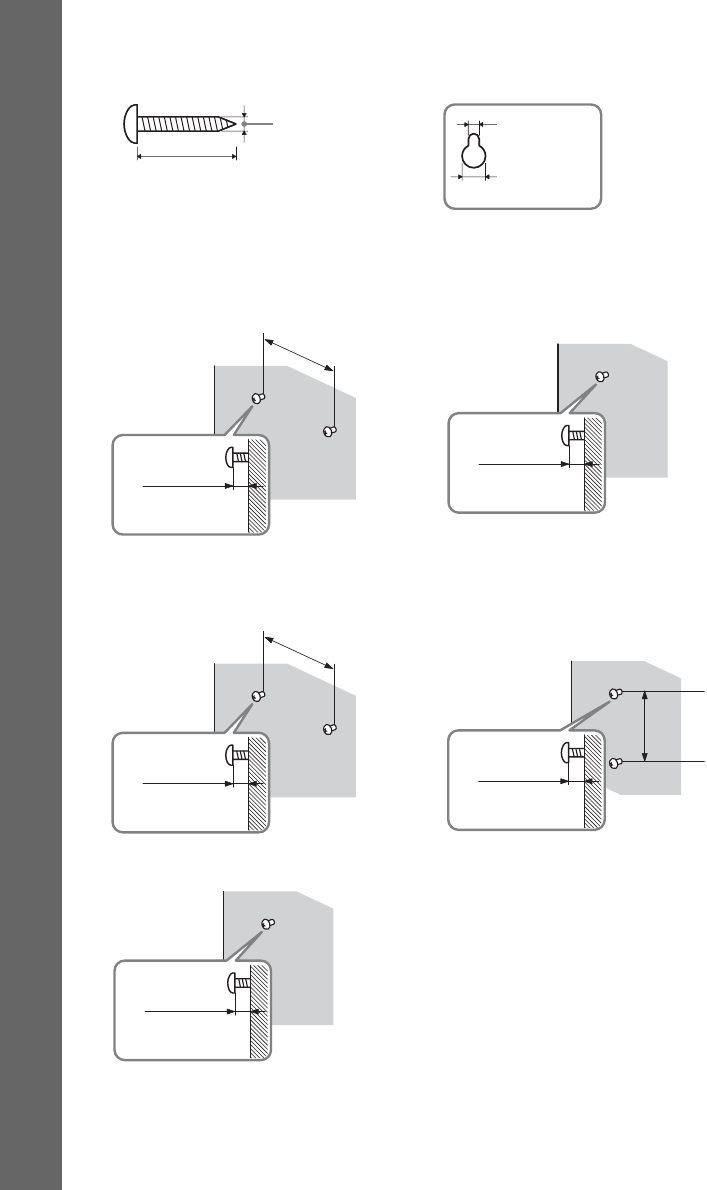
30 mm (1
3
/
16
inches)
4 mm (
5
/
32
inch)
Hole on the back of
the speaker
5 mm
(
7
/
32
inch)
10 mm
(
13
/
32
inch)
8 to 10 mm
(
11
/
32
to
13
/
32
inch
)
145 mm
(5
3
/
4
inches)
For the center speaker
For the other speakers
8 to 10 mm
(
11
/
32
to
13
/
32
inch
)
8 to 10 mm
(
11
/
32
to
13
/
32
inch
)
145 mm
(5
3
/
4
inches)
For the center speaker
100 mm
(
4
inches
)
For the front speakers
8 to 10 mm
(
11
/
32
to
13
/
32
inch
)
For the surround speakers
8 to 10 mm
(
11
/
32
to
13
/
32
inch
)